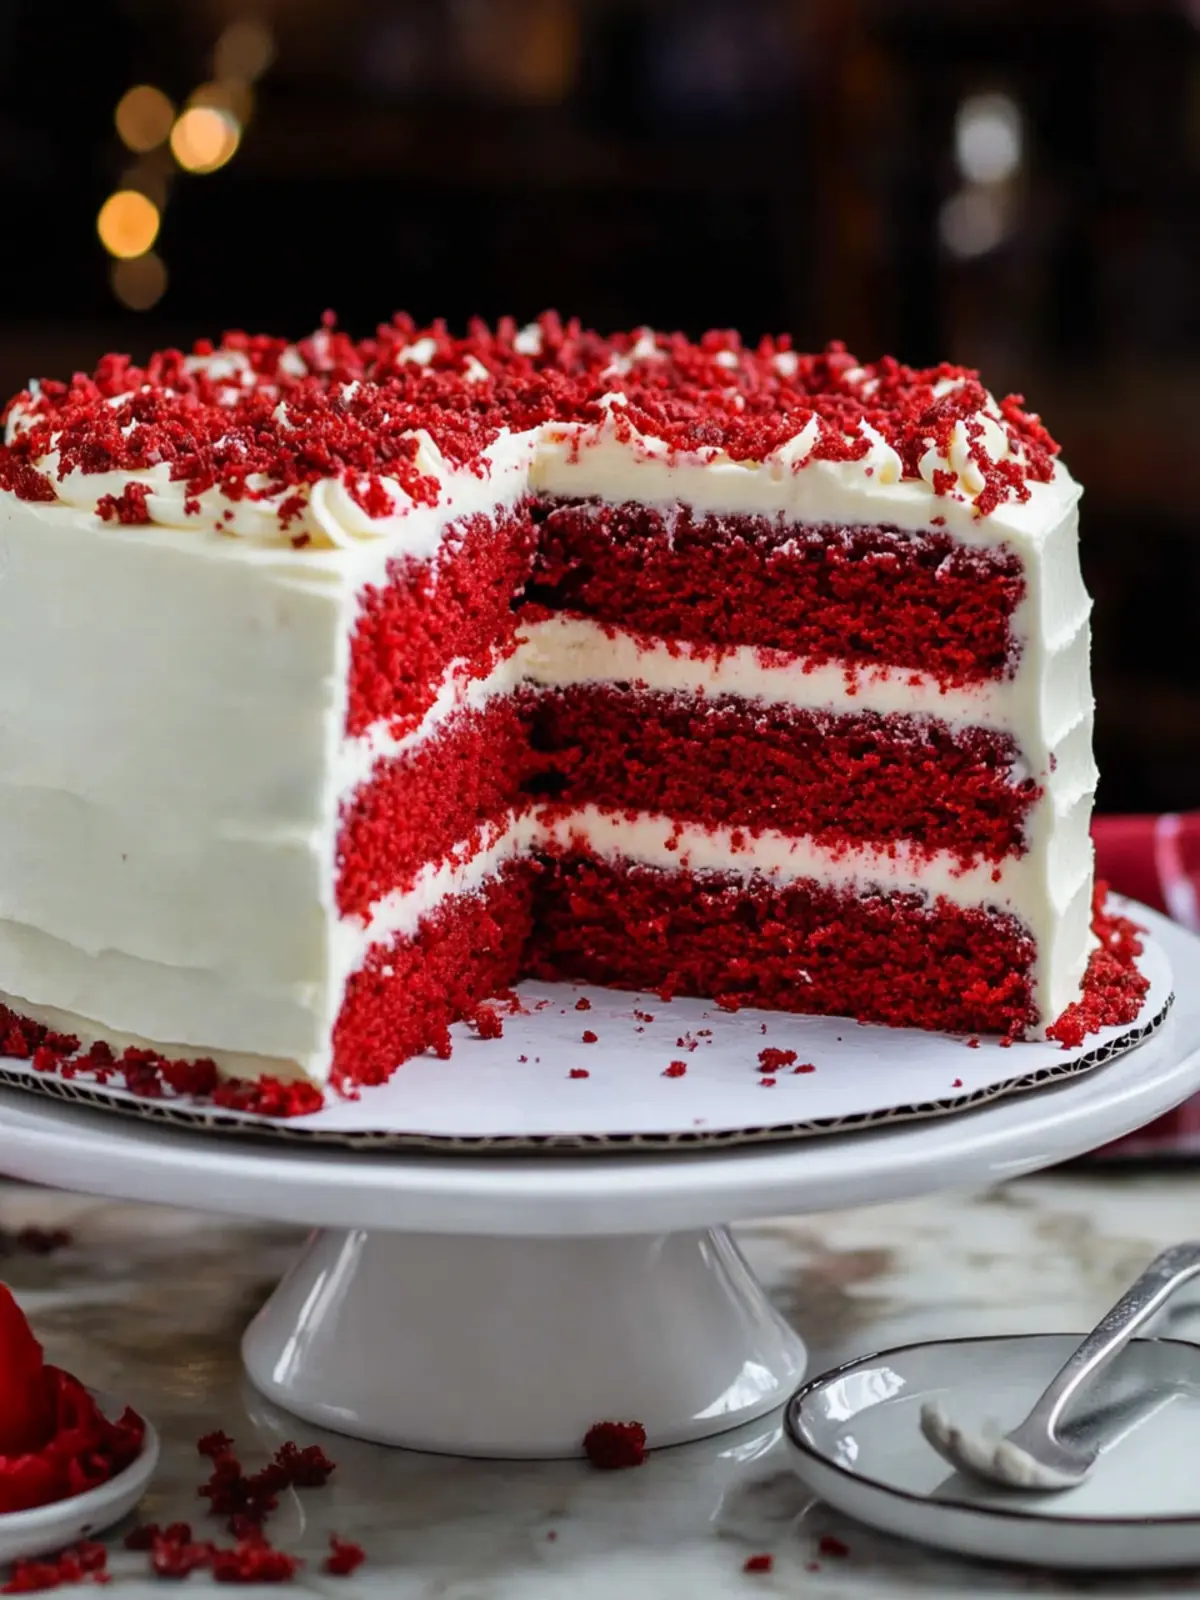
There’s something incredibly satisfying about slicing into a vibrant red velvet layer cake, especially when that first whiff of rich cocoa and cream cheese frosting fills the air. This classic dessert isn’t just a feast for the eyes; it embodies the warmth and nostalgia of family gatherings and celebration. I often reminisce about the laughter and joy that surrounded the dining table at birthdays, with this luscious cake at the center, stealing the show.
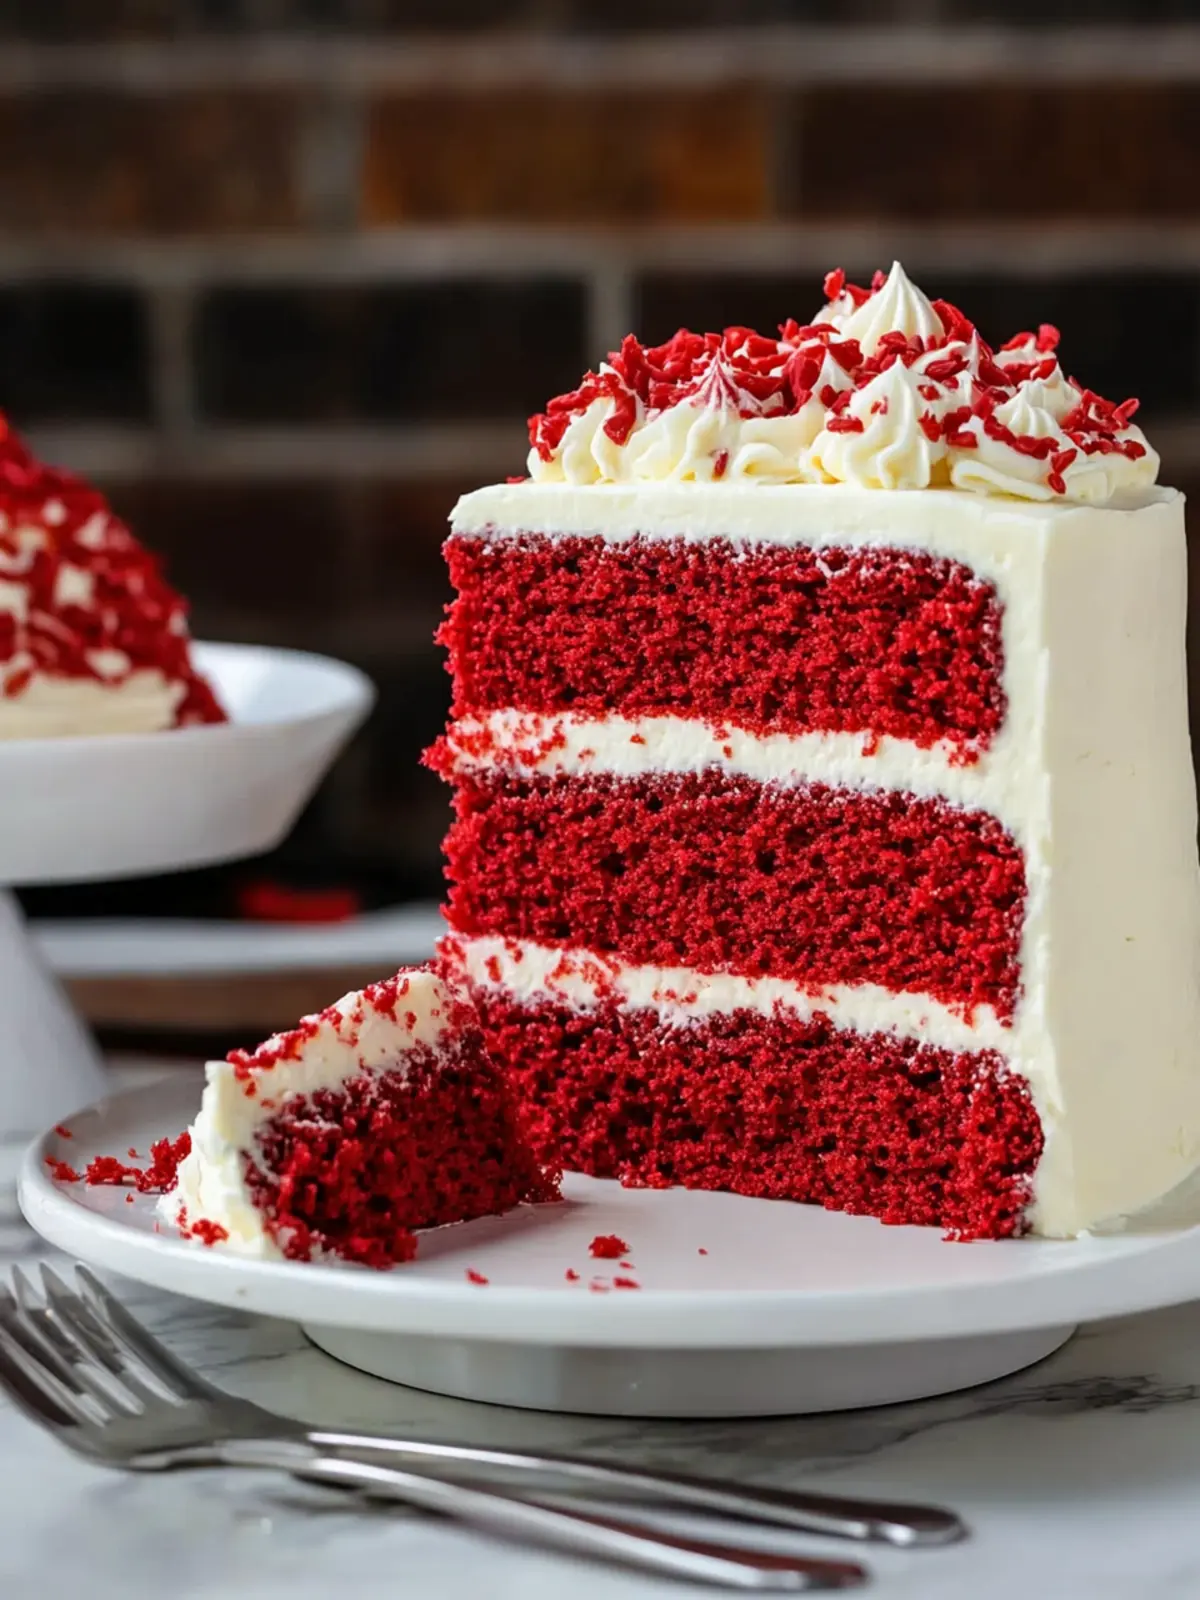
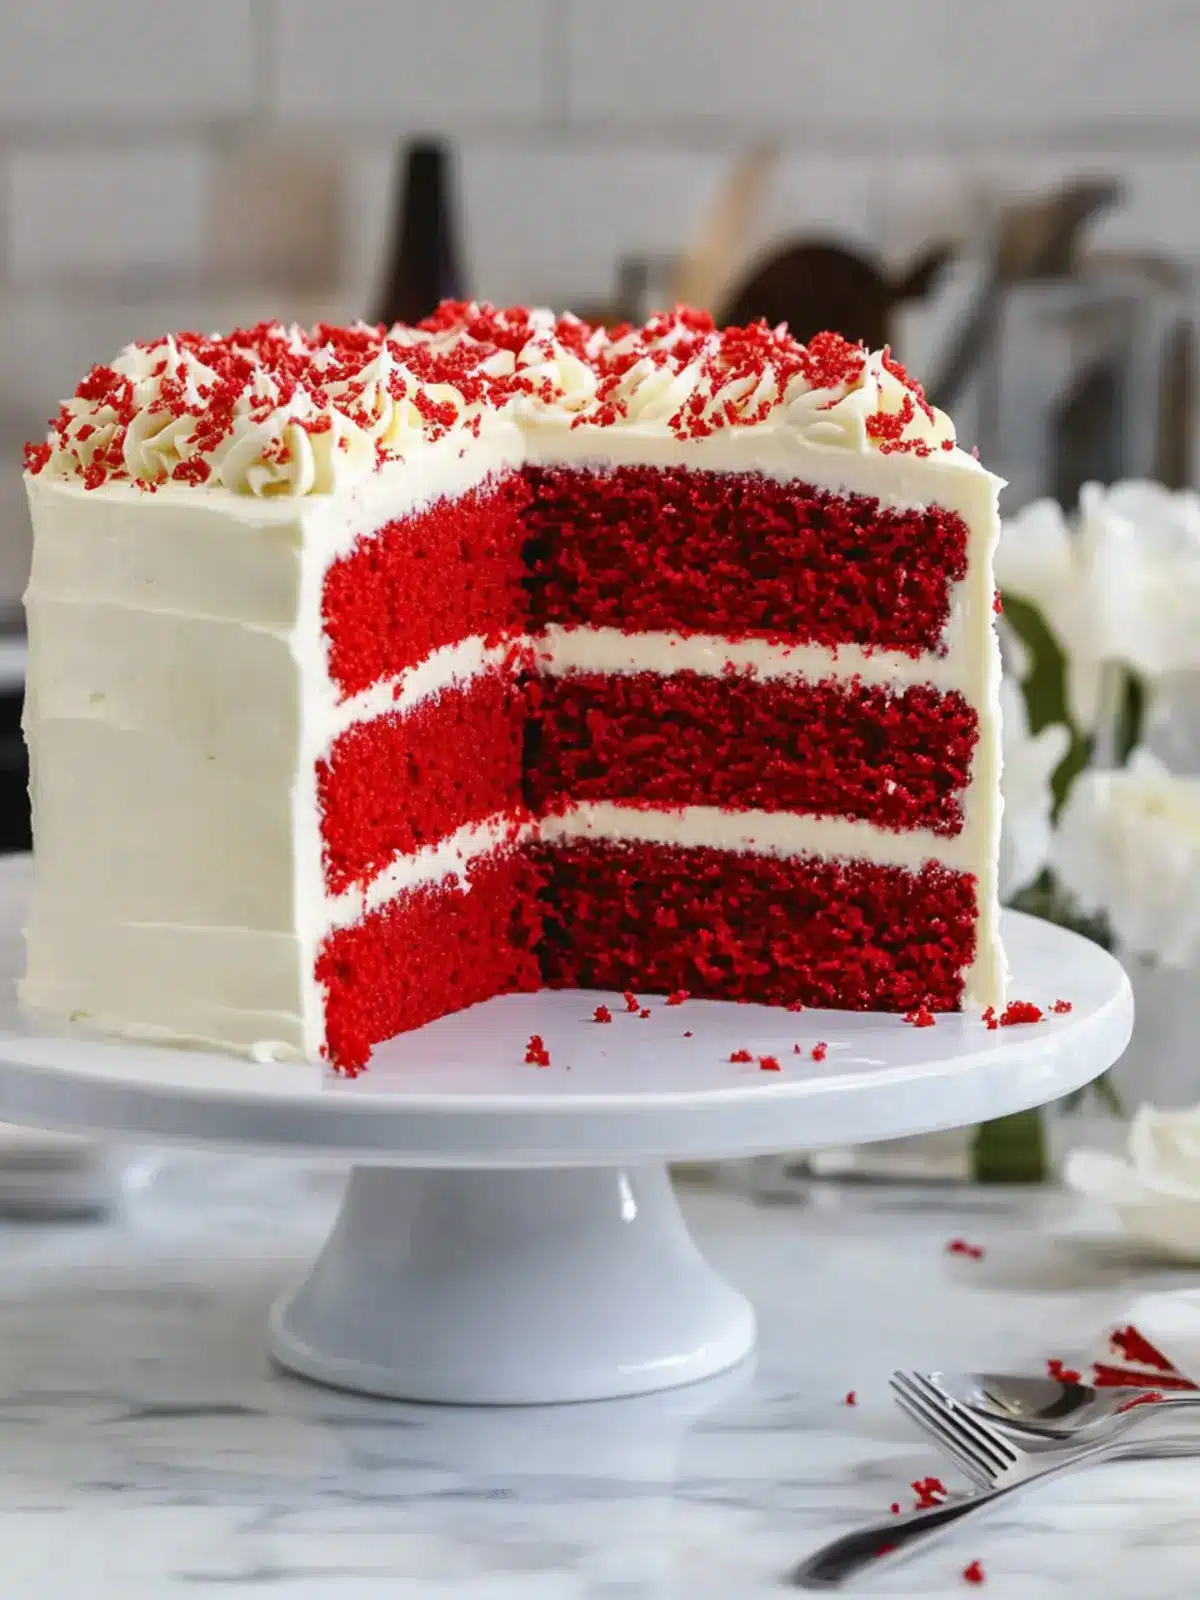
Crafted to perfection, this Classic Red Velvet Layer Cake with Cream Cheese Frosting boasts a moist, tender crumb and an irresistible flavor that leaves everyone asking for seconds. Whether you’re looking to impress guests at a festive occasion or want to indulge in a homemade treat, this recipe is your ticket to deliciousness. Plus, with easy substitutions, you can cater to various dietary needs without compromising taste. Ready to dive into a baking adventure that exudes elegance and nostalgia? Let’s get started!

Why is this Classic Red Velvet Layer Cake special?
Irresistible Flavor: This cake harmoniously blends rich cocoa and creamy frosting for an unforgettable taste.
Visual Appeal: Its stunning red layers create an eye-catching centerpiece for any gathering.
Versatile: Easily transform it into cupcakes or experiment with various frostings to suit your preferences.
Crowd-Pleaser: Perfect for celebrations, this dessert brings smiles and satisfied cravings, making it an instant favorite!
Easy Swaps: With simple substitutions for gluten-free and dairy-free options, everyone can enjoy a slice.
If you’re curious about alternatives, check out my tips on creating variations to keep your baking fresh and exciting!
Classic Red Velvet Layer Cake Ingredients
A delicious foundation for your cake awaits!
For the Cake
- Vegetable or Canola Oil – Provides moisture, resulting in a fluffy texture; coconut oil can be used for a different flavor.
- Buttermilk – Adds acidity for flavor and tenderness; can be substituted with yogurt or milk mixed with vinegar.
- Large Eggs – Essential for binding; make sure they’re at room temperature for optimal mixing.
- Vanilla Extract or Vanilla Bean Paste – Offers sweetness and depth; imitation vanilla works in a pinch.
- White Vinegar – Reacts with baking soda for leavening; lemon juice can be an alternative.
- Red Gel Food Coloring – Vital for that iconic hue; gel is best as liquid may dilute.
- Granulated Sugar – Sweetens and retains moisture; no substitutions recommended here.
- All-Purpose Flour – Provides structure; for gluten-free, opt for a 1:1 blend.
- Unsweetened Cocoa Powder – Balances sweetness and adds flavor; Dutch-processed changes color slightly.
- Fine Salt – Enhances all the flavors; omitting it isn’t advisable.
- Baking Soda & Baking Powder – Leavening agents crucial for rise; don’t substitute unless necessary.
For the Frosting
- Unsalted Butter – Adds richness to your frosting; use vegan butter for a dairy-free version.
- Full-Fat Cream Cheese – Essential for a creamy, stable frosting; light cream cheese can reduce stability.
- Powdered Sugar – Sweetens the frosting and helps achieve the right texture; sift it to avoid grittiness.
- Heavy Whipping Cream – Adds creaminess; you can swap with light cream if needed.
How to Make Classic Red Velvet Layer Cake
Preheat your oven to 350°F (175°C) and prepare three 6-inch cake pans by greasing them and lining the bottoms with parchment paper. This ensures easy removal once baked.
Whisk together in a mixing bowl the vegetable oil, buttermilk, large eggs, vanilla extract, white vinegar, and red gel food coloring until well-combined and smooth. This mixture creates a rich base full of flavor.
Gradually add the granulated sugar and then sift in the dry ingredients—flour, cocoa powder, salt, baking soda, and baking powder. Mix until the batter is smooth and well blended, but don’t overdo it!
Divide the batter evenly among the prepared pans and bake for 27-30 minutes, or until a toothpick inserted into the center comes out clean. Your kitchen will smell delightful as the cakes rise.
Cool the layers in their pans for about 15 minutes, then gently transfer them to wire racks to cool completely. This cooling process is crucial before frosting.
For the frosting: beat together the unsalted butter and full-fat cream cheese in a large bowl until smooth and creamy. Gradually add in the sifted powdered sugar and a splash of heavy cream until you reach your desired frosting consistency.
Crumble the tops of the cooled cake layers and set aside, which will be used for decoration later. This adds a lovely rustic touch.
Assemble the cake by stacking the layers with a generous spread of frosting in between each one. Apply a thin crumb coat all around, then chill until set.
Finish decorating with a thicker layer of frosting on the outside. Optionally, use the reserved cake crumbs for decoration around the edges and pipe a decorative border if desired.
Optional: Enhance with a drizzle of chocolate sauce for an extra decadent treat!
Exact quantities are listed in the recipe card below.
What to Serve with Classic Red Velvet Layer Cake?
Indulging in a slice of this cake is delightful, but pairing it with the right sides can truly elevate your dessert experience.
Creamy Vanilla Ice Cream: A scoop of classic vanilla ice cream provides a cool, smooth contrast to the rich, velvety cake. The combination is simply irresistible!
Fresh Berries: Strawberries or raspberries add a refreshing burst of tartness, cutting through the sweetness. Their vibrant color also complements the cake beautifully.
Chocolate Ganache: Drizzling warm chocolate ganache over each slice heightens the flavor profile, introducing a layer of decadence that chocolate lovers will adore.
Coffee or Espresso: Serve with freshly brewed coffee or a shot of espresso to balance the cake’s sweetness. The warmth and bitterness of coffee wonderfully complement the dessert.
Whipped Cream: Light and airy whipped cream adds a cloud-like texture. Its subtle sweetness enhances the cake without overpowering its rich flavors.
Nutty Crunch: A sprinkle of chopped nuts, like pecans or walnuts, not only provides contrast in texture but also adds a delightful earthy flavor that pairs well with the cake.
Sparkling Wine: A flute of sparkling wine or champagne creates a festive atmosphere. The effervescence is a perfect match for indulgent desserts, making every bite feel like a celebration.
Cream Cheese Frosting Drizzle: Enhance each slice with a little drizzle of extra cream cheese frosting to elevate the flavors and offer a glimpse of the luscious frosting within.
Coconut Macaroons: These chewy, sweet gems offer a different texture but still harmonize with the cake’s flavor, making for a delightful pairing.
Each of these suggestions can take your enjoyment of this Classic Red Velvet Layer Cake to new heights, creating a memorable dessert experience!
Make Ahead Options
This Classic Red Velvet Layer Cake with Cream Cheese Frosting is ideal for meal prep, allowing busy home cooks to enjoy a delicious dessert without last-minute stress. You can bake the cake layers up to 3 days in advance; simply cool them completely, wrap them tightly in plastic wrap, and refrigerate. For longer storage, freeze the layers for up to 2 months. The cream cheese frosting can also be made ahead and stored in the fridge for up to 1 week; just give it a quick re-whip before using. When you’re ready to serve, layer and frost the cake as instructed, and you’ll have an impressive dessert that tastes just as delicious as if made fresh!
Classic Red Velvet Layer Cake Variations
Feel free to let your creativity shine and adapt this recipe to your taste and dietary needs!
- Cupcake Conversion: Transform this classic into cupcakes by adjusting baking time to 18-21 minutes. They’ll be just as delectable!
- Chocolate Delight: Fold in chocolate chips or chopped nuts for a new twist that adds delightful crunch and flavor.
- Strawberry Bliss: Add fresh strawberries between layers for a fruity surprise that complements the rich cake beautifully.
- Dairy-Free Option: Substitute cream cheese frosting with whipped coconut cream for a lighter, dairy-free version bursting with flavor.
- Gluten-Free Treat: Use a 1:1 gluten-free flour blend in the cake batter, ensuring that everyone can indulge in the joy of red velvet.
- Spiced Up: Sprinkle a dash of cinnamon or nutmeg into the batter for a warm spice that enhances the flavors beautifully.
- Layered Luxury: Create a trifle dessert with pieces of cake, frosting, and layers of whipped cream or custard for an impressive presentation.
- Heat It Up: For a fun kick, add a hint of cayenne pepper into the batter; the spice marries well with the chocolatey flavor.
With these variations, your baking adventures will continue to delight and surprise!
How to Store and Freeze Classic Red Velvet Layer Cake
Fridge: Store any leftovers covered with plastic wrap or in an airtight container for up to 3 days to maintain moisture and freshness.
Freezer: For longer storage, wrap each cake layer tightly in plastic wrap and foil, then freeze for up to 3 months. Thaw in the fridge before frosting.
Frosting: The cream cheese frosting can be refrigerated in an airtight container for up to 1 month. Re-whip lightly before using to restore its texture.
Reheating: If you’ve frozen the cake, let it come to room temperature before serving, allowing the flavors to meld and enhance the overall experience of your Classic Red Velvet Layer Cake.
Expert Tips for Classic Red Velvet Layer Cake
Room Temperature Ingredients: Ensure all ingredients, especially eggs and buttermilk, are at room temperature for smoother mixing and better texture in your classic red velvet layer cake.
Measure Flour Correctly: Avoid a dense cake by measuring flour accurately—spoon it into the measuring cup and level it off with a knife for perfect results.
Don’t Overmix: Mix only until the dry ingredients are just incorporated; overmixing can lead to a tough cake. Aim for a light and fluffy texture!
Cool Layers Thoroughly: Be patient and allow the cake layers to cool completely before frosting to prevent the frosting from melting.
Test Substitutions First: If you’re exploring substitutions like alternative flours or dairy-free options, bake a small test batch to ensure the texture and flavor meet your expectations.
Classic Red Velvet Layer Cake with Cream Cheese Frosting Recipe FAQs
What is the best way to select ripe ingredients for this cake?
Absolutely! For the best results, use buttermilk that is fresh and properly stored. Ensure your eggs are large and at room temperature for optimal mixing, which helps the cake rise properly. For the oil, vegetable or canola oil works beautifully; however, I often prefer melted coconut oil for an added flavor twist!
How should I store the leftover Classic Red Velvet Layer Cake?
It’s very straightforward! Store any leftovers covered with plastic wrap or in an airtight container in the fridge for up to 3 days. This helps retain moisture and freshness. If you’re like me and love enjoying cake for several days, this is a must!
Can I freeze the Classic Red Velvet Layer Cake and how?
Yes, you certainly can! To freeze, wrap each cake layer tightly in plastic wrap and then cover with aluminum foil to prevent freezer burn. This method keeps the cake fresh for up to 3 months. When you’re ready to enjoy, simply thaw the layers in the refrigerator overnight before frosting and serving.
What do I do if my cake comes out dense or dry?
If you find your cake is dense or dry, it may have come from overmixing the batter or not measuring the flour correctly. I recommend using the spoon-and-level method for measuring flour to avoid packing it down. Additionally, be sure to mix the batter just until the dry ingredients are incorporated, and not a second longer. Keeping your ingredients at room temperature also helps maintain that tender cake texture!
Are there any dietary considerations I should keep in mind?
Very! If you’re accommodating dietary restrictions, you can easily make this recipe gluten-free by using a 1:1 gluten-free flour blend instead of all-purpose flour. For a dairy-free frosting, swap out the cream cheese and butter for vegan alternatives. Always make sure to check labels for allergens, especially if you’re serving this cake to guests with food sensitivities. Happy baking!
Decadent Classic Red Velvet Layer Cake with Cream Cheese Frosting
Ingredients
Equipment
Method
- Preheat your oven to 350°F (175°C) and prepare three 6-inch cake pans by greasing them and lining the bottoms with parchment paper.
- Whisk together in a mixing bowl the vegetable oil, buttermilk, large eggs, vanilla extract, white vinegar, and red gel food coloring until well-combined and smooth.
- Gradually add the granulated sugar and then sift in the dry ingredients—flour, cocoa powder, salt, baking soda, and baking powder. Mix until the batter is smooth.
- Divide the batter evenly among the prepared pans and bake for 27-30 minutes, or until a toothpick inserted into the center comes out clean.
- Cool the layers in their pans for about 15 minutes, then gently transfer them to wire racks to cool completely.
- Beat together the unsalted butter and full-fat cream cheese in a large bowl until smooth and creamy.
- Gradually add in the sifted powdered sugar and a splash of heavy cream until you reach your desired frosting consistency.
- Crumble the tops of the cooled cake layers and set aside for decoration.
- Assemble the cake by stacking the layers with a generous spread of frosting in between each one. Apply a thin crumb coat all around, then chill until set.
- Finish decorating with a thicker layer of frosting on the outside.
- Optionally, use the reserved cake crumbs for decoration around the edges and pipe a decorative border if desired.
- Optional: Enhance with a drizzle of chocolate sauce for an extra decadent treat!