As the joy of Easter approaches, the craving for sweet treats becomes undeniable—especially those rich, chocolatey delights that remind us of childhood memories. I found myself reminiscing about the familiar taste of peanut butter and chocolate while daydreaming about festive décor and family gatherings. That’s when I decided to whip up these delightful Homemade Peanut Butter Easter Eggs.
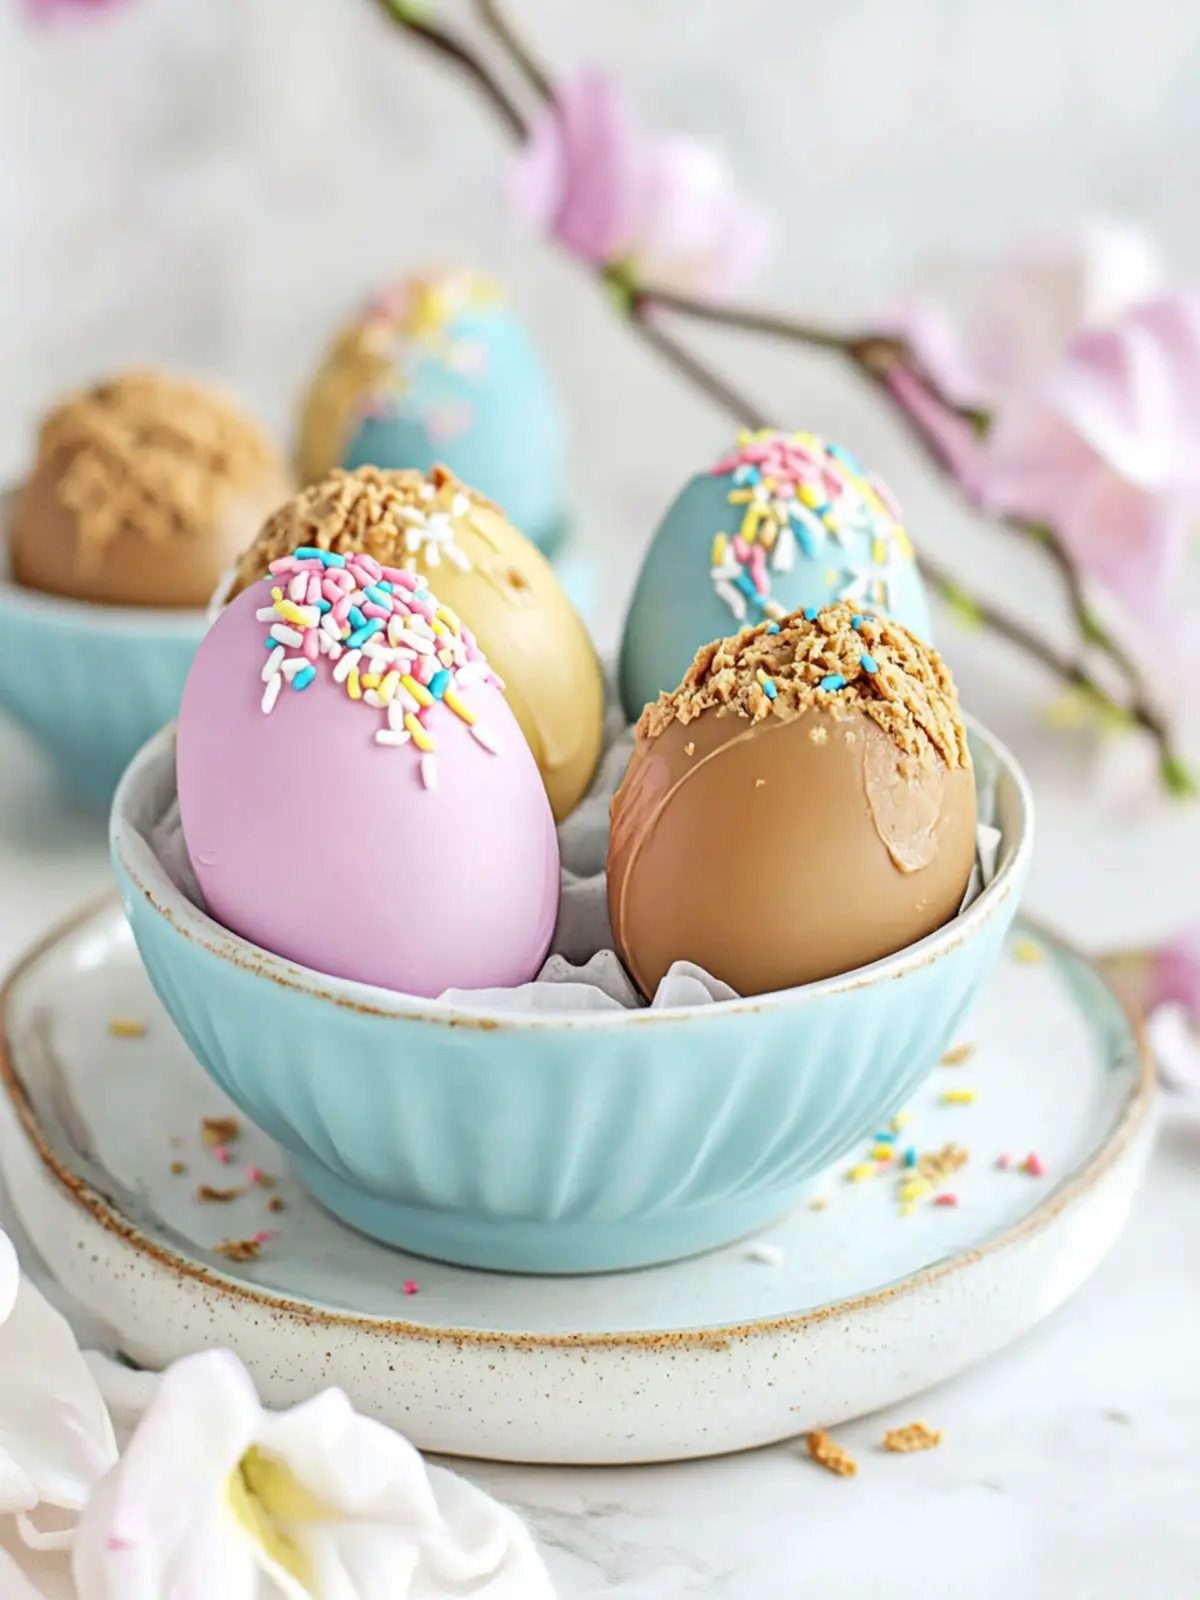
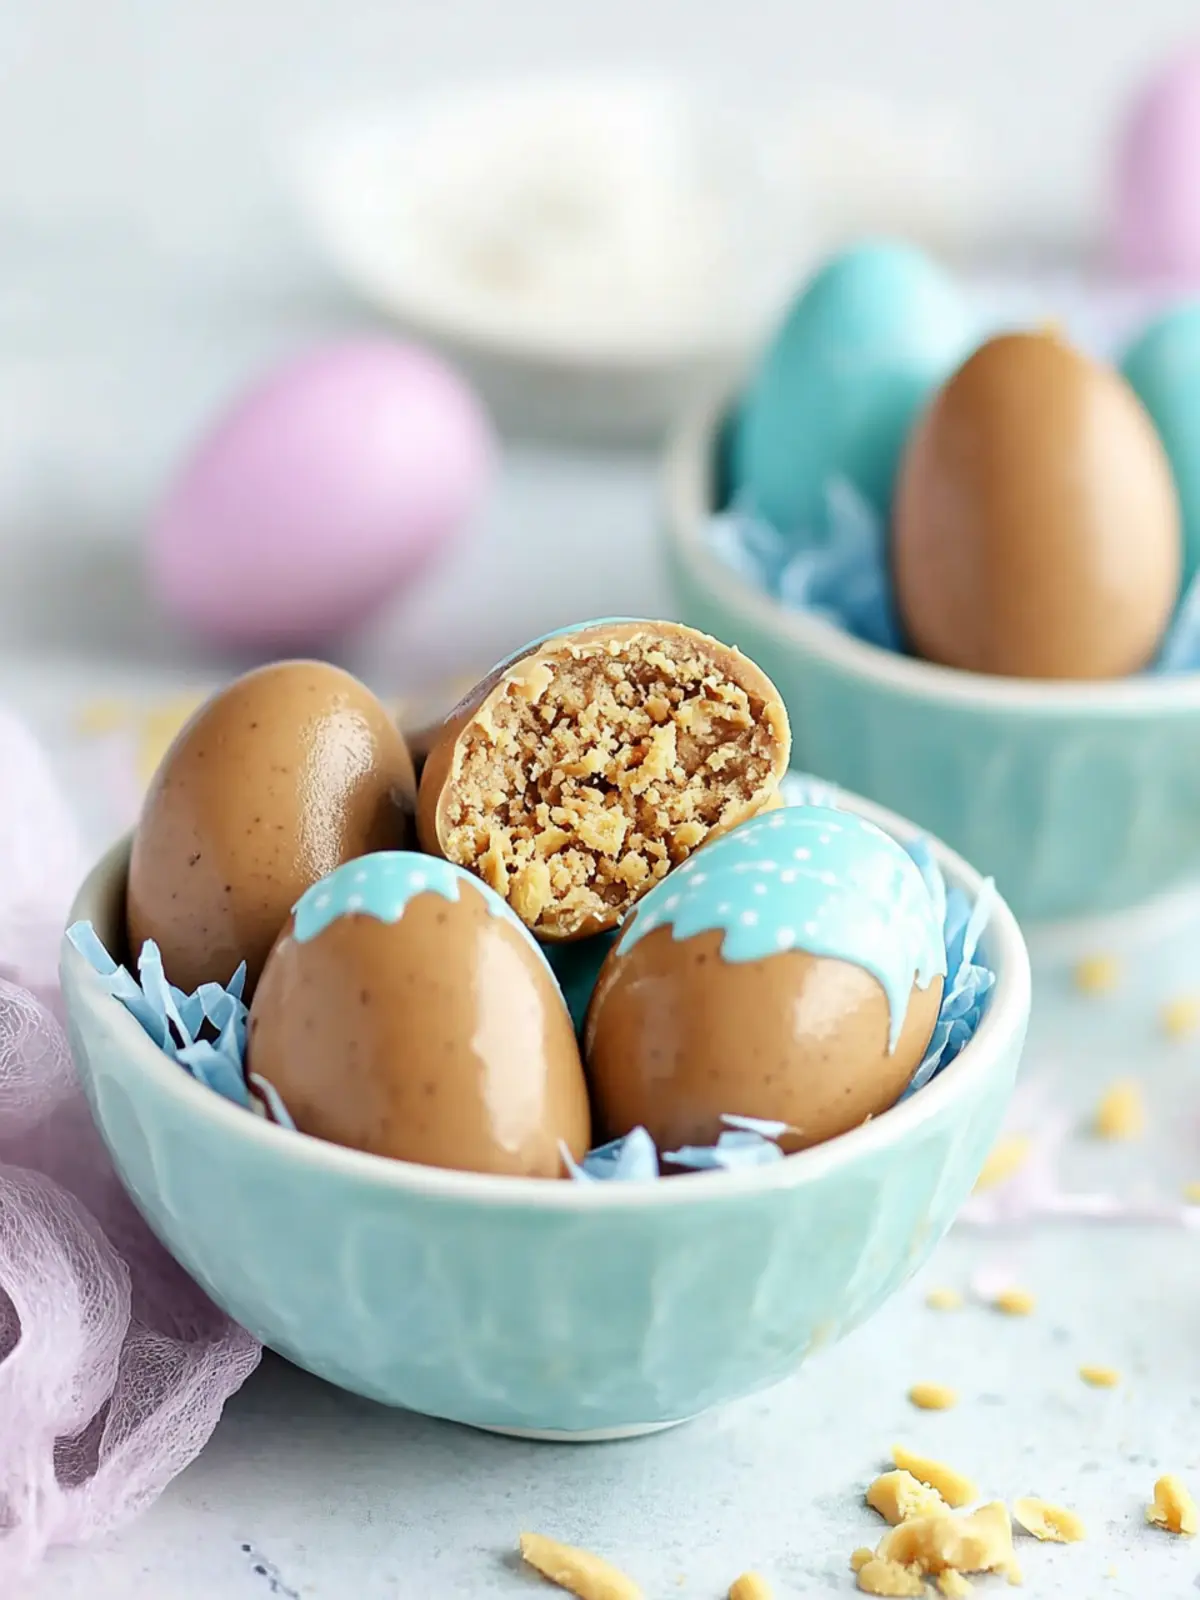
Imagine a slightly crumbly, sweet and salty peanut butter filling encased in a luxurious chocolate shell. With vibrant pastel decorations, these eggs not only satisfy your cravings but also add a cheerful touch to your holiday table. Once you serve these beauties, I promise you’ll be converting friends and family into fans who will request them year after year, leaving store-bought options behind. So roll up your sleeves, let’s create some homemade magic that’s both fun and utterly delicious!

Why will you adore these peanut butter easter eggs?
Delightful homemade treats are just the beginning! You’ll love the sweet, salty filling wrapped in rich chocolate, creating a heavenly flavor experience. Festive decorations make these eggs perfect for Easter gatherings, bringing cheer to your holiday table. Family-friendly and versatile, they’re ideal for involving kids in the kitchen. Time-saving tips mean you can prep these ahead and enjoy the fun without stress. Transform your celebrations with these cheerful, decadent delights!
Peanut Butter Easter Eggs Ingredients
For the Peanut Butter Filling
• Graham Crackers – Provides structure and a crumbly texture; substitute with digestive biscuits for a similar taste.
• Smooth Peanut Butter – Adds creaminess and rich peanut flavor; any nut butter can be used as a substitute for dietary restrictions.
• Powdered Sugar – Sweetens the filling for a smooth texture; granulated sugar can be ground into a fine powder if needed.
• Vanilla Extract – Enhances flavor complexity; use pure vanilla for the best results or imitation vanilla as an acceptable substitute.
• Unsalted Butter – Provides richness to the filling; if dairy-free, opt for a vegan butter alternative.
• Salt – Balances sweetness and enhances flavors; it’s optional but highly recommended for depth.
For the Chocolate Coating
• Colored Candy Coating Melts – Used for decorating the chocolate shells; any brand works, or substitute with colored white chocolate.
• Chocolate Candy Coating Melts – Forms the outer layer of the eggs; choose milk, dark, or white chocolate based on your preference.
Dive into this recipe and create your own fabulous peanut butter Easter eggs!
How to Make Peanut Butter Easter Eggs
Prepare the Filling: Start by crushing graham crackers into fine crumbs. In a bowl, combine the crumbs with smooth peanut butter, powdered sugar, vanilla extract, unsalted butter, and a pinch of salt. Mix until everything is smooth, then chill in the refrigerator until firm, about 30 minutes.
Decorate Molds: Preheat your creative spirit! Clean and dry your egg-shaped silicone molds. Melt the colored candy coating melts and use a small paintbrush or spoon to create fun designs inside the molds. Then, refrigerate them until hard, around 10-15 minutes.
Create Chocolate Shells: Melt the chocolate candy coating until completely smooth. Brush it inside the cooled molds, aiming for an even layer. Be sure to clean the edges and pop them into the fridge until set, which should take about 20 minutes.
Assemble: Take the cooled chocolate shells and carefully fill each with the chilled peanut butter mixture, making sure to leave a little gap at the top. Seal each one with additional melted chocolate, spreading to ensure it’s well-covered.
Cool and Unmold: Return the filled molds to the refrigerator and chill until the coating is shiny and hard, around 30 minutes. Gently flex the molds to release your beautiful peanut butter Easter eggs.
Optional: Drizzle melted white chocolate on top for an extra decorative touch.
Exact quantities are listed in the recipe card below.
Make Ahead Options
These delicious peanut butter Easter eggs are perfect for meal prep enthusiasts! You can prepare the filling up to 3 days in advance by mixing together the graham cracker crumbs, peanut butter, powdered sugar, vanilla, butter, and salt, then refrigerating it until firm. Additionally, the chocolate shells can be created up to 24 hours ahead; simply melt the chocolate candy coating and brush it into the molds, letting it set in the fridge. When you’re ready to finish, fill each shell with the chilled filling, seal with more melted chocolate, and allow it to set. This way, you save valuable time during your holiday preparations while still enjoying these delightful homemade treats just as delicious as fresh!
What to Serve with Peanut Butter Easter Eggs?
To elevate your holiday gathering, consider some delightful pairings that harmonize beautifully with these sweet treats.
Vanilla Ice Cream: A scoop of creamy vanilla ice cream provides a cool, smooth contrast to the rich chocolate, balancing flavors perfectly.
Fresh Strawberries: The juicy sweetness of strawberries cuts through the richness, adding a refreshing bite that complements every decadent nibble.
Chocolate Milkshake: Treat yourself and your guests to a thick chocolate milkshake. Its indulgent flavor pairs nicely while echoing the chocolatey goodness of the eggs.
Coffee or Espresso: A cup of fresh-brewed coffee enhances the flavors of the peanut butter and chocolate, creating the perfect cozy indulgence for adult gatherings.
Easter-Themed Fruit Salad: Toss seasonal fruits like melons and berries for a vibrant touch. Their natural sweetness and freshness provide a fun contrast on the plate.
Carrot Cake: This classic dessert not only fits the Easter theme, but its spiced flavor profile beautifully balances the rich sweetness of the eggs, creating a harmonious dessert table.
Nutty Granola Bars: For a simpler contrast, serve homemade nutty granola bars; their chewiness adds a satisfying texture next to the eggs’ creamy filling.
Sparkling Lemonade: Bright and zesty, sparkling lemonade offers a refreshing pop against the rich taste of the eggs, perfect for any festive gathering.
Expert Tips for Peanut Butter Easter Eggs
- Chill Properly: Ensure your peanut butter mixture is well-chilled before filling, as this helps prevent the eggs from leaking during assembly.
- Coating Thickness: Apply a generous layer of chocolate candy coating to avoid any cracking or leaking; a thick shell adds sturdiness and a delightful crunch.
- Decorating Patience: Allow melted colors to set fully before adding the chocolate shell; rushing this step can lead to bleeding colors in your peanut butter Easter eggs.
- Mold Selection: Invest in high-quality silicone molds for easy removal and a perfect shape; they also help the chocolate to set uniformly.
- Flavor Variations: Experiment with different nut butters, like almond or cashew, for unique twists that keep your family excited!
How to Store and Freeze Peanut Butter Easter Eggs
- Room Temperature: Store your peanut butter Easter eggs in an airtight container at room temperature for up to 2 weeks to keep them fresh and delightful.
- Fridge: If you prefer to keep these treats cooler, they can be stored in the refrigerator for up to 1 month. Just ensure they’re sealed tightly to prevent moisture.
- Freezer: For longer storage, freeze the eggs in a single layer on a baking sheet before transferring to a freezer-safe container, where they can last up to 3 months.
- Reheating: Let the frozen peanut butter Easter eggs thaw in the fridge overnight or at room temperature before enjoying their creamy goodness again.
Peanut Butter Easter Eggs Variations
Feel free to have fun with these delightful twists that will elevate your homemade treats even further!
Nutty Crunch: Add a layer of crushed nuts like walnuts or almonds for a satisfying crunch that contrasts beautifully with the creamy filling. The extra texture makes each bite a delightful surprise.
Seasonal Swaps: Use colored candy melts that align with different holidays or celebrations, such as deep reds for Valentine’s Day or vibrant greens for St. Patrick’s Day! It’s a fun way to keep the festive spirit alive year-round.
Flavor Infusion: Try flavored peanut butters like chocolate, honey, or cinnamon for a unique twist that adds an exciting depth to your filling. Each variation allows you to create your signature style of Easter egg.
Coconut Fling: Mix shredded coconut into the peanut butter filling for a tropical touch that pairs wonderfully with chocolate. This adds a chewy texture and a taste reminiscent of a summer getaway.
Fruity Highlights: Incorporate mini chocolate chips, dried cranberries, or chopped dried apricots within the filling for intermittent bursts of flavor. Each bite will awaken new taste sensations, turning a classic into a flavor adventure.
Spicy Kick: Add a pinch of cayenne pepper or chili powder to the peanut butter filling for those who enjoy a fiery twist. This unexpected heat elevates the flavor profile and will impress adventurous eaters!
Vegan Delight: Substitute all dairy ingredients with plant-based alternatives, like coconut oil for butter and almond milk for any creamy elements. This ensures everyone can enjoy these festive treats without compromising on texture or flavor!
Sweet Drizzle: Finish with a drizzle of melted caramel or additional chocolate on top of the cooled eggs for an extra decadent touch that’s always a crowd-pleaser. It not only looks inviting but adds a luscious layer of sweetness.
Peanut Butter Easter Eggs Recipe FAQs
How do I choose ripe ingredients for this recipe?
Absolutely! When selecting your ingredients, look for graham crackers that are fresh and free of breakage. For the peanut butter, choose smooth varieties without any added sugars or oils for the best flavor. If you’re using butter, opt for unsalted for better taste control.
What are the best storage methods for leftover peanut butter Easter eggs?
To keep your homemade peanut butter Easter eggs fresh, store them in an airtight container at room temperature for up to 2 weeks. If you prefer a cooler treat, refrigerate them for up to 1 month. Just ensure they’re sealed tightly to avoid moisture!
Can I freeze peanut butter Easter eggs, and if so, how?
Definitely! To freeze your peanut butter Easter eggs, start by placing them in a single layer on a baking sheet. Once frozen solid, transfer them to a freezer-safe container or zip-top bag, ensuring to remove as much air as possible. They can last up to 3 months in the freezer. When you’re ready to enjoy them, let them thaw in the fridge overnight or at room temperature for a delightful treat.
What should I do if my chocolate coating cracks during assembly?
Very often, cracks in the chocolate coating happen when it’s too thin or cools too quickly. If you notice cracks while filling, try reheating the chocolate slightly and applying a thicker layer. If it’s already set, you can patch cracks by melting a bit more chocolate and gently applying it over any damaged areas to seal them up.
Are these peanut butter Easter eggs suitable for people with allergies?
While delicious, these peanut butter Easter eggs do contain common allergens like peanut butter and dairy! If you’re making them for someone with a nut or dairy allergy, consider using sunflower seed butter for the filling and vegan butter for a dairy-free alternative. Always check the labels of all ingredients to ensure safety for your guests.
Can kids help with making these peanut butter Easter eggs?
The more the merrier! Kids can definitely get involved in every step from crushing graham crackers to decorating the molds. Just supervise them while melting chocolate and using the molds, ensuring they have fun while creating these festive treats!
Delicious Peanut Butter Easter Eggs You Can Make at Home
Ingredients
Equipment
Method
- Crush graham crackers into fine crumbs and mix with peanut butter, powdered sugar, vanilla extract, unsalted butter, and salt until smooth. Chill for 30 minutes.
- Clean and dry the egg-shaped silicone molds. Melt the colored candy coating and create designs inside the molds. Refrigerate until hard, about 10-15 minutes.
- Melt the chocolate candy coating until smooth, brush inside the cooled molds, and refrigerate until set for about 20 minutes.
- Fill the chocolate shells with the chilled peanut butter mixture, leaving a gap at the top. Seal with additional melted chocolate.
- Chill until the coating is shiny and hard, around 30 minutes. Flex the molds gently to release the peanut butter Easter eggs.