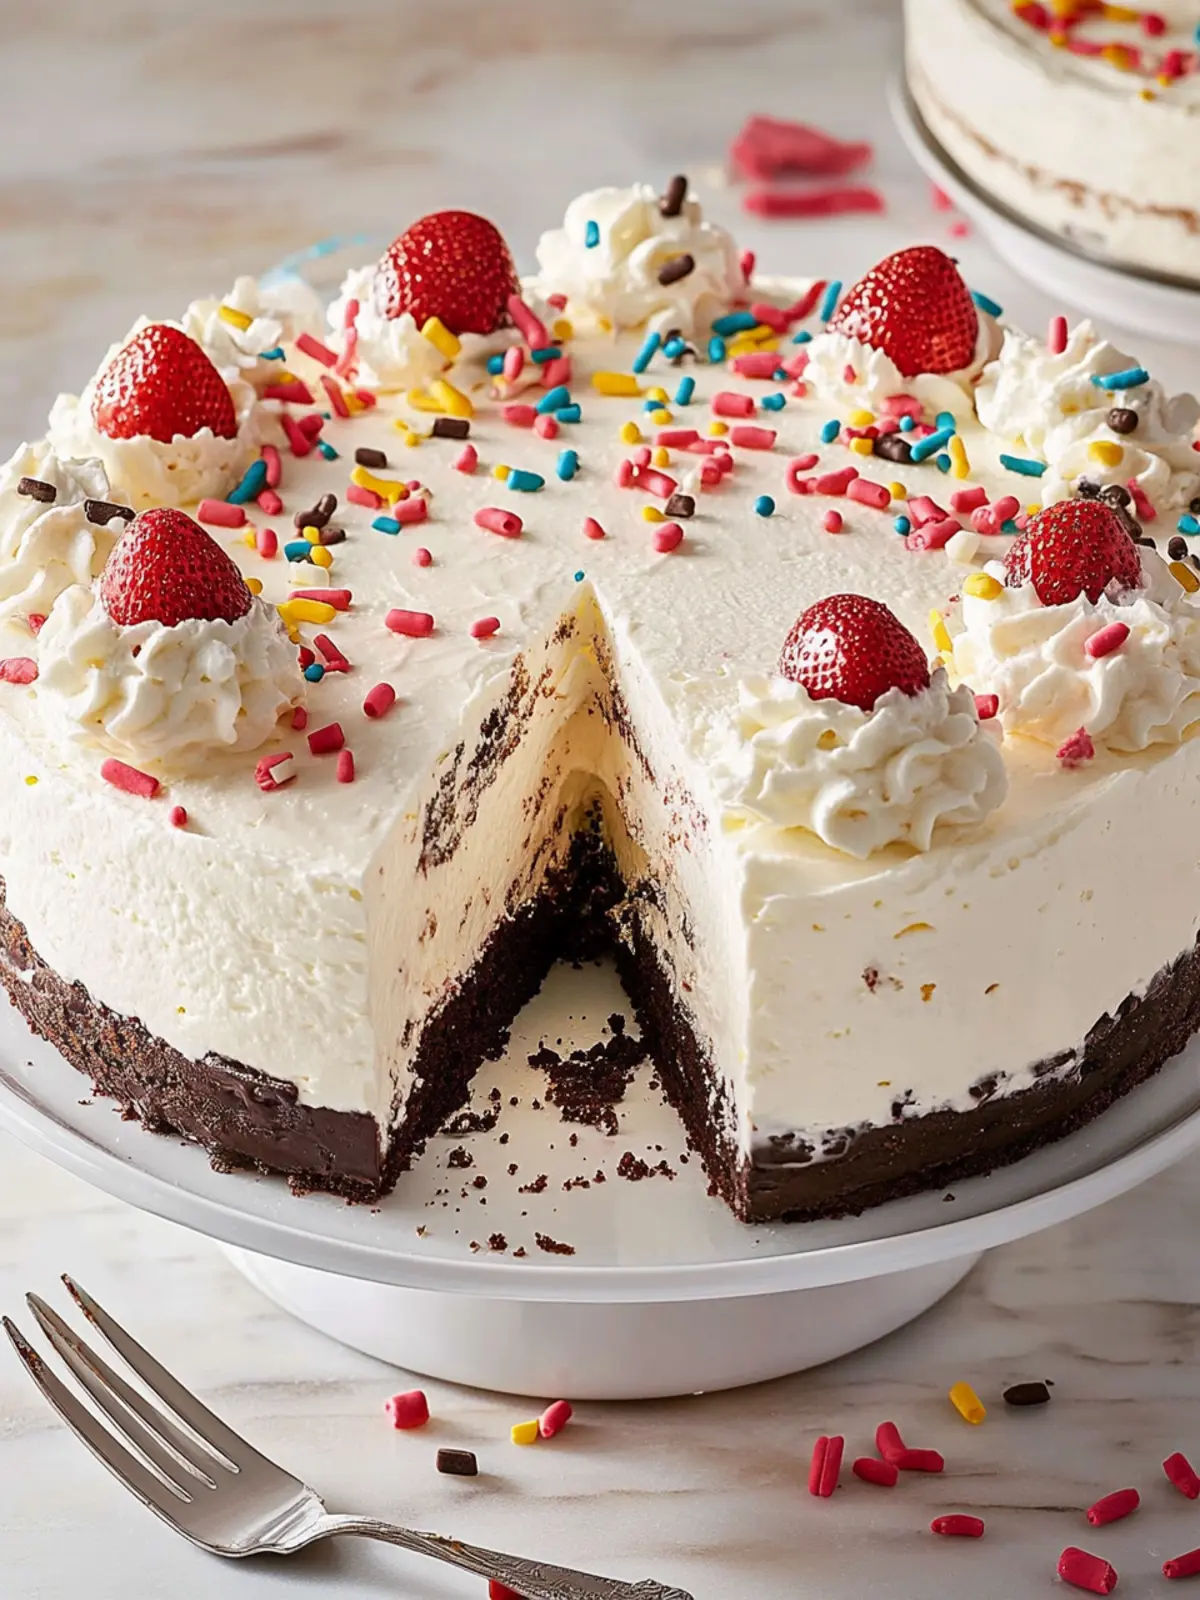
As the temperatures begin to rise and thoughts of summer gatherings fill the air, I find myself craving a scoop of nostalgia that perfectly balances creamy sweetness with a satisfyingly crunchy texture. That’s when this Copycat Dairy Queen Ice Cream Cake comes to mind—a show-stopping dessert that’s surprisingly easy to whip up right in your kitchen!
Layered with creamy vanilla and rich chocolate ice cream, complemented by a luscious fudge ribbon and crunchy Oreo cookie pieces, this cake brings back delightful memories of joyful celebrations. It’s the kind of indulgent treat that can make any occasion special, whether you’re hosting a birthday party or simply enjoying a quiet evening at home.
Join me as we dive into this delectable recipe that promises to turn any gathering into a sweet celebration, all while steering clear of pricey takeout options. With just a few pantry staples, you’ll create a dessert that not only impresses but also transports you back to carefree summer days!

Why is Copycat Dairy Queen Ice Cream Cake a Must-Try?
Indulgent layers: This crowd-pleaser features luscious vanilla and rich chocolate ice cream that your family will adore.
Easy to make: With simple steps, you won’t need any advanced baking skills.
Nostalgic treat: It brings back summer memories and the joy of celebrations.
Customizable: You can swap ice cream flavors or add toppings to match your taste.
Perfect for gatherings: Whether a birthday party or a cozy get-together, this cake is sure to wow your guests!
Copycat Dairy Queen Ice Cream Cake Ingredients
For the Cookie Layer
- Oreo Cookies – Provides the crunchy chocolate cookie base; can substitute with gluten-free cookies for a gluten-free option.
- Unsalted Butter (melted) – Binds the cookie crumbs together; can replace with coconut oil for a dairy-free option.
- Semi-sweet Chocolate Chips – Adds extra richness to the cookie crunch; dark chocolate chips can be used for a deeper flavor.
- Refined Coconut Oil or Vegetable Shortening – Helps the chocolate mixture set properly; full-fat coconut milk is a dairy-free alternative.
For the Ice Cream Layers
- Vanilla Ice Cream – This base layer provides creaminess; may use dairy-free ice cream for a vegan option.
- Chocolate Ice Cream – The second layer contrasts beautifully with vanilla; can be swapped for coffee or mint flavored ice cream for a fun twist.
For the Whipped Topping
- Heavy Whipping Cream – Used to create a fluffy whipped topping; can use coconut cream as a dairy-free substitute.
- Confectioners’ Sugar – Sweetens the whipped cream; may omit for a less sweet topping.
- Pure Vanilla Extract – Enhances the flavor depth; can use almond extract for an interesting variation.
For the Fudge and Decoraion
- Hot Fudge Topping – Adds a delightful sweetness and fudge ribbon; chocolate syrup can be a handy substitute.
- Sprinkles – For decoration to add a festive touch; optional but definitely adds visual appeal.
With these ingredient details, you’re already on your way to crafting a remarkable Copycat Dairy Queen Ice Cream Cake that everyone will rave about!
How to Make Copycat Dairy Queen Ice Cream Cake
Preheat oven: Start by preheating your oven to 350°F (175°C). Prepare a baking sheet by lining it with parchment paper, ensuring easy removal later on.
Combine cookie ingredients: In a mixing bowl, combine the crushed Oreo cookies with melted butter. Stir until all crumbs are evenly coated, then spread the mixture onto the prepared baking sheet.
Bake until toasted: Bake the cookie mixture for about 10 minutes, or until it’s slightly golden and fragrant. Remove from the oven and allow it to cool completely.
Mix with chocolate: Once cooled, combine the cookie crumbs with melted chocolate in a large bowl. Mix well and chill in the refrigerator until the mixture is set, about 30 minutes.
Soften ice cream: Let both the vanilla and chocolate ice cream sit at room temperature for about 10 minutes until slightly softened. This makes spreading much easier.
Layer vanilla ice cream: In a cake tin, spread the vanilla ice cream evenly to form the first layer. Drizzle hot fudge on top, followed by a layer of the chocolate cookie mixture.
Spread chocolate ice cream: Gently spread the chocolate ice cream over the cookie layer, smoothing it out with a spatula for an even finish.
Prepare whipped cream: In a mixing bowl, whip the heavy cream with confectioners’ sugar and vanilla extract until stiff peaks form. This delicious topping will add a light finish to your cake.
Frost the cake: Spread the whipped cream over the top of the ice cream layers, creating a frosty layer. Decorate with sprinkles for a festive touch!
Freeze before serving: Cover the cake with plastic wrap and freeze for several hours, or overnight for best results, until firm and ready to serve.
Optional: Drizzle additional hot fudge on slices before serving for an extra indulgent treat.
Exact quantities are listed in the recipe card below.
Make Ahead Options
These Copycat Dairy Queen Ice Cream Cakes are fantastic for busy home cooks who enjoy seamless meal prep! You can prepare the cookie crumb layer and the whipped cream topping up to 24 hours in advance, storing them separately in the refrigerator. Just ensure the cookie mixture is in an airtight container to maintain its crunch. The ice cream layers can remain frozen for up to 3 days if they’re assembled in advance and stored properly, making them ready to serve when needed. When it’s time to enjoy, let the cake soften slightly at room temperature before slicing, and add a drizzle of hot fudge on each slice for a delicious finish!
Expert Tips for Copycat Dairy Queen Ice Cream Cake
- Soft Yet Firm: Make sure your ice cream is just soft enough to spread but still firm. This ensures layers hold their shape without melting.
- Use a Spatula: An offset spatula works wonders for creating smooth, even layers. This detail elevates the overall look of your ice cream cake.
- Chill the Layers: Allow each ice cream layer to freeze and firm up for at least 30 minutes before adding the next. This keeps the flavors separate and distinct.
- Fudgy Perfection: Drizzle the hot fudge in between layers for a luscious fudge ribbon, but don’t overdo it to prevent sogginess.
- Presentation Counts: Top with fresh whipped cream and colorful sprinkles to make your Copycat Dairy Queen Ice Cream Cake truly Instagram-worthy!
How to Store and Freeze Copycat Dairy Queen Ice Cream Cake
Room Temperature: This cake should not be left at room temperature for more than 30 minutes, as the ice cream will begin to melt and lose its structure.
Fridge: Store leftover slices in an airtight container in the fridge for up to 3 days. Keep them wrapped well to maintain freshness and avoid freezer burn.
Freezer: If you’d like to keep the cake longer, freeze it for up to one week. Ensure it’s tightly wrapped in plastic wrap and foil to prevent freezer burn.
Reheating: When ready to enjoy, take it out of the freezer and let it sit at room temperature for about 10-15 minutes to soften slightly before slicing.
Copycat Dairy Queen Ice Cream Cake Variations
Feel free to get creative with this recipe and make it your own by trying out these delightful twists!
- Fruity Delight: Substitute vanilla ice cream with strawberry for a refreshing summer flavor that brings a burst of fruity sweetness.
- Nutty Crunch: Mix in chopped nuts, like pecans or almonds, into your cookie layer for an added crunch and nutty flavor that complements the chocolate.
- Vegan Version: Use coconut cream in place of heavy whipping cream and dairy-free ice creams to create a vegan-friendly dessert without sacrificing taste.
- Coffee Twist: Swap chocolate ice cream for coffee-flavored ice cream for a bold kick that coffee lovers will adore.
- Minty Fresh: Replace chocolate ice cream with mint chocolate chip for a cool, refreshing take that’s perfect for warmer days.
- Fudge-Free: Skip the hot fudge and opt for a fruit sauce, like raspberry or strawberry, to lighten it up while still adding a layer of delicious flavor.
- Flavor Explosion: Add a dash of instant coffee granules to your whipped cream for an unexpected flavor boost that elevates the dessert.
- Cheesecake Layer: Incorporate a layer of no-bake cheesecake in between the ice cream layers for an indulgent twist that adds a creamy richness.
Each variation offers a unique taste experience, allowing you to tailor this indulgent ice cream cake to suit your preferences and those of your loved ones!
What to Serve with Copycat Dairy Queen Ice Cream Cake?
Looking to elevate your dessert experience? Here are some delightful pairings that will enhance the creamy sweetness of your ice cream cake!
- Fresh Berries: Juicy strawberries, blueberries, or raspberries add a refreshing tartness that cuts through the richness beautifully.
- Chocolate Sauce: Drizzling extra chocolate sauce over each slice offers a luscious, indulgent touch that chocolate lovers will adore.
- Classic Whipped Cream: Fluffy whipped cream dollops provide a light contrast against the dense ice cream layers, making each bite even more heavenly.
- Mint Leaves: A sprig of fresh mint not only adds a pop of color but brings a refreshing note that brightens the dessert.
- Crispy Waffle Cones: Crumbled waffle cones on the side add a satisfying crunch, echoing the deliciously crunchy cookie layer.
- Iced Coffee: A chilled iced coffee balances the sweetness of the cake, making for a refreshing beverage pairing.
- Vanilla Ice Cream: For those who crave extra creaminess, serving a scoop of plain vanilla ice cream alongside creates a delightful juxtaposition.
- Fruit Salad: A vibrant fruit salad brings a light, fruity flair, and the natural sweetness complements the ice cream cake perfectly.
- Chocolate Milkshake: Indulging in a chocolate milkshake alongside the cake transports dessert to a new level of happiness and nostalgia!
Copycat Dairy Queen Ice Cream Cake Recipe FAQs
What types of cookies work best for the cookie layer?
Absolutely! While Oreo cookies are the classic choice for this recipe, you can easily substitute with gluten-free cookies if you have dietary considerations. For a unique twist, consider using chocolate wafer cookies or even graham crackers for a different flavor profile.
How should I store leftovers of the Copycat Dairy Queen Ice Cream Cake?
This delightful cake can be kept in the freezer for up to one week. Just wrap it tightly in plastic wrap and then in foil to prevent any freezer burn. If you have any leftover slices, you can store them in an airtight container in the fridge for up to 3 days. Just remember to keep them well-wrapped to maintain freshness!
Can I freeze the entire cake? How do I manage that?
Yes, you can freeze the entire Copycat Dairy Queen Ice Cream Cake! To do so, cover it tightly with plastic wrap and then again with aluminum foil to ensure no air gets in. It can stay in the freezer for up to one week. When you’re ready to serve, just remove it from the freezer and allow it to sit at room temperature for about 10-15 minutes to soften slightly before cutting.
What can I do if the ice cream is too hard to spread?
If you find your ice cream is too hard, let it sit at room temperature for about 10 minutes. Keeping it partially frozen works best! You should aim for it to be soft enough to spread without melting completely. If you’re still struggling, a few seconds in the microwave (in 10-second bursts) can help, but be careful not to overdo it!
Is this recipe safe for those with specific allergies?
While this indulgent cake is packed with flavor, it does contain common allergens such as dairy and gluten due to the ice cream and cookies. For those with allergies, feel free to swap in dairy-free ice cream and gluten-free cookies. Always check ingredient labels if you’re uncertain; there are now many amazing alternative products on the market that cater to various dietary needs!
Copycat Dairy Queen Ice Cream Cake You Can Make at Home
Ingredients
Equipment
Method
- Preheat your oven to 350°F (175°C) and line a baking sheet with parchment paper.
- In a mixing bowl, combine the crushed Oreo cookies with melted butter. Stir until all crumbs are evenly coated, then spread the mixture onto the prepared baking sheet.
- Bake the cookie mixture for about 10 minutes or until slightly golden and fragrant. Allow to cool completely.
- Combine the cooled cookie crumbs with melted chocolate in a large bowl. Chill in the refrigerator until set, about 30 minutes.
- Let both the vanilla and chocolate ice cream sit at room temperature for about 10 minutes until slightly softened.
- In a cake tin, spread the vanilla ice cream evenly to form the first layer. Drizzle hot fudge on top, followed by a layer of the chocolate cookie mixture.
- Gently spread the chocolate ice cream over the cookie layer, smoothing it out with a spatula for an even finish.
- Whip the heavy cream with confectioners' sugar and vanilla extract until stiff peaks form.
- Spread the whipped cream over the top of the ice cream layers and decorate with sprinkles.
- Cover with plastic wrap and freeze for several hours or overnight until firm.