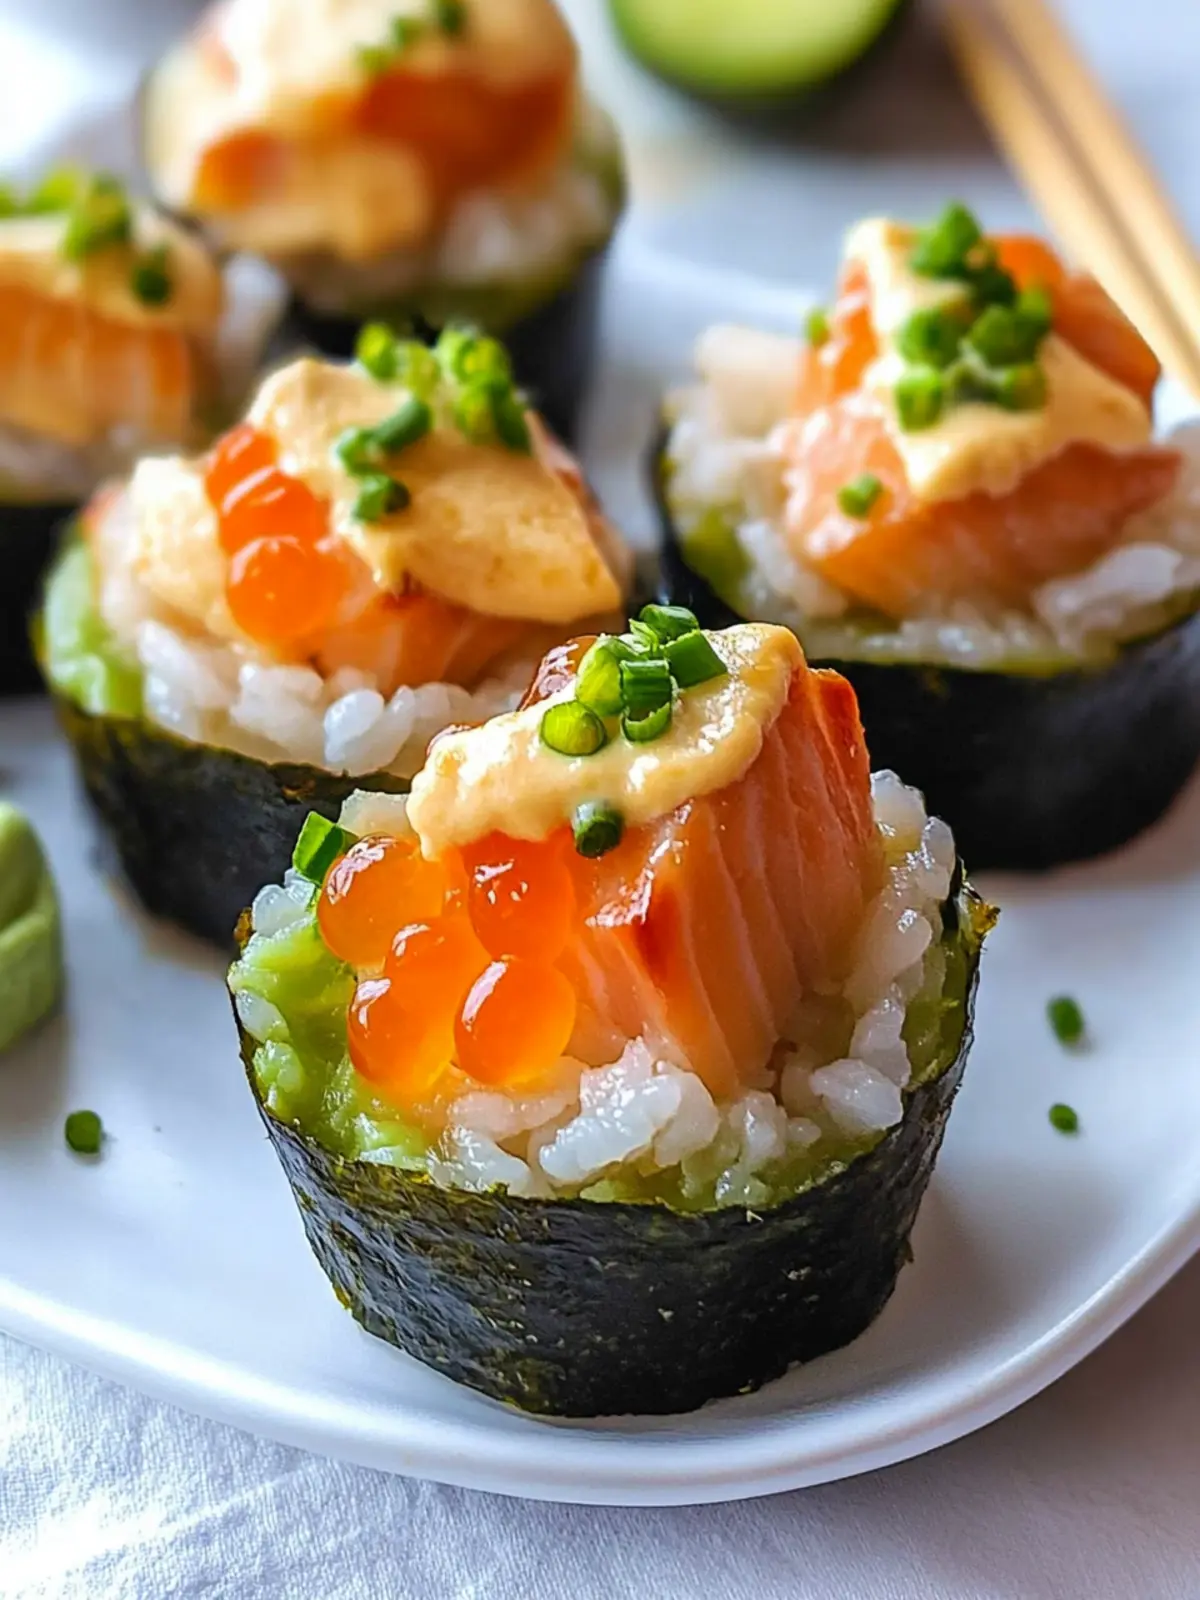
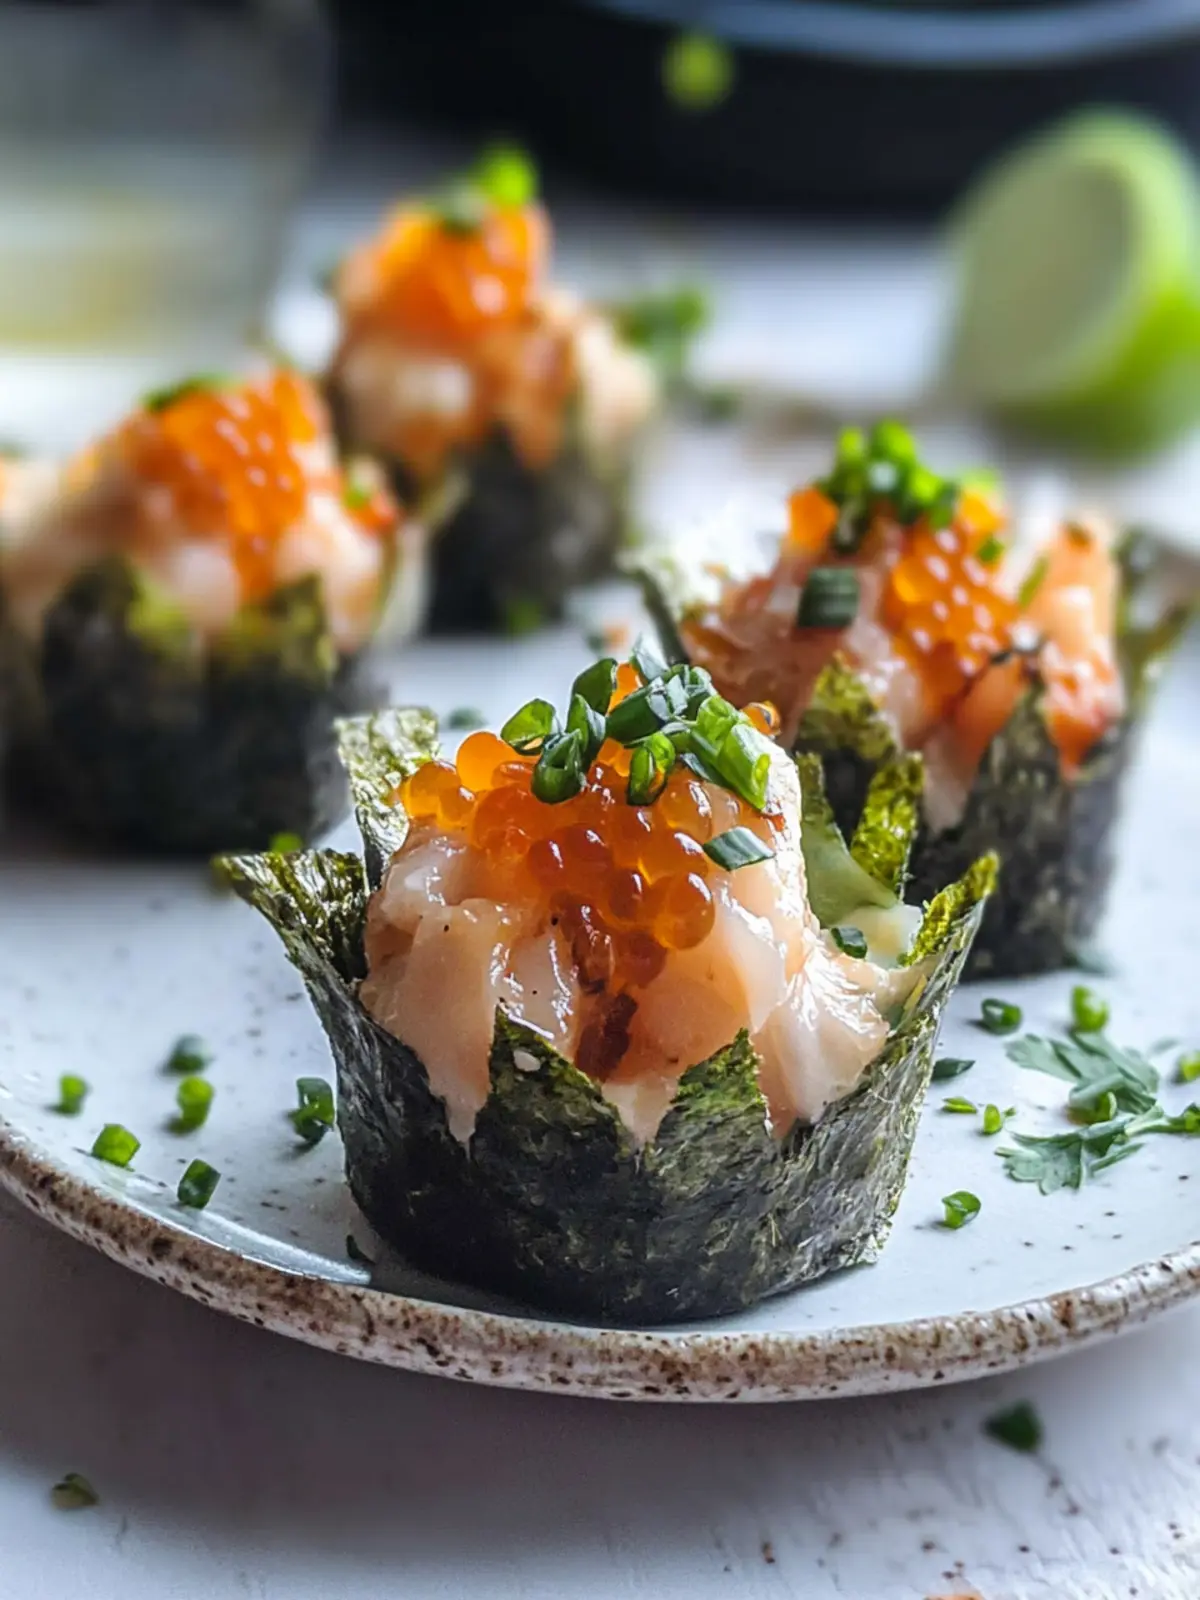
When the craving for sushi hits but you want to skip the traditional rolls, these Salmon Sushi Cups emerge as the ultimate solution. Picture this: the warmth of freshly cooked rice nestled in crisp nori, topped with tender salmon and a kick of spicy mayo. It’s like a sushi restaurant experience right in your own kitchen!
I discovered this recipe after a busy week left me yearning for something fresh and flavorful, yet easy enough to whip up on a whim. With just a handful of ingredients and a quick baking session, you can create an impressive dish that will have your friends and family raving. Who knew that something so elegant could come together in under 30 minutes? Whether you’re entertaining guests or enjoying a quiet night at home, these Sushi Bake Cups are destined to impress while satisfying your palate. Let’s dive in and make this deliciousness together!

Why are Sushi Bake Cups a game changer?
Simplicity in preparation makes these Sushi Bake Cups an effortless choice for any weeknight dinner. Flavor-packed with tender salmon and zesty spicy mayo, each bite is pure delight. Versatile enough for special occasions or casual family meals, they appeal to both seasoned chefs and novice cooks alike. Time-saving too, as they come together in just 25 minutes—perfect for busy lifestyles! Want to elevate your weeknight meals? Try these delicious treats that are bound to impress everyone at your table!
Sushi Bake Cups Ingredients
For the Rice
• ½ cup rice – Use jasmine, sushi, or short grain for the perfect texture.
• salt – A pinch will enhance the rice flavor.
• 2 teaspoons seasoned rice vinegar – Optional, but adds a delicious tang.
For the Salmon Filling
• ½ pound salmon – Make sure it’s skinless and boneless for easy preparation.
• 1 tablespoon coconut aminos – A great soy sauce substitute for a gluten-free option.
• 1 tablespoon spicy mayo – Adds a creamy kick, with extra for garnish.
For the Sushi Cups
• 2 sheets of nori – Cut into squares for easy assembly.
• chopped fresh chives – Provides a fresh, vibrant garnish that elevates presentation.
How to Make Sushi Bake Cups
Preheat your oven to 400°F. This ensures your Sushi Bake Cups will bake evenly and achieve that lovely crisp texture on top.
Rinse the rice thoroughly under cold water until the water runs clear. Cook it according to the package instructions. If you’re using seasoned rice vinegar, mix it in after cooking for a flavorful touch.
Prepare the salmon by patting it dry with paper towels, then cutting it into small cubes. Toss the salmon with coconut aminos, a pinch of salt, and spicy mayo in a bowl until well combined.
Cut the nori sheets into six equal-sized squares. This size is perfect for creating your little sushi cups, ensuring each one holds just the right amount of filling.
Scoop 1 tablespoon of cooked rice onto each nori square. Gently press the rice into the nori to create a sturdy base that can hold the toppings.
Place each nori and rice square into a muffin tin insert. Top each rice cup with a tablespoon of your cubed salmon mixture for that delightful, savory bite.
Bake for about 15 minutes. Don’t forget to broil for the last 60 seconds to get a nice crisp on top. Your kitchen will smell amazing as they cook!
Cool slightly after removing from the oven, then transfer the sushi cups onto a plate. Garnish generously with more spicy mayo and a sprinkle of chives for that extra flair.
Optional: Drizzle some extra spicy mayo on top for a flavor boost.
Exact quantities are listed in the recipe card below.

Make Ahead Options
These Sushi Bake Cups are perfect for meal prep, allowing you to enjoy a delicious dish even on your busiest days! You can prepare the rice and salmon filling up to 24 hours in advance. Simply cook and cool the rice, and mix the cubed salmon with the coconut aminos and spicy mayo, then refrigerate them both in airtight containers. When you’re ready to serve, place the nori squares into the muffin tins, top with the prepared rice and salmon, and bake as directed. This way, you’ll enjoy fresh, flavorful sushi cups with minimal effort, just as delightful as if made from scratch each time!
What to Serve with Sushi Bake Cups?
Creating a delightful meal goes beyond just one dish; let’s explore what can complement these delectable sushi cups.
Refreshing Seaweed Salad: This light and zesty salad enhances the oceanic flavors of the sushi, adding a pleasing crunch.
Savory Edamame: Steamed and lightly salted, these vibrant green soybeans provide a satisfying texture contrast and rich protein content.
Miso Soup: A warm bowl of miso soup adds a comforting depth to your meal, perfectly balancing the flavors of the sushi cups.
Tangy Pickled Ginger: The sharpness of pickled ginger cuts through richness, refreshing your palate with each bite.
Mango Tango Smoothie: A blend of mango, yogurt, and a hint of lime offers a sweet contrast that enhances the overall meal experience.
Crisp Cucumber Slices: Fresh cucumber adds a cool crunch, creating a bright and refreshing palate cleanser between bites of sushi.
Sake or Green Tea: For drinks, a chilled sake or hot green tea elevates your dining experience while complementing the umami notes in the dish.
Chocolate Mochi for Dessert: A sweet finish with chewy chocolate mochi delivers a delightful fusion that mirrors the flavors of the sushi.
Expert Tips for Sushi Bake Cups
• Rice Rinsing: Always rinse your rice until the water runs clear to remove excess starch, which prevents it from being gummy.
• Salmon Prep: Ensure the salmon is completely dry before cubing it. This helps it absorb the flavors and prevents excess moisture in your cups.
• Nori Handling: Use fresh, crisp nori sheets. Cutting them too early can cause them to lose their texture; assemble them just before use for the best experience.
• Broiling Tip: Keep an eye on your cups while broiling; they can go from perfect to burnt in mere seconds. This step is crucial for that crispy finish!
• Garnishing Smart: Don’t skimp on garnishes! Fresh chives and extra spicy mayo not only enhance the look but also elevate the overall flavor of the Sushi Bake Cups.
Sushi Bake Cups Variations & Substitutions
Feel free to get creative and make these delightful Sushi Bake Cups your own with these fun variations!
Spicy Tuna: Swap the salmon for diced sushi-grade tuna mixed with sriracha for an extra kick. The combination of flavors is simply irresistible!
Vegetarian Delight: Replace the fish with avocado slices and cucumber strips for a fresh, vegan option. This twist will still provide that satisfying sushi experience.
Quinoa Base: Use cooked quinoa instead of rice for a nutty flavor boost. Quinoa adds a great texture while packing in extra protein!
Add a Crunch: Sprinkle crushed panko breadcrumbs on top before baking to create a crispy topping. This adds a beautiful crunch that contrasts with the soft filling.
Creamy Sauce: Experiment with different sauces like a creamy garlic aioli or wasabi mayo in place of spicy mayo for an exciting flavor twist. Each dip brings a unique dimension!
Herb Infusion: Mix in fresh herbs like cilantro or basil into the salmon for a fresh, aromatic lift. This combination is perfect for herb lovers!
Sweet Heat: Add chopped jalapeños mixed into the salmon for some heat or even a touch of honey for a sweet contrast. This combination will tantalize your taste buds!
Rice Alternatives: Try cauliflower rice for a low-carb option or even black rice for a visually stunning and nutritious choice. The possibilities are endless!
How to Store and Freeze Sushi Bake Cups
Fridge: Keep leftover Sushi Bake Cups in an airtight container for up to 3 days. Reheat in the oven to preserve their crispy texture.
Freezer: For longer storage, freeze the baked cups individually wrapped in plastic and then in a freezer bag for up to 1 month. Thaw in the fridge overnight before reheating.
Reheating: To reheat, place them on a baking sheet and warm in a preheated oven at 350°F for about 10 minutes or until heated through. Enjoy the fresh taste once more!
Sushi Bake Cups Recipe FAQs
What type of rice is best for Sushi Bake Cups?
Absolutely! For the best texture, I recommend using sushi rice, jasmine rice, or short-grain rice. These varieties will provide just the right stickiness, allowing the rice to hold together when you press it onto the nori.
How should I store leftover Sushi Bake Cups?
After enjoying your delicious Sushi Bake Cups, store any leftovers in an airtight container in the fridge for up to 3 days. I often find that reheating them in the oven helps maintain their crispy texture, so preheat your oven to 350°F and warm them for about 10 minutes.
Can I freeze Sushi Bake Cups, and if so, how?
Very! To freeze your Sushi Bake Cups, I recommend wrapping each cup individually in plastic wrap and then placing them in a freezer bag. They can be stored this way for up to 1 month. When you’re ready to enjoy them again, just thaw in the fridge overnight and reheat in the oven at 350°F for approximately 10 minutes or until heated through.
What should I do if my nori gets soggy?
If you find your nori is soggy, consider using fresher, crisp nori sheets next time. Make sure to assemble the cups just before baking. Adding the salmon and rice mixture right before baking helps maintain the crispness, allowing each cup to be a delightful treat!
Are there any dietary considerations for Sushi Bake Cups?
Absolutely! If you’re preparing these cups for someone with a soy allergy, you can use coconut aminos as a gluten-free alternative to soy sauce. Additionally, if you’re serving to pets or those with seafood allergies, simply omit the salmon and consider using vegetables or tofu instead to create a delicious vegetarian option.
Can I adjust the level of spicy mayo?
Yes, definitely! If you’d like a milder flavor, you can reduce the amount of spicy mayo or choose a less spicy version. Conversely, if you crave more heat, feel free to add extra spicy mayo or even sprinkle some chili flakes on top before serving for an extra kick!
Sushi Bake Cups: Easy, Flavor-Packed Treats You’ll Love
Ingredients
Equipment
Method
- Preheat your oven to 400°F. This ensures your Sushi Bake Cups will bake evenly and achieve that lovely crisp texture on top.
- Rinse the rice thoroughly under cold water until the water runs clear. Cook it according to the package instructions. If you’re using seasoned rice vinegar, mix it in after cooking for a flavorful touch.
- Prepare the salmon by patting it dry with paper towels, then cutting it into small cubes. Toss the salmon with coconut aminos, a pinch of salt, and spicy mayo in a bowl until well combined.
- Cut the nori sheets into six equal-sized squares. This size is perfect for creating your little sushi cups, ensuring each one holds just the right amount of filling.
- Scoop 1 tablespoon of cooked rice onto each nori square. Gently press the rice into the nori to create a sturdy base that can hold the toppings.
- Place each nori and rice square into a muffin tin insert. Top each rice cup with a tablespoon of your cubed salmon mixture for that delightful, savory bite.
- Bake for about 15 minutes. Don’t forget to broil for the last 60 seconds to get a nice crisp on top.
- Cool slightly after removing from the oven, then transfer the sushi cups onto a plate. Garnish generously with more spicy mayo and a sprinkle of chives for that extra flair.