There’s something enchanting about the crisp sound of biting into a cannoli, especially when it’s filled with luscious ricotta and a hint of chocolate, evoking memories of Italian family gatherings or festive celebrations. Picture it: the holiday season is creeping up, and you’re searching for that perfect dessert that will impress your loved ones without tying you up in the kitchen.
Enter my easy no-fry cannoli recipe! By using store-bought shells, I’ve taken the fuss out of this beloved Italian classic, allowing even the busiest home cooks to create an indulgent treat that looks and tastes like a labor of love. This quick and delightful dessert offers all the traditional flavors and whimsical charm, ensuring it becomes a blissful centerpiece during Christmas dinners or family gatherings.
So, whether you’re a passionate home chef or just someone craving a sweet escape from fast food, let’s dive into this delightful cannoli journey and awaken your taste buds!

Why will you love this cannolis recipe?
Simplicity: This no-fry cannolis recipe means less time in the kitchen, allowing you to savor every bite.
Decadent Flavor: The creamy ricotta blend with chocolate chips creates a rich, sweet filling that’ll impress everyone.
Family-Friendly: Easy to make and even easier to love, perfect for holiday dinners or casual family gatherings.
Make Ahead: Prepare the filling in advance to save time and ensure a delightful treat ready when you are.
Versatility: Feel free to customize with flavors, spices, or toppings that suit your taste or festive mood.
Crowd Favorite: Whether it’s Christmas or any special occasion, these cannoli will surely steal the show!
Cannoli Recipe Ingredients
For the Shells
• Store-Bought Cannoli Shells – These save you time and effort, allowing you to focus on the delicious filling.
For the Filling
• Ricotta Cheese – The creamy base of your filling; opt for whole milk ricotta for a richer taste.
• Confectioners’ Sugar – A touch of sweetness that smooths out your filling beautifully.
• Mini Chocolate Chips – Adds delightful flavor and texture; reserve some for garnishing.
• Pure Vanilla Extract – Elevates the overall flavor profile, making each bite divine.
• Fresh Orange Zest (optional) – Introduces a zesty freshness that nods to traditional flavors for your cannolis recipe.
For Serving
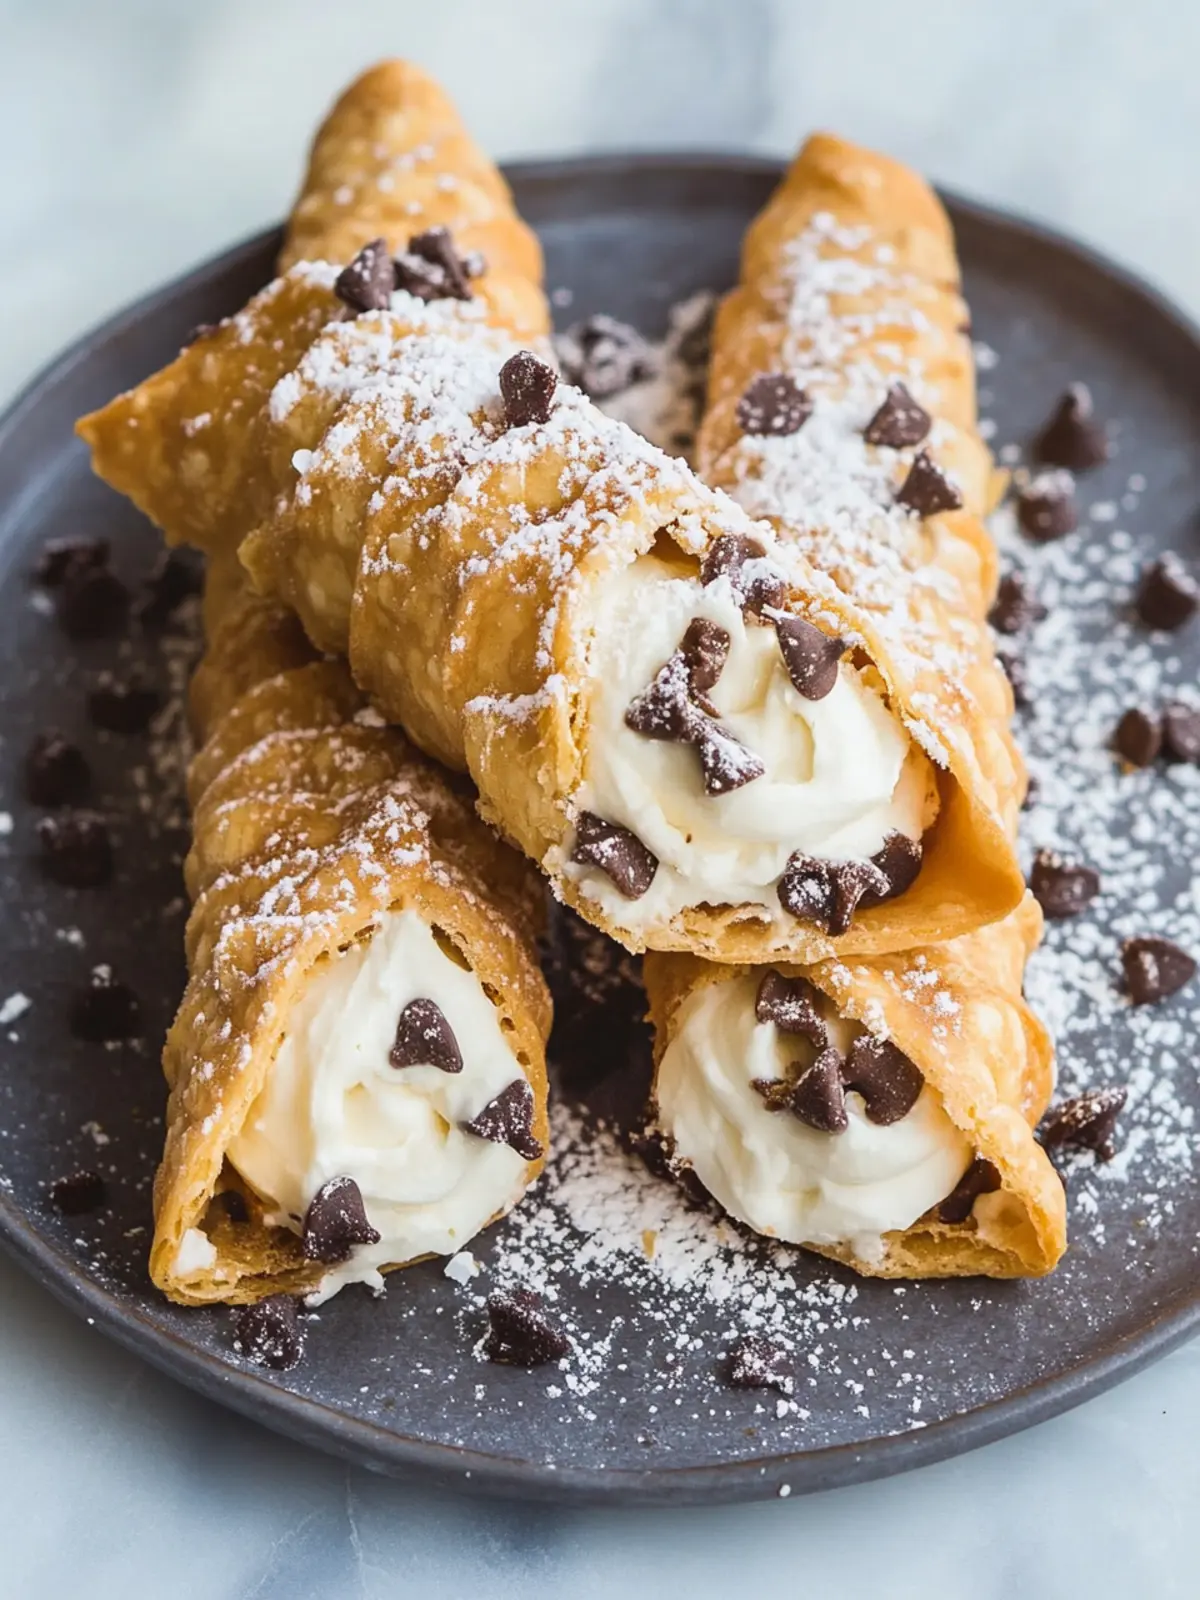
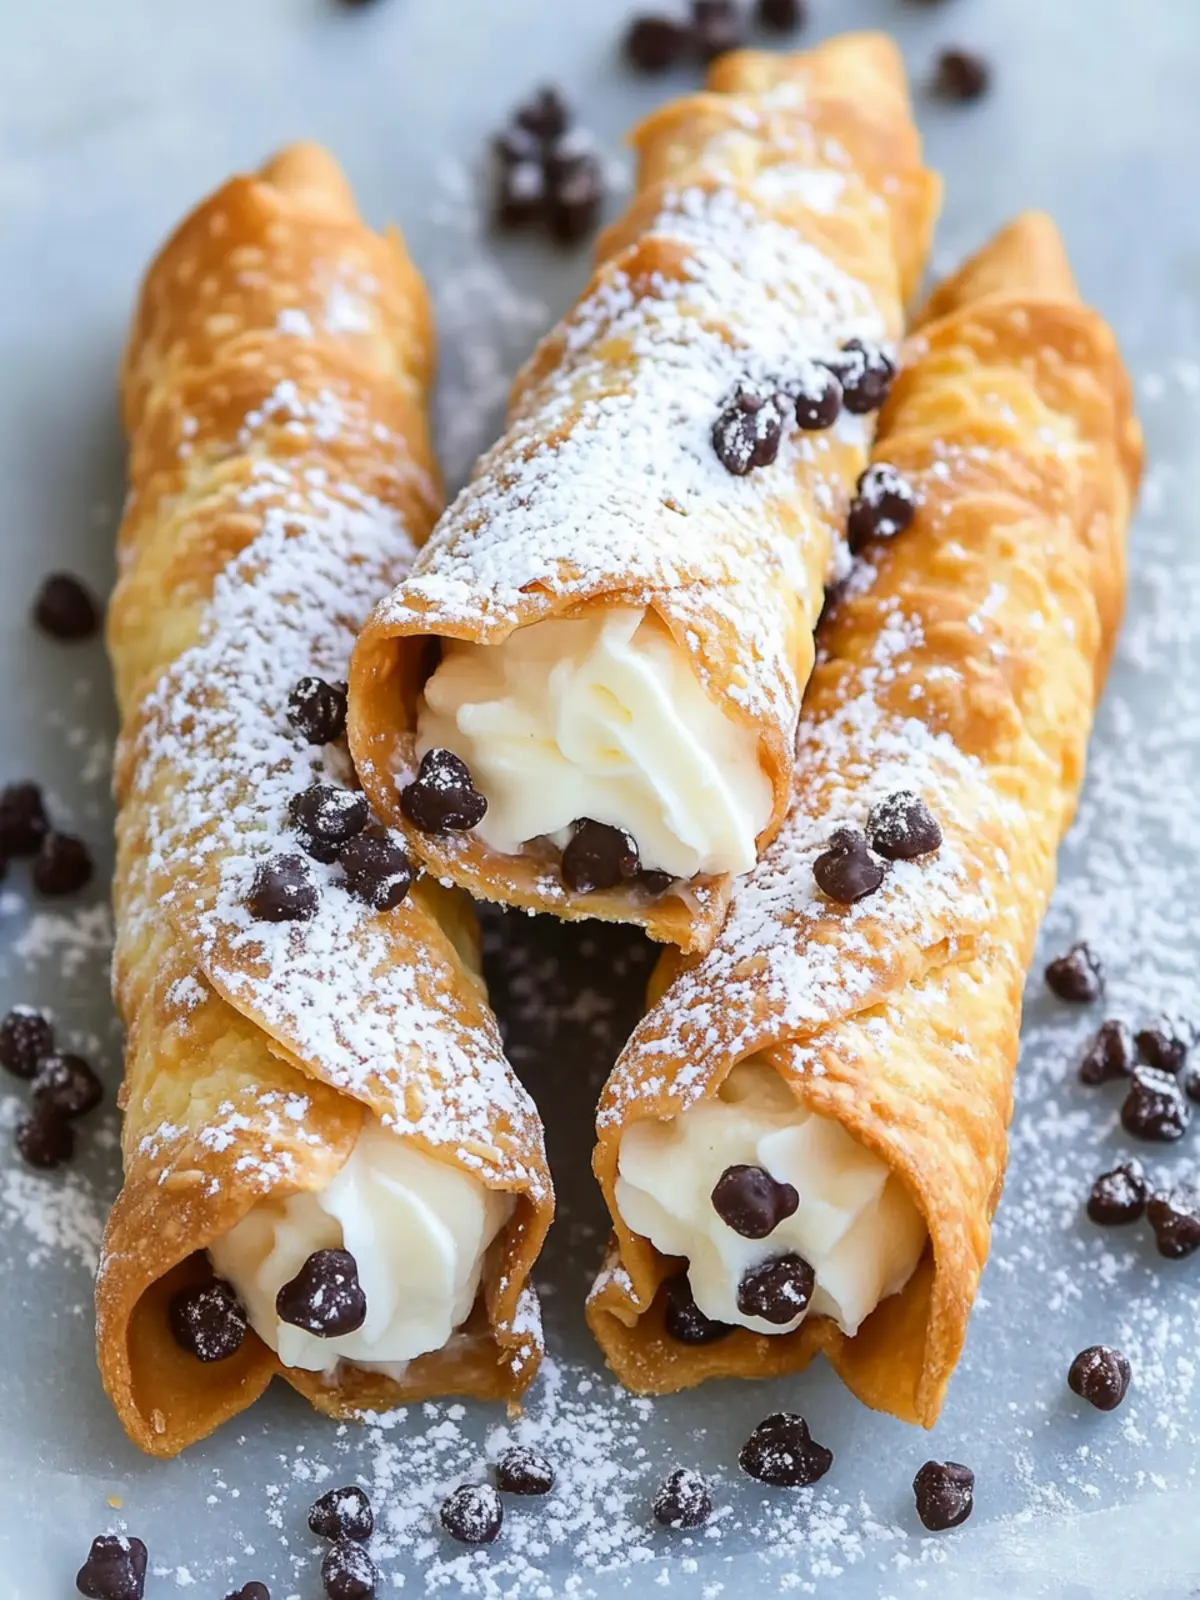
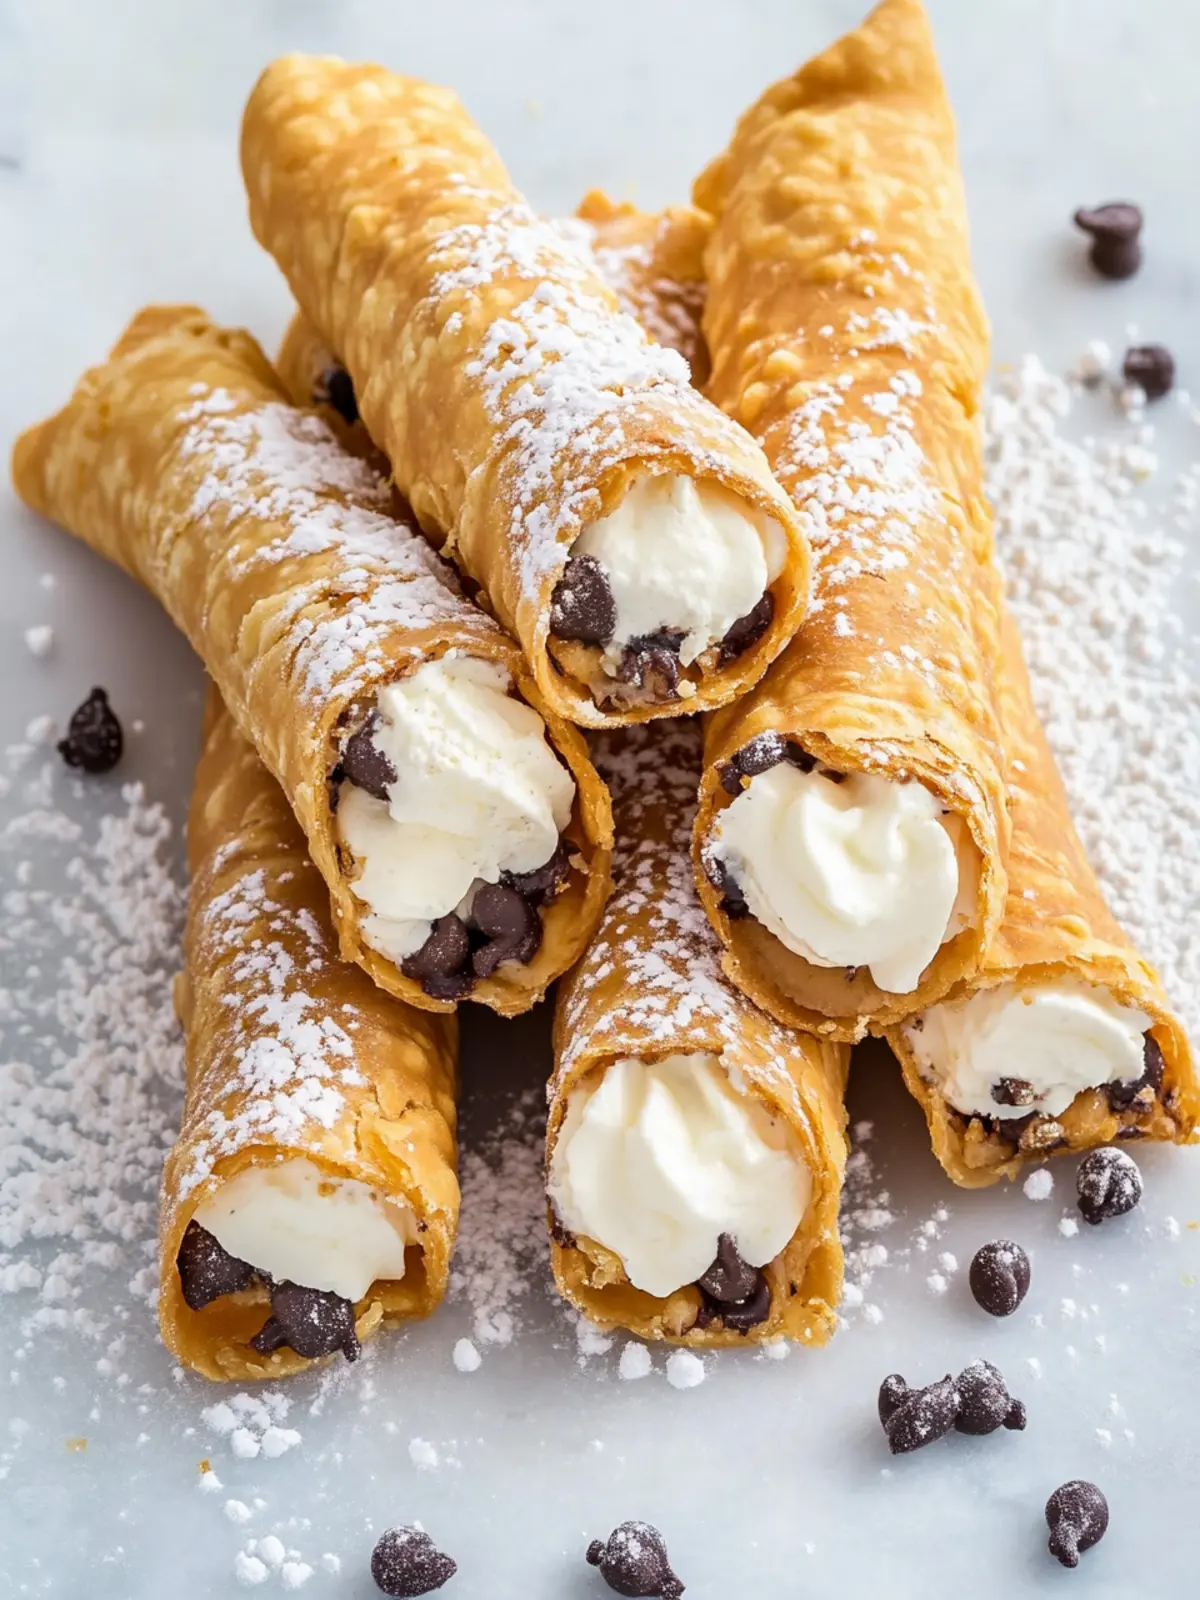
• Additional Mini Chocolate Chips – For dipping the ends of the filled cannoli, creating a visually appealing finish.
• Extra Confectioners’ Sugar – Dust lightly over the cannoli for a sweet, snowy touch before serving.
How to Make Easy Cannoli
Prep Filling: Begin by draining the ricotta cheese in a fine mesh strainer, allowing excess moisture to escape. Let it sit in the fridge for at least 6 hours to 24 hours for optimal texture.
Mix Ingredients: In a mixing bowl, combine the drained ricotta, confectioners’ sugar, 1/4 cup mini chocolate chips, vanilla extract, and orange zest (if using). Stir gently until well-combined and creamy.
Pipe Filling: Grab a pastry bag and fill it with the ricotta mixture. Carefully pipe the filling into each cannoli shell from both ends, filling them about halfway for a delightful bite.
Finish Cannoli: Dip each end of the filled cannoli in the reserved mini chocolate chips, and then dust lightly with confectioners’ sugar for a festive touch.
Serve Immediately: Enjoy your finished cannoli right away to savor their delightful crunch. They are best served on the same day for maximum crispeness!
Optional: Garnish with a sprinkle of fresh orange zest for an extra pop of color and flavor.
Exact quantities are listed in the recipe card below.
How to Store and Freeze Cannoli
Fridge: Store filled cannoli in an airtight container and enjoy them within 2-3 hours for the best texture. They can be refrigerated for up to 1 day if filled.
Filling Storage: Refrigerate the ricotta filling separately for up to 24 hours. This allows for easy assembly just before serving, keeping your shells crispy.
Freezer: Unfilled cannoli shells can be frozen for up to 2 months. Wrap them tightly in plastic wrap, then keep them in an airtight container to prevent damage.
Reheating: Avoid reheating filled cannoli, as this may compromise their crunch. Enjoy them cold for the best experience!
What to Serve with Easy No-Fry Cannoli with Chocolate Filling?
Creating a delightful meal involves finding the perfect companions for your desserts, setting the stage for shared moments and satisfied smiles.
- Espresso: The rich, bold flavor of espresso beautifully contrasts the sweetness of cannoli, offering a classic Italian experience.
- Fresh Berries: Juicy strawberries or raspberries add a refreshing touch that balances the creamy filling’s richness while enhancing the presentation.
- Gelato: A scoop of creamy gelato, like pistachio or vanilla, is a delightful way to elevate your dessert spread, inviting you to savor each bite.
- Chocolate Sauce: Drizzling chocolate sauce over cannoli not only enriches the flavors but also adds a decadent visual appeal to your dessert plate.
- Whipped Cream: Light and airy whipped cream complements the cannoli’s texture, providing an indulgent contrast that feels luxurious.
For the ultimate experience, consider hosting a dessert bar where guests can mix and match toppings or sauces, turning your gathering into a sweet celebration filled with laughter and fond memories!
Make Ahead Options
These easy no-fry cannoli are perfect for meal prep enthusiasts! You can prepare the ricotta filling up to 24 hours in advance. Simply drain the ricotta, mix it with confectioners’ sugar, mini chocolate chips, vanilla extract, and optional orange zest, then refrigerate the mixture in an airtight container. This ensures the filling remains creamy and delicious. However, for best results, it’s essential to fill the cannoli shells just before serving to maintain their delightful crunch. When you’re ready to serve, simply pipe the filling into the shells and dip the ends in chocolate chips for an impressive and stress-free dessert that tastes just as delicious as if you made it all in one go!
Cannoli Recipe Variations
Feel free to play with this delightful recipe, bringing your unique flair to each bite!
Pistachio Surprise: Fold in finely chopped pistachios for a nutty twist that pairs beautifully with the creamy filling. They add both flavor and a lovely color contrast.
Minty Freshness: Incorporate a few drops of peppermint extract into the filling for a refreshing taste that captures the essence of winter festivities. It’s perfect for holiday gatherings!
Spicy Touch: Add a pinch of ground cinnamon or nutmeg to the ricotta mixture for a warm, spicy kick that elevates traditional flavors to new heights.
Citrus Burst: Swap orange zest for lemon or lime zest in the filling, bringing a zesty brightness that dances on your palate. This twist is refreshing and perfect for spring celebrations.
Almond Joy: Replace vanilla extract with almond extract for a rich, nutty flavor that resembles the classic candy bar. It’s a delicious homage to sweet nostalgia.
Chocolate Lovers: Use chocolate-flavored ricotta or add cocoa powder to the filling for an intense chocolate experience that will satisfy even the most ardent chocoholics.
Fun Sprinkles: Dip your cannoli ends in colorful sprinkles instead of chocolate chips for a festive look perfect for kids’ parties or special celebrations.
Savory Option: For an unexpected savory twist, incorporate crumbled feta cheese and a touch of dill, creating a cannoli that’s a delightful departure from the sweet classic!
Expert Tips for Cannoli Recipe
- Proper Drainage: Drain the ricotta for at least 6 hours to avoid a soggy filling; excess moisture is a common mistake.
- Chill the Filling: Refrigerate the ricotta mixture before piping for a thicker, creamier texture that holds up well in the cannoli.
- Fill Just Before Serving: For the best crunch, fill the shells right before serving; otherwise, the shells can get soft.
- Experiment with Flavors: Don’t be shy! Add spices, flavored extracts, or different chocolate for a unique twist on your cannoli recipe.
- Presentation Counts: Dip the ends of your cannoli in mini chocolate chips for a delightful finish and visual appeal that impresses guests.
Easy No-Fry Cannoli with Chocolate Filling Recipe FAQs
What type of ricotta cheese should I use for the filling?
Absolutely! For the best flavor and texture in your cannoli filling, I highly recommend using whole milk ricotta. It provides a creamy richness that elevates the dessert. Be sure to drain it thoroughly for at least 6 hours to ensure your filling isn’t watery.
How should I store my filled cannoli to maintain their crispiness?
Very! Filled cannoli are best enjoyed fresh, ideally within 2-3 hours of assembly. If you need to store them, place the filled cannoli in an airtight container lined with paper towels to absorb any excess moisture. They can last in the fridge for up to 1 day, but they tend to lose their crunch as time goes on.
Can I freeze the cannoli shells?
Of course! Unfilled cannoli shells can be frozen for up to 2 months. To do this, wrap them tightly in plastic wrap to prevent freezer burn, then place them in an airtight container. When you’re ready to use them, simply thaw them at room temperature and fill with your prepared ricotta mixture just before serving.
What should I do if my cannoli filling is too runny?
If you find that your filling is too runny, don’t worry! You can simply re-drain the ricotta to remove any excess moisture. Alternatively, you can add a bit of confectioners’ sugar or a small amount of heavy cream to thicken it. Mix gently until you achieve the desired consistency and flavor.
Are these cannoli safe for pets or individuals with allergies?
Good question! It’s important to note that cannoli contain dairy (ricotta) and often chocolate, which can be harmful to pets, especially dogs. Additionally, keep in mind that those with dairy allergies should avoid this recipe or consider using non-dairy alternatives. Always check ingredient labels if preparing for someone with specific allergies!
Can I make these cannoli ahead of time?
Absolutely! You can prepare the ricotta filling up to 24 hours in advance by refrigerating it in an airtight container. Just remember to fill the shells just before you’re ready to serve to maintain their delightful crunch! This way, you can enjoy a stress-free assembly while impressing your guests with fresh cannoli.
Easiest Cannoli Recipe with Chocolate You’ll Love to Make
Ingredients
Equipment
Method
- Begin by draining the ricotta cheese in a fine mesh strainer, allowing excess moisture to escape.
- Let the ricotta sit in the fridge for at least 6 hours to optimal texture.
- In a bowl, combine drained ricotta, confectioners' sugar, 1/4 cup mini chocolate chips, vanilla extract, and orange zest (if using). Stir gently until creamy.
- Fill a pastry bag with the ricotta mixture and pipe it into each cannoli shell from both ends.
- Dip each end of the cannoli in reserved mini chocolate chips and dust lightly with confectioners' sugar.
- Serve immediately to enjoy the delightful crunch.