There’s something undeniably nostalgic about a warm slice of cherry pie, especially when it’s made from scratch. Picture this: the sweet and tart aroma of fresh cherries mingling with spices like cinnamon and ginger, filling your kitchen with a cozy, inviting scent. This classic cherry pie recipe is my go-to summer dessert, the one I can always count on to bring smiles to the table.
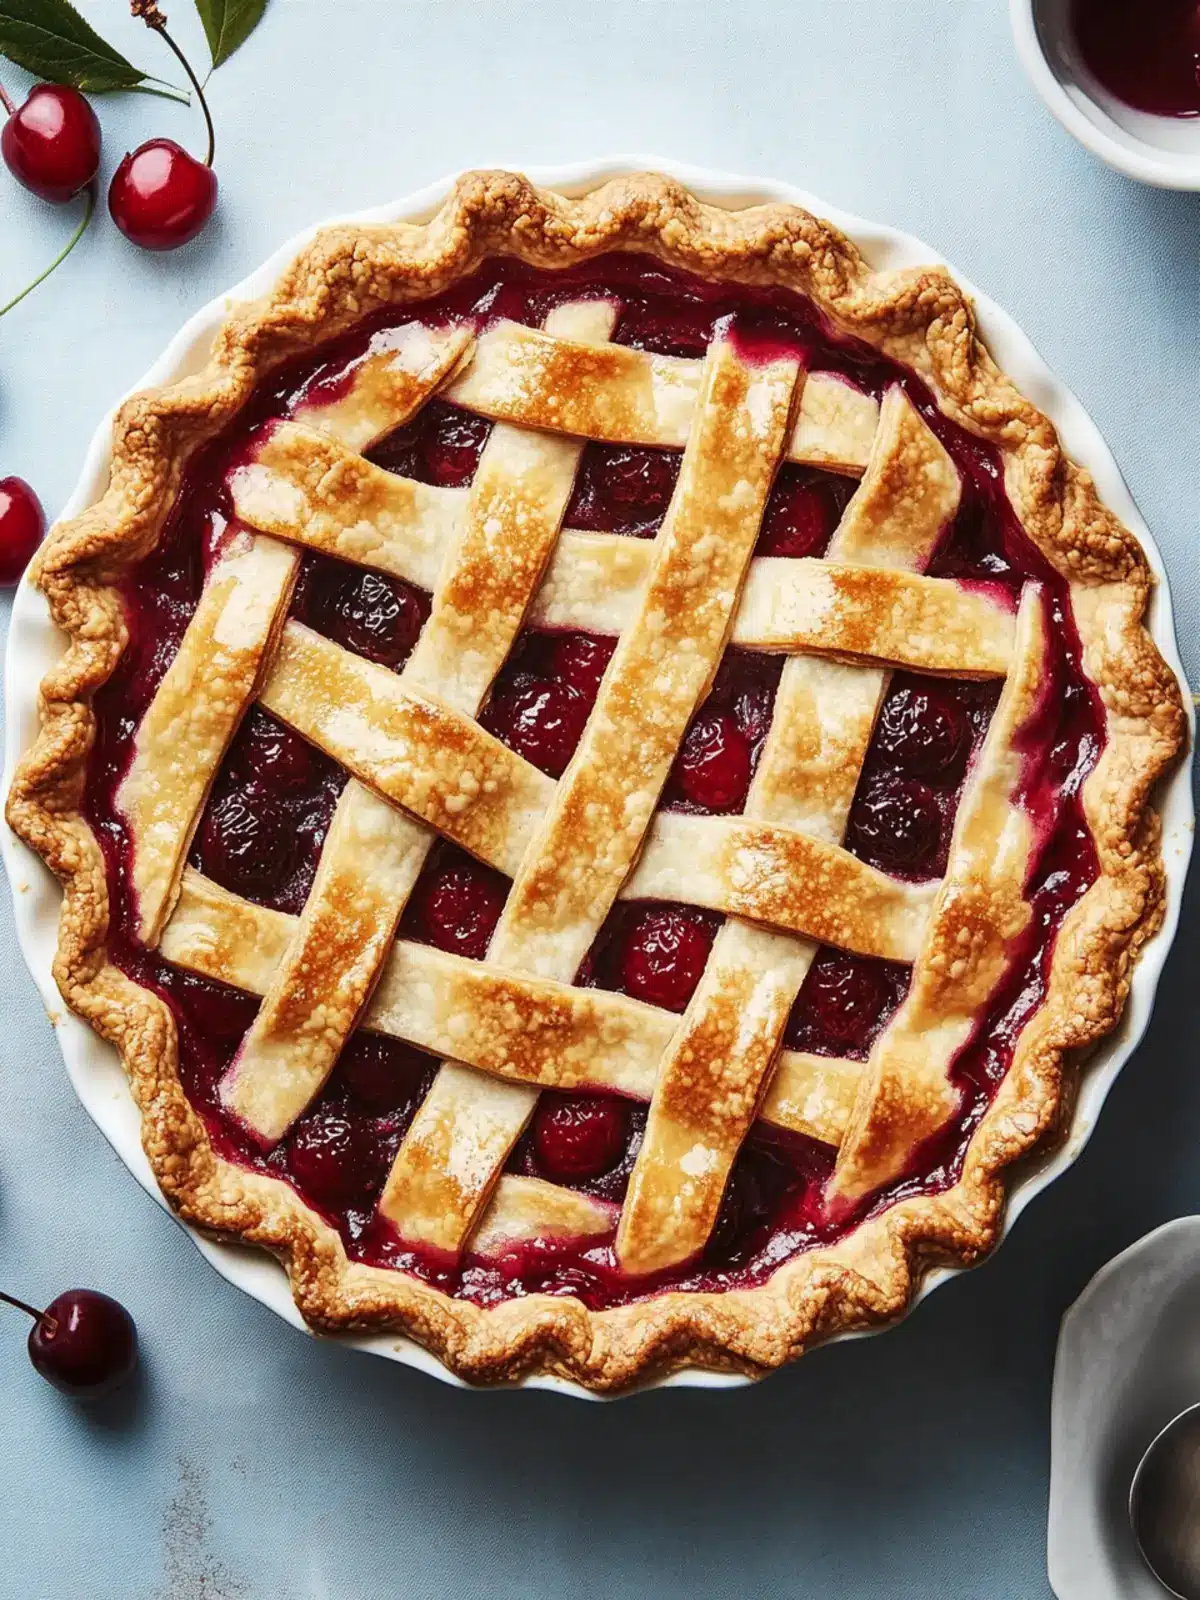
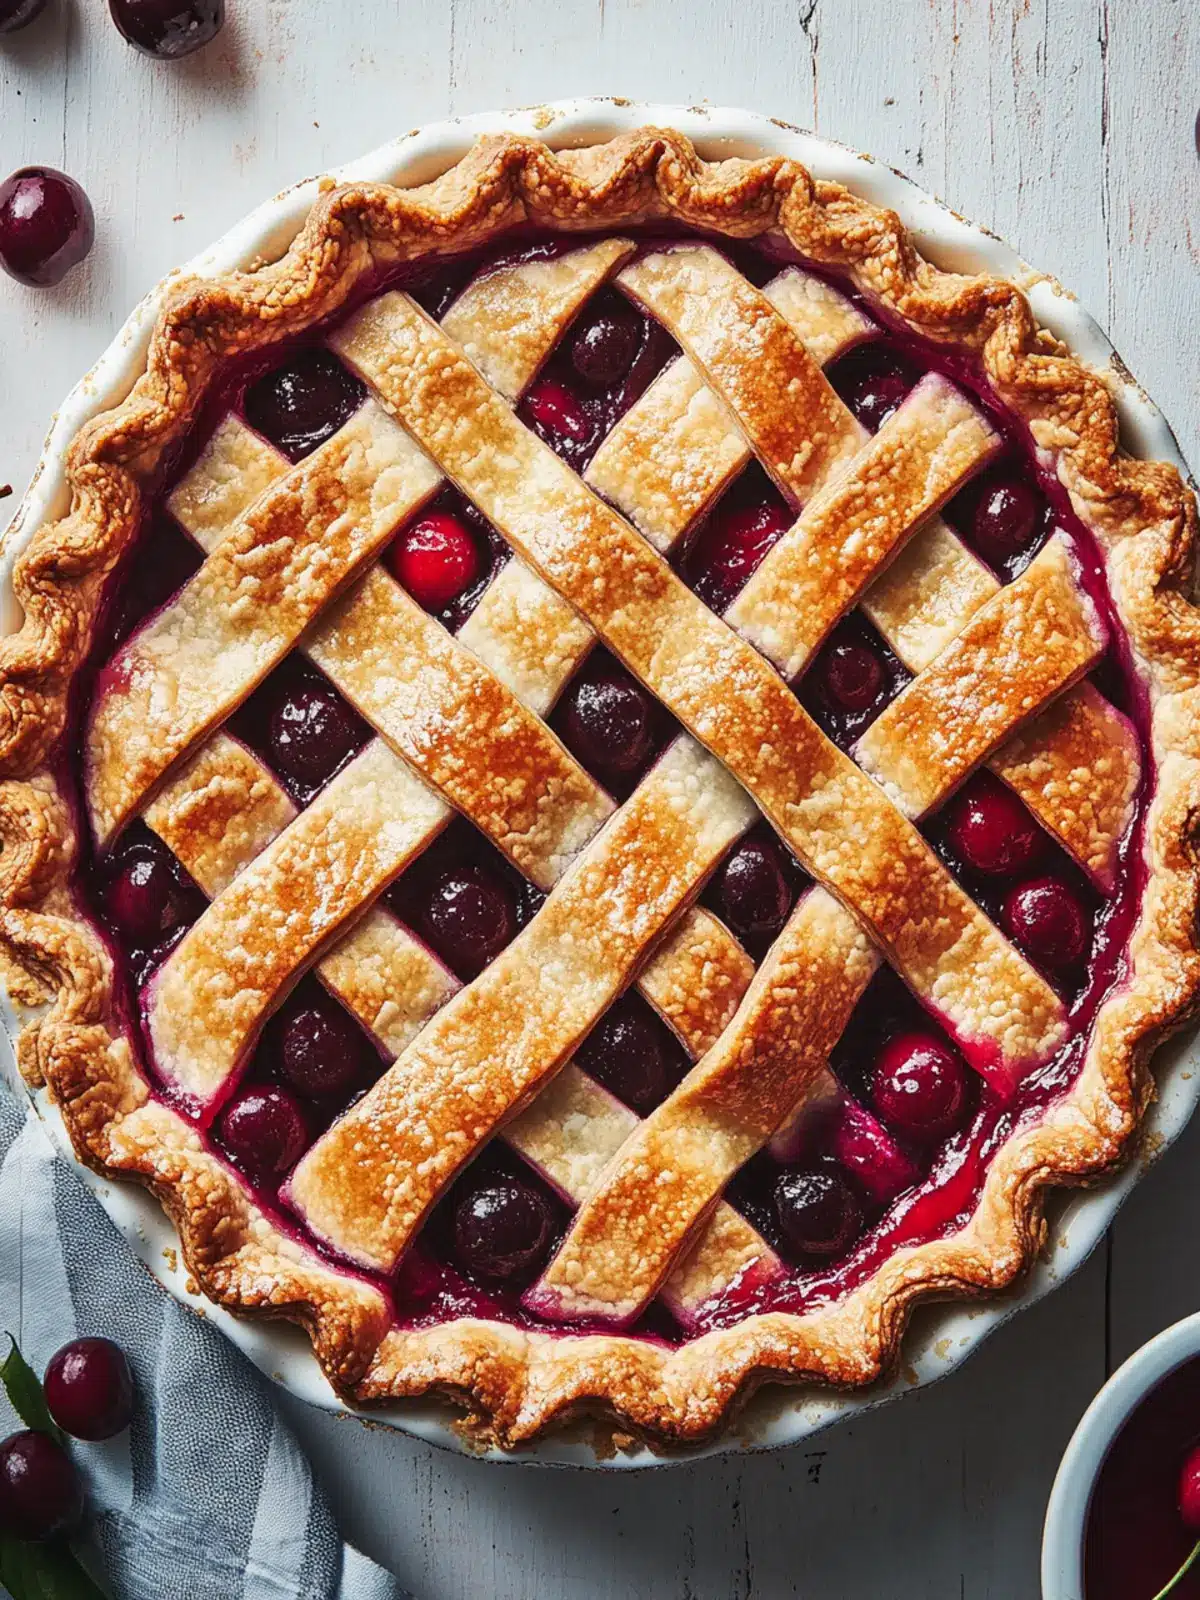
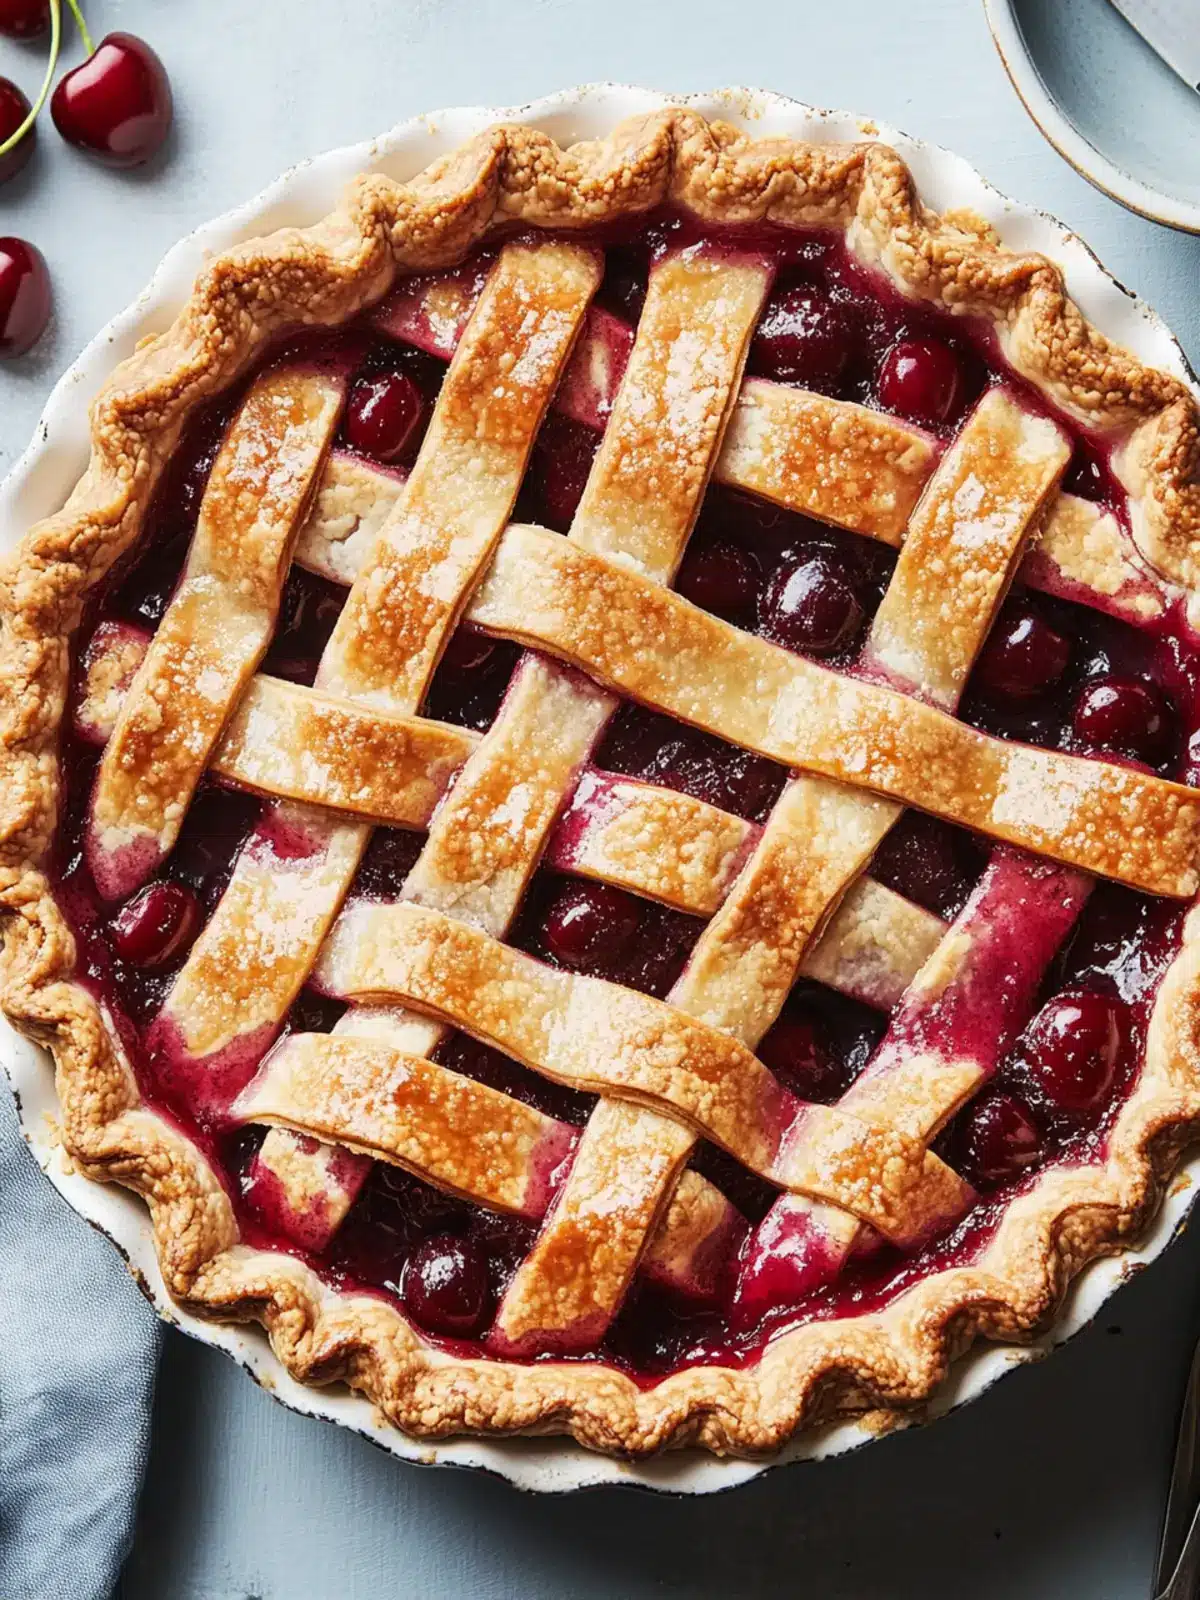
With its flaky lattice crust that looks almost too good to eat and that delightful jammy filling bursting with vibrant cherry flavor, this pie is perfect for gatherings or simply to enjoy on a quiet evening at home. Whether you’re an experienced baker or someone looking to step away from the fast-food routine, I promise this charming dessert will remind you of simpler times spent with loved ones, making it a true crowd-pleaser. So, let’s roll up our sleeves and dive into this delightful homemade treat that will leave everyone asking for seconds!

Why is this cherry pie recipe irresistible?
Nostalgic delight: This homemade cherry pie captures the essence of summer with its sweet-tart filling and flaky crust.
Perfect Lattice Crust: The visually appealing lattice top adds a touch of elegance that’s sure to impress.
Family Favorite: It’s a true crowd-pleaser that brings smiles to gatherings or quiet nights in.
Easy to Make: Even novice bakers will find joy in creating this classic dessert, making it a fun kitchen project!
Perfect Pairing: Serve warm with vanilla ice cream for an indulgent treat, enhancing its delicious flavors.
Creative Variations: You can easily adapt the recipe with other fruits or spices, keeping it fresh and exciting!
Cherry Pie Recipe Ingredients
For the Filling
• Fresh Cherries – Essential for that sweet-tart flavor; a mix of sweet and tart varieties is ideal.
• Granulated Sugar – Adds sweetness to balance the tang of the cherries; adjust based on cherry sweetness.
• Cornstarch – Thickens the filling to ensure it sets perfectly; can be substituted with arrowroot for a gluten-free option.
• Juice of 1/2 Lemon – Enhances acidity and balances sweetness; freshly squeezed works best.
• Ground Cinnamon – Adds warmth and depth; nutmeg can be a delightful alternative.
• Ground Ginger – Offers a warm spiciness; optionally use if you prefer a bolder flavor.
• Almond or Vanilla Extract – Boosts the overall taste; vanilla is a popular substitute.
• Kosher Salt – Enhances cherry sweetness; just a pinch goes a long way.
For the Crust
• Store-bought or Homemade Pie Dough – Provides a flaky base; homemade is fresher, while store-bought saves time.
• All-purpose Flour – Keeps surfaces dusted to prevent sticking during rolling.
• Large Egg (lightly beaten) – Used for egg wash, giving the crust that beautiful golden finish.
• Turbinado Sugar – Sprinkled on top for a sweet crunch; elevates the crust’s texture.
Feel free to gather these ingredients and get ready to create the most heartwarming cherry pie recipe your family will rave about!
How to Make Cherry Pie
Prepare Filling: In a pot, gently combine fresh cherries, granulated sugar, cornstarch, lemon juice, ground ginger, ground cinnamon, almond extract, and a pinch of salt. Bring the mixture to a boil, then reduce to a simmer for about 15 minutes until it thickens, and let it cool completely.
Prepare Crust: Allow your pie dough to sit at room temperature for 5-10 minutes to make it easier to roll. Dust your work surface with flour, then roll out both crusts into 12-inch rounds, fitting one into a 9-inch pie plate.
Create Lattice Top: Cut the second rolled crust into 1-inch wide strips. Start laying the strips vertically across the pie filling, then alternate by placing horizontal strips to create a beautiful lattice design.
Finish Crust: Trim any excess dough from the edges, tucking it under if needed before crimping the edges for a decorative touch. Brush the lattice top with the beaten egg wash and sprinkle with turbinado sugar for that extra sweetness and crunch.
Chill & Bake: Place the pie in the refrigerator for 30 minutes to chill. Preheat your oven to 425°F and bake the pie on a preheated baking sheet for 25 minutes. Then reduce the heat to 375°F and bake for an additional 45-60 minutes until the crust is a glorious golden brown.
Cool: After baking, allow your cherry pie to cool completely on a wire rack before slicing and serving so the filling can set perfectly.
Optional: Serve warm with a scoop of vanilla ice cream for a delightful indulgence!
Exact quantities are listed in the recipe card below.
Cherry Pie Variations
Feel free to add your own twist to this delightful cherry pie and make it truly your own!
Berry Blast: Substitute fresh cherries with blueberries, raspberries, or a mix for a bright, vibrant flavor.
Combining various berries creates a lovely tartness and depth that’s perfect for summer gatherings.Bourbon Infusion: Add a tablespoon of bourbon to the filling for a delightful kick.
This not only enhances the flavor but also brings a rich complexity that will impress your guests.Spice It Up: Mix in a pinch of cayenne pepper for a subtle heat that contrasts beautifully with the sweetness of the pie.
This fun twist adds an unexpected zing, keeping everyone on their toes.Nutty Crust: Incorporate finely chopped nuts, like almonds or pecans, into the pie crust for added texture and flavor.
This nutty twist elevates the crust and offers a delightful crunch with each bite.Chocolate Cherry: Drizzle melted dark chocolate over the filling before adding the lattice crust for an indulgent touch.
The blend of chocolate and cherries creates a luxurious dessert experience that’s impossible to resist.Low-Sugar Option: Use a sugar substitute like stevia or monk fruit to make the filling healthier while keeping it delicious.
This is a fantastic option for those watching their sugar intake without sacrificing flavor.Lemon Zest Kick: Add the zest of one lemon to the filling for a brighter, more refreshing taste.
The zesty notes will brighten the flavors, elevating your cherry pie to a whole new level.Coconut Cream: Top the finished pie with lightly sweetened coconut whipped cream for a tropical flair.
This creamy addition creates a wonderful contrast to the tangy cherries and adds a unique twist.
What to Serve with Classic Cherry Pie?
There’s something magical about creating a meal that perfectly complements this summertime treat, bringing moments of joy and warmth to your table.
Vanilla Ice Cream: The creamy texture and vanilla sweetness enhance the tart cherry flavors wonderfully, creating a dreamy contrast.
Whipped Cream: A dollop of this light and fluffy topping adds a touch of elegance while balancing the pie’s sweetness, making every bite irresistible.
Fresh Mint: Garnish your slice with mint leaves for a pop of color and a refreshing herbal note that brightens the overall experience.
Pecan Crunch Salad: A mix of crunchy pecans and crisp greens, this salad adds an earthy contrast, making a satisfying counterpoint to the dessert’s richness.
Sparkling Lemonade: The citrusy zing and bubbles provide a refreshing beverage option to cleanse the palate while enjoying your cherry pie.
Cheesecake Bars: These can be a delightful addition to the table, offering a creamy complement to the pie’s fruity flavor, perfect for dessert lovers.
Fruit Compote: A warm berry compote drizzled over pie brings extra fruitiness that enhances the cherry experience, harmonizing the flavors beautifully.
Coffee or Tea: A warm cup of coffee or herbal tea pairs perfectly with dessert, rounding out the meal and providing a comforting finish.
Indulge in these pairings for a memorable dining experience that elevates your classic cherry pie to new heights!
How to Store and Freeze Cherry Pie
Fridge: Store leftover cherry pie in the refrigerator for up to 3 days. Cover it with plastic wrap or place it in an airtight container to preserve freshness.
Freezer: You can freeze the pie for up to a month. Wrap it tightly in plastic wrap and then in aluminum foil or place it in a freezer-safe container to prevent freezer burn.
Reheating: To reheat, bake frozen cherry pie directly from the freezer at 350°F for about 30-40 minutes until warmed through. This will restore the flaky crust and delicious filling of your cherry pie recipe.
Cooling: Allow the pie to cool completely before storing to ensure the filling sets properly and avoids becoming soggy.
Expert Tips for Cherry Pie
Choose Wisely: Use a mix of sweet and tart cherries for balanced flavor; this enhances the overall taste of your cherry pie recipe.
Chill Your Dough: Ensure your pie crust is properly chilled before rolling out; this helps achieve that flaky texture we all love.
Avoid Soggy Bottom: Let the filling cool completely before assembling the pie to prevent a soggy crust. A thoroughly cooled filling keeps everything intact when sliced.
Master the Lattice: Practice makes perfect! Don’t hesitate to try different designs with the lattice; it adds character and looks impressive.
Clean-Up Made Easy: Place a baking sheet underneath your pie while baking to catch any drips, making clean-up a breeze.
Baking Time: Keep an eye on it as all ovens vary; adjust baking times if necessary to ensure your pie comes out beautifully golden.
Make Ahead Options
These delightful cherry pies are perfect for meal prep! You can prepare the filling up to 3 days in advance; simply mix the cherries with the sugar, cornstarch, lemon juice, and spices, then refrigerate. For the pie crust, you can make it ahead of time and store it in the fridge, wrapped tightly, for up to 24 hours, or freeze it for up to a month. When you’re ready to bake, assemble the pie by fitting the crust into the dish, add the chilled filling, create the lattice top, and bake it directly from the refrigerator or freezer for delicious results just like fresh! By preparing these components ahead, you’ll save precious time and enjoy a homemade cherry pie that still tastes just as delightful!
Classic Cherry Pie Recipe FAQs
How do I select the freshest cherries for my pie?
Absolutely! When choosing cherries, look for firm, plump berries that are well-colored. The best varieties for pie-making combine sweet and tart cherries. Avoid cherries with dark spots all over or soft, mushy areas, as they won’t have the best flavor or texture. I often mix Bing and Sour cherries for the perfect balance!
What’s the best way to store leftover cherry pie?
Very easy! Simply cover the leftover pie with plastic wrap or place it in an airtight container. It can be stored in the refrigerator for up to 3 days. This helps keep the crust from getting too soggy while ensuring every slice stays delicious!
Can I freeze my cherry pie, and if so, how?
Absolutely! To freeze your cherry pie, make sure it’s completely cooled. Wrap it tightly in plastic wrap, then in aluminum foil to prevent freezer burn. This way, it can last for up to a month in the freezer. When you’re ready to enjoy, you can bake it directly from frozen at 350°F for about 30-40 minutes to warm it throughout. This also helps restore that beautifully flaky crust!
What should I do if my filling turns out runny?
Common issue! If your cherry pie filling is too runny, it might be due to not using enough cornstarch or not allowing the filling to cool completely before assembling. In future, consider adding an extra tablespoon of cornstarch for thickening. Also, make sure your pie is baked long enough; the heat helps the cornstarch activate and thicken the filling properly.
Is this cherry pie recipe suitable for pets or those with allergies?
Absolutely not! While the classic cherry pie is delicious for humans, avoid giving it to pets or anyone allergic to cherries or gluten. If preparing for someone with allergies, you can use gluten-free pie dough and substitute cornstarch with arrowroot to ensure everyone can enjoy a slice safely!
How can I enhance the flavor of my cherry pie?
Very, very easy! You can kick up the flavor by incorporating a tablespoon of bourbon into the filling, which adds a rich depth that complements the sweetness of the cherries. Also, don’t shy away from adjusting the spices; a pinch of nutmeg or using more ginger can create a delightful twist on this classic cherry pie recipe!
Homemade Cherry Pie Recipe with Perfect Lattice Crust
Ingredients
Equipment
Method
- In a pot, combine fresh cherries, granulated sugar, cornstarch, lemon juice, ground ginger, ground cinnamon, almond extract, and a pinch of salt. Bring to a boil, then simmer for about 15 minutes until thickened and cool completely.
- Allow pie dough to sit at room temperature for 5-10 minutes. Dust work surface with flour, then roll out both crusts into 12-inch rounds, fitting one into a 9-inch pie plate.
- Cut the second rolled crust into 1-inch wide strips. Lay strips vertically across the filling, then alternate with horizontal strips to create a lattice design.
- Trim excess dough, tuck under if needed, and crimp edges. Brush lattice top with egg wash and sprinkle with turbinado sugar.
- Chill the pie for 30 minutes. Preheat oven to 425°F and bake on a preheated baking sheet for 25 minutes. Reduce heat to 375°F and bake for an additional 45-60 minutes until golden brown.
- Let the cherry pie cool completely on a wire rack before slicing and serving.