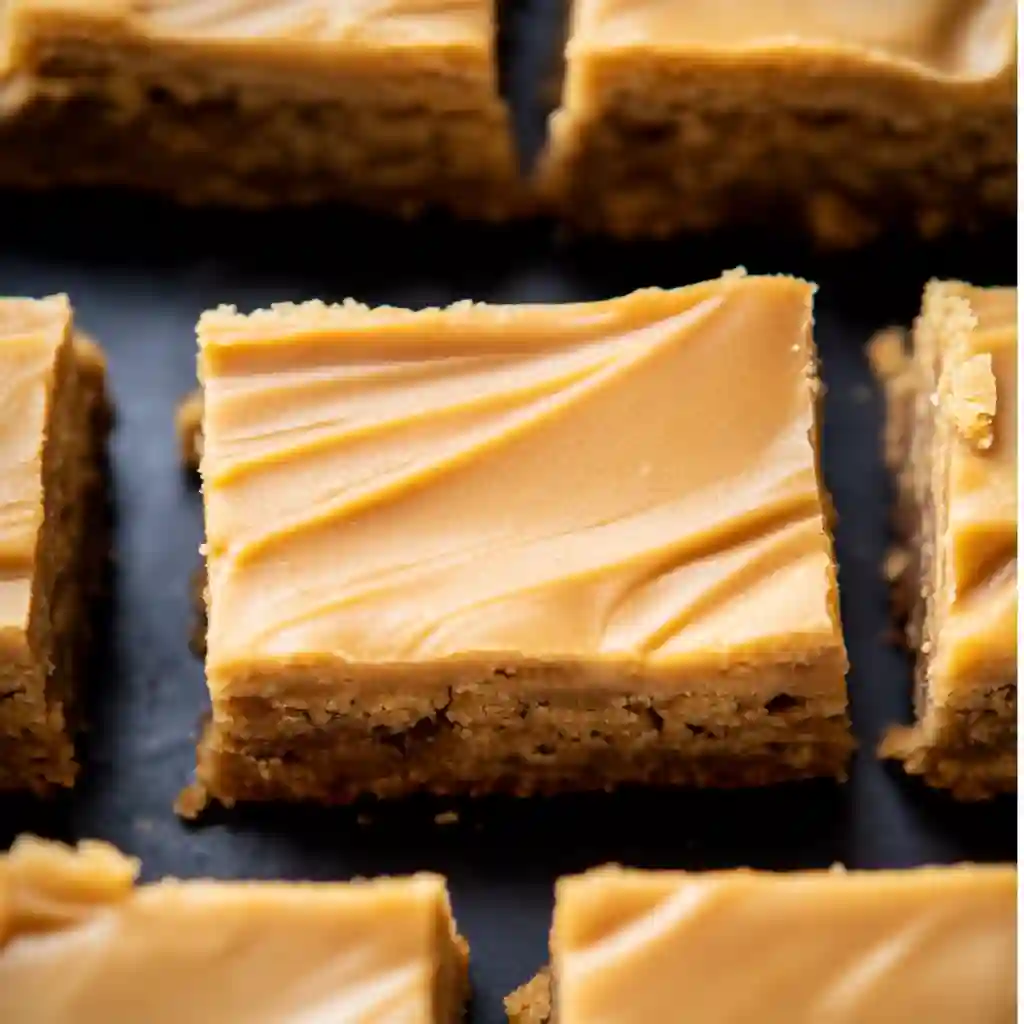
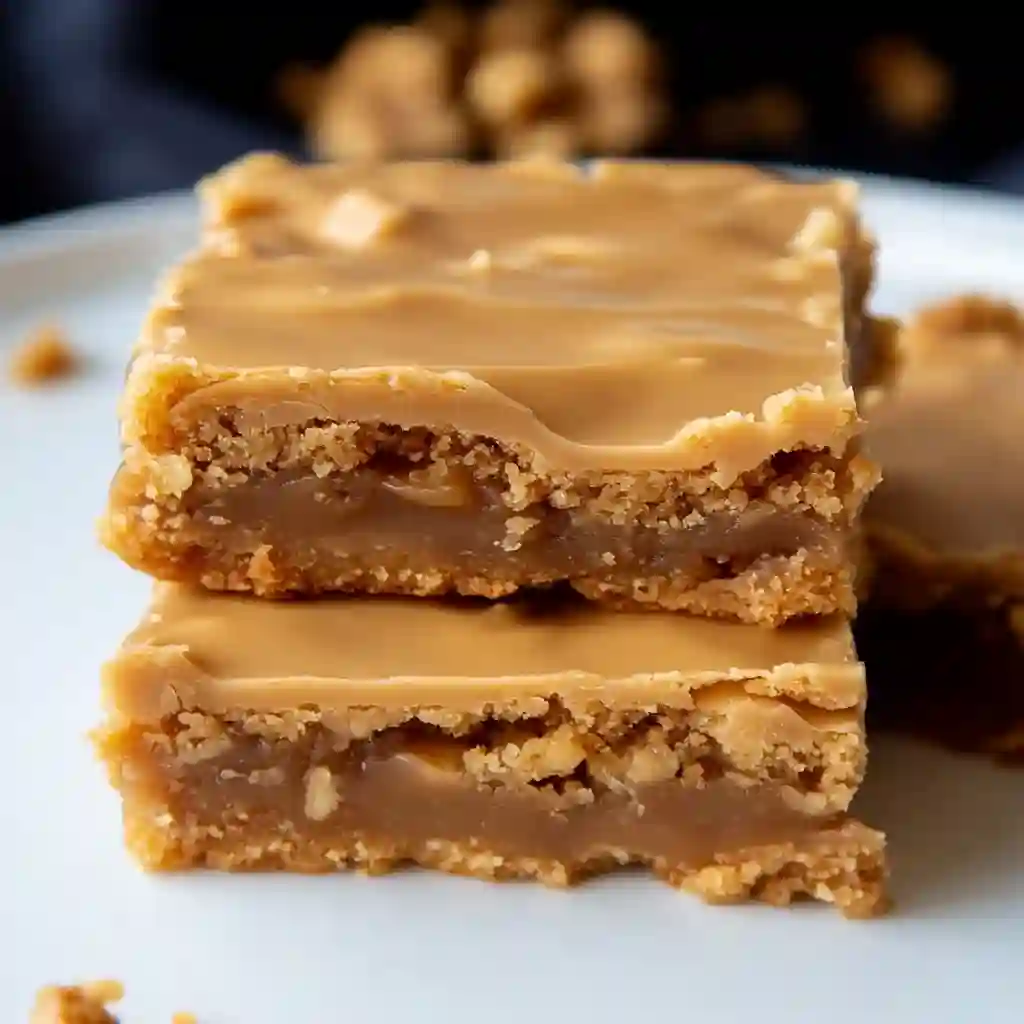
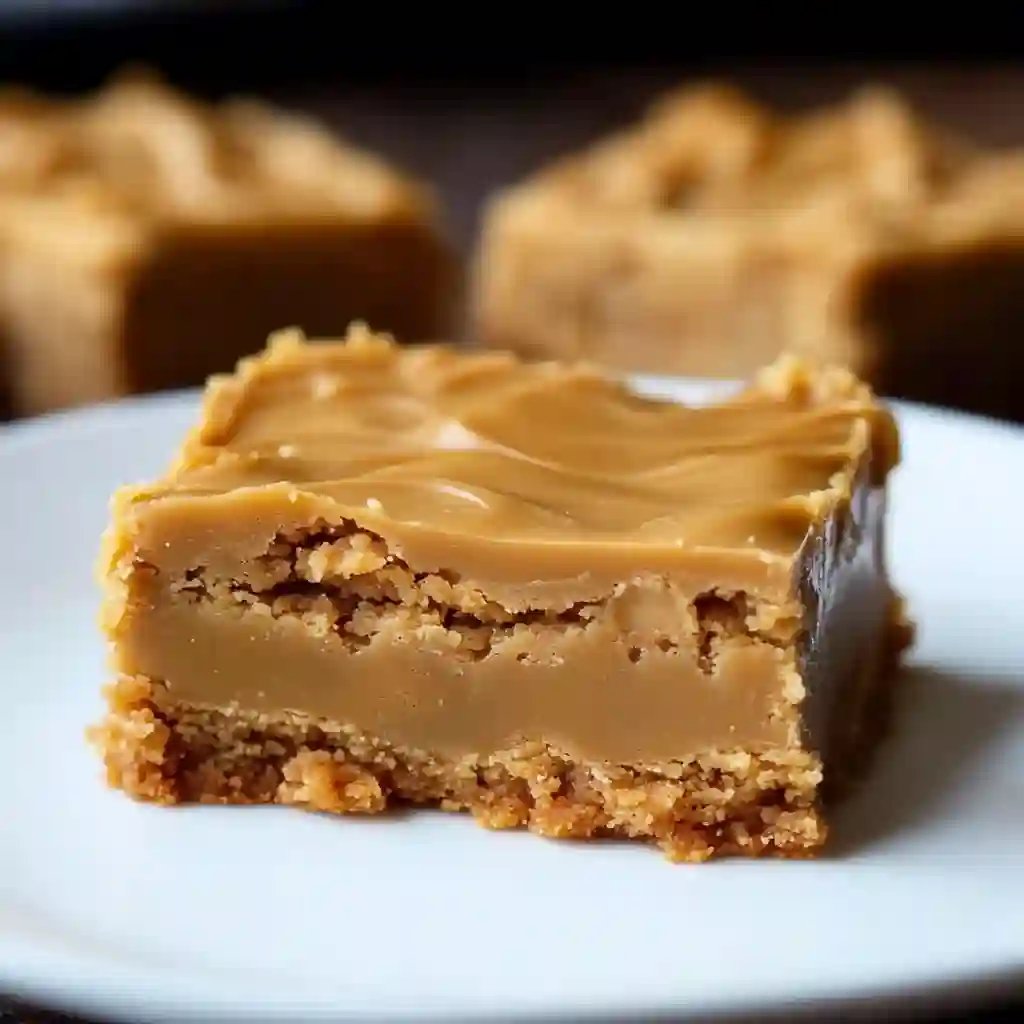
If you love soft, chewy, and ultra-peanut-buttery treats, these Peanut Butter Lunch Lady Cookie Bars are about to become your new favorite dessert! Inspired by the classic school cafeteria cookie bars, this easy recipe delivers thick, buttery bars topped with a smooth, creamy peanut butter glaze.
Perfect for bake sales, potlucks, or simply satisfying a sweet tooth, these bars are rich, indulgent, and packed with peanut butter flavor. Best of all, they’re super easy to make—no rolling dough or chilling required! Just mix, bake, glaze, and enjoy.
Stick around for the full recipe, ingredient swaps, baking tips, and storage hacks! 👇
Ingredients for Peanut Butter Lunch Lady Cookie Bars

For the Cookie Bars:
- 1 cup unsalted butter, melted
- 1 cup creamy peanut butter
- 1 ½ cups granulated sugar
- 1 cup brown sugar, packed
- 4 large eggs
- 1 tablespoon vanilla extract
- 2 cups all-purpose flour
- 1 teaspoon baking powder
- ½ teaspoon salt
For the Peanut Butter Glaze:
- ½ cup creamy peanut butter
- 2 cups powdered sugar
- 6 tablespoons milk (adjust for consistency)
- 1 teaspoon vanilla extract
These ingredients come together for a rich, chewy texture with just the right amount of sweetness. Want to make it gluten-free or dairy-free? I’ll share substitutions in the tips section!
Step-by-Step Instructions
Step 1: Prepare the Cookie Bars
- Preheat your oven to 350°F (175°C). Grease a 9×13-inch baking pan or line it with parchment paper for easy removal.
- Melt the butter and whisk it together with the peanut butter until smooth.
- Add the sugars (granulated and brown sugar) and mix well until fully combined.
- Incorporate the eggs and vanilla extract, whisking until the mixture is smooth and creamy.
- In a separate bowl, whisk together the flour, baking powder, and salt.
- Gradually add the dry ingredients to the wet mixture, stirring until just combined. Be careful not to overmix.
- Spread the batter evenly into the prepared baking pan.
Step2: Bake the Bars
- Bake for 25-30 minutes, or until the edges are golden brown and a toothpick inserted in the center comes out with a few moist crumbs.
- Let the bars cool slightly in the pan while you prepare the glaze.
Step3: Make the Peanut Butter Glaze
- In a bowl, mix the peanut butter, powdered sugar, milk, and vanilla extract until smooth. Adjust the milk amount to reach a pourable consistency.
- Pour the glaze over the warm cookie bars, spreading it evenly with a spatula.
Step 4: Let It Set & Serve
- Allow the bars to cool completely before slicing into squares. This helps the glaze set properly.
- Cut into bars and enjoy!
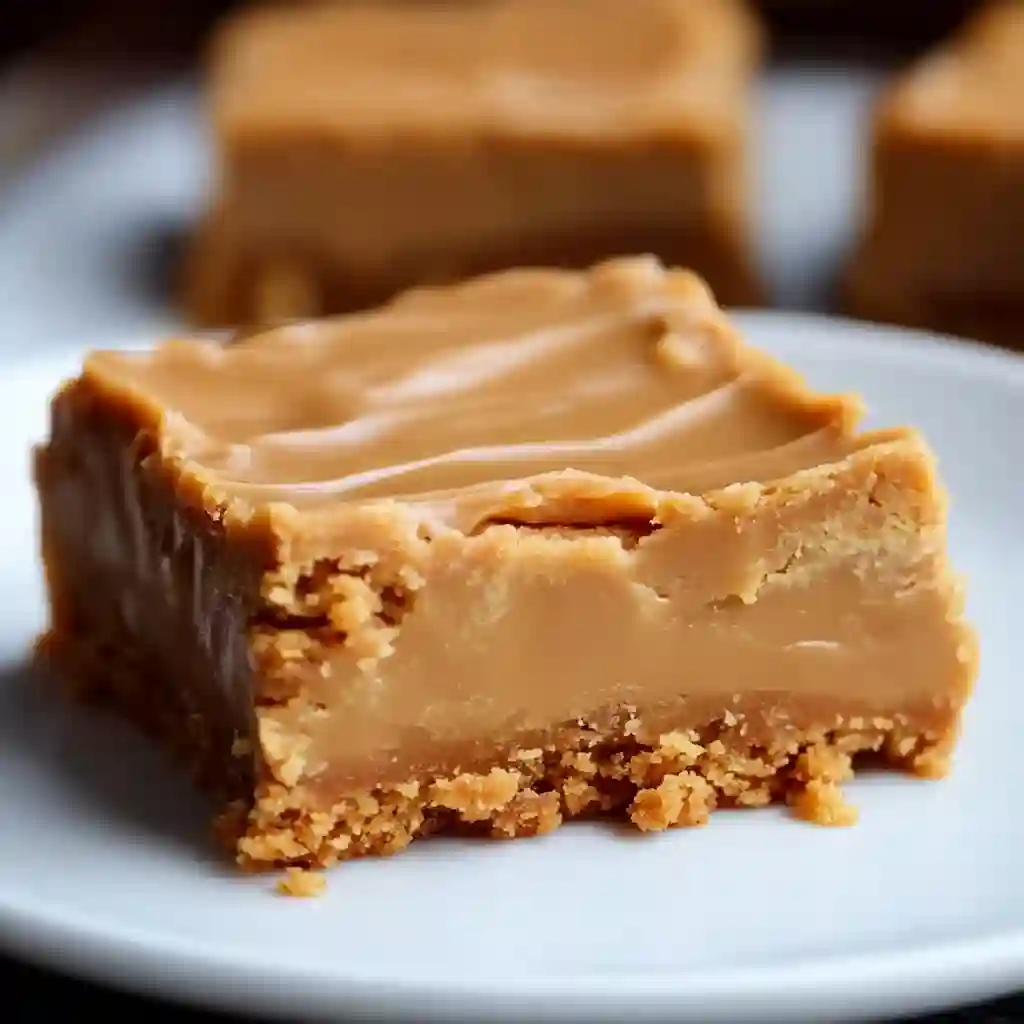
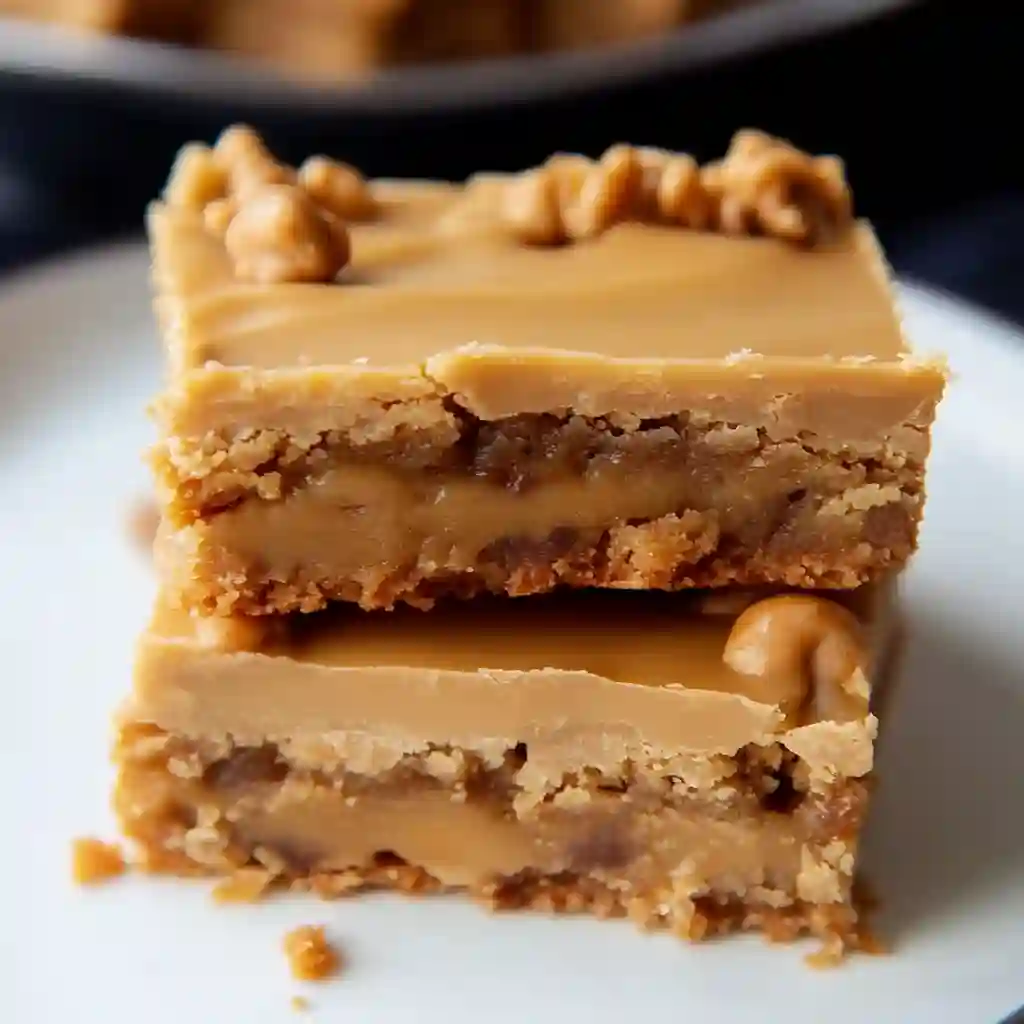
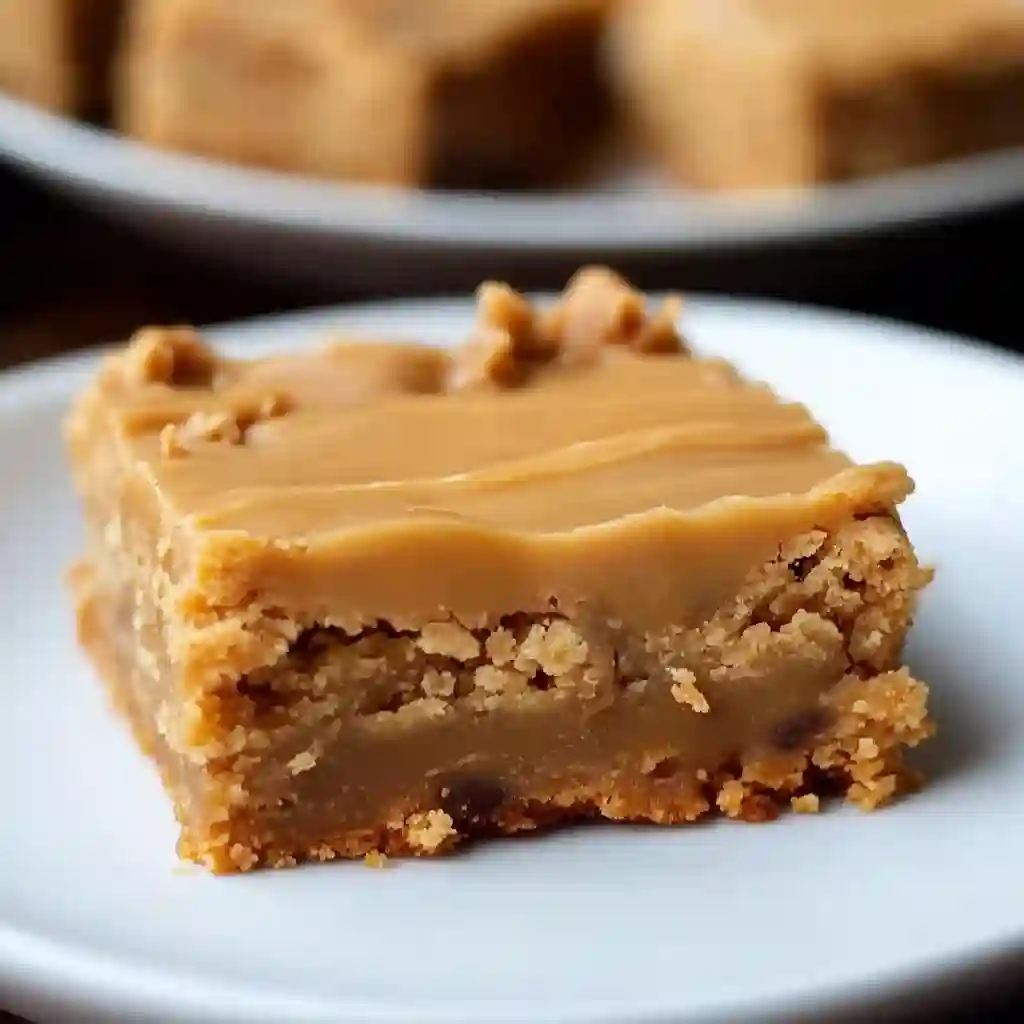
These cookie bars are soft, chewy, and packed with peanut butter goodness!
Baking Time, Servings & Pro Tips
Bake Time & Servings
- Prep Time: 10 minutes
- Bake Time: 25-30 minutes
- Cooling Time: 30 minutes
- Total Time: ~1 hour
- Servings: 24 bars
These bars are perfect for sharing! You can cut them into larger squares for a bakery-style treat or smaller bites for easy snacking.
Pro Tips for the Best Peanut Butter Cookie Bars
- ✅ Don’t overbake! The bars will continue to set as they cool, so take them out when the edges are golden and the center looks slightly underdone.
- ✅ Use creamy peanut butter for the best texture. Natural peanut butter can make the bars crumbly, but if using it, stir well before adding.
- ✅ For extra chewiness, slightly underbake the bars and let them cool completely before cutting.
- ✅ Love chocolate? Stir in 1 cup of chocolate chips to the batter for a peanut butter-chocolate combo!
- ✅ Make them gluten-free by swapping all-purpose flour with a 1:1 gluten-free baking mix.
Storage, Reheating & Nutrition Info
How to Store Peanut Butter Cookie Bars
- At Room Temperature: Store in an airtight container for up to 4 days.
- In the Refrigerator: Keep in a sealed container for up to a week for extra freshness.
- In the Freezer: Freeze individual bars for up to 3 months. Wrap them in plastic wrap and place them in a freezer-safe bag.
How to Reheat
- Room Temp: Let frozen bars thaw at room temperature for about 30 minutes before eating.
- Microwave: Warm a bar for 10-15 seconds to get a soft, gooey texture.
Estimated Nutrition Per Bar (based on 24 servings)
- Calories: ~250
- Fat: 12g
- Carbohydrates: 30g
- Protein: 5g
- Sugar: 20g
These bars are an indulgent treat—rich in peanut butter and full of flavor!
Peanut Butter Lunch Lady Cookie Bars
Ingredients
Equipment
Method
- Step 1: Prepare the Cookie Bars
- Preheat your oven to 350°F (175°C). Grease or line a 9×13-inch baking pan with parchment paper.
- In a large mixing bowl, whisk together the melted butter and peanut butter until smooth.
- Add the granulated sugar and brown sugar; mix well.
- Stir in the eggs and vanilla extract until fully incorporated.
- In a separate bowl, whisk together the flour, baking powder, and salt.
- Gradually fold the dry ingredients into the wet ingredients, stirring until just combined.
- Spread the batter evenly into the prepared baking pan.
- Step 2: Bake the Bars
- Bake for 25-30 minutes, or until the edges are golden and a toothpick inserted in the center comes out with a few moist crumbs.
- Let the bars cool slightly while preparing the glaze.
- Step 3: Make the Peanut Butter Glaze
- In a bowl, whisk together the peanut butter, powdered sugar, milk, and vanilla extract until smooth. Adjust the milk for desired consistency.
- Pour the glaze over the warm cookie bars and spread evenly with a spatula.
- Step 4: Let It Set & Serve
- Allow the bars to cool completely before slicing into squares.
- Cut into bars and enjoy!
Notes
Want chocolate? Stir in 1 cup of chocolate chips into the batter before baking.
For clean slices, use a sharp knife and wipe it between cuts.
Make it gluten-free by using a 1:1 gluten-free flour substitute.
Storage: Store at room temperature for 4 days, refrigerate for up to 1 week, or freeze for up to 3 months.
FAQs
1. Can I use crunchy peanut butter instead of creamy?
Yes! Crunchy peanut butter will add a bit of texture to the bars. Just be aware that they may not be as smooth and soft.
2. Why did my bars turn out dry?
Overbaking is the most common reason for dry bars. Remove them from the oven when the edges are golden but the center looks slightly underdone—it will continue to set as it cools.
3. How do I make these bars dairy-free?
Use a dairy-free butter substitute and replace the milk in the glaze with almond milk, oat milk, or another non-dairy option.
4. Can I add chocolate?
Absolutely! Stir in 1 cup of chocolate chips into the batter before baking, or drizzle melted chocolate over the glaze for a peanut butter-chocolate combo.
5. Can I double the recipe?
Yes! Simply bake in a larger pan (such as a 12×18-inch sheet pan) and increase the baking time by about 5-10 minutes.
6. How do I get clean, even slices?
Let the bars cool completely before slicing. Use a sharp knife and wipe it clean between cuts for neat squares.
Final Thoughts – Enjoy Your Peanut Butter Cookie Bars!
These Peanut Butter Lunch Lady Cookie Bars are the perfect balance of soft, chewy, and peanut buttery goodness. Whether you’re making them for a bake sale, family gathering, or just a personal treat, they’re guaranteed to be a hit!
The best part? They’re easy to make with simple ingredients and no special equipment. Plus, you can customize them with chocolate chips, a drizzle of caramel, or even a sprinkle of sea salt for an extra flavor boost.
Did You Try This Recipe?
Let us know how it turned out! Leave a comment below and share your experience. If you made any fun variations, we’d love to hear about them. Don’t forget to snap a picture and tag us on social media! 📸
Enjoy baking, and happy snacking! 🍪🥜✨
Love delicious inspiration? Follow me on Pinterest (opens in a new tab) for quick dinners, baking ideas, and meal-prep tips!
More Posts