Summer celebrations always call for something sweet, and what could be more delightful than a homemade Copycat Dairy Queen Ice Cream Cake? The moment I took my first bite of this frozen treat at a family gathering, I was instantly transported back to carefree childhood summers, enjoying ice cream cones and laughter under the sun.
This recipe is so easy to whip up that you’ll wonder why you ever considered picking it up from the store. The combination of creamy vanilla and rich chocolate ice creams layered with crunchy Oreo cookies and luscious hot fudge is an absolute crowd-pleaser. Plus, it’s customizable, so you can add your favorite toppings or swap up flavors to fit every guest’s palate.
If you’ve ever felt uninspired by fast food desserts or longed to impress friends and family without spending all day in the kitchen, this cake is your answer. Let’s dive into the magic of creating your very own ice cream cake that promises to steal the spotlight at any occasion!

Why is Copycat Dairy Queen Ice Cream Cake a must-try?
Ultimate summer indulgence: This tantalizing cake blends creamy ice creams with crunchy Oreo cookies and warm fudge, creating a layered masterpiece that’s perfect for hot days.
Customizable delight: Adjust flavors and toppings to cater to your guests’ tastes, ensuring everyone gets a slice they’ll love.
Easy to prepare: You don’t need to be a baking whiz; assembly and minimal time in the kitchen make this recipe approachable for all skill levels.
Crowd-pleaser guaranteed: Serve this showstopper at parties or family gatherings, and watch as it disappears faster than you can say “ice cream.”
Versatile snack: Beyond summer, this dessert is an all-year-round favorite that brings joy to any celebration. Don’t hesitate to explore more delightful creations in our ice cream section!
Copycat Dairy Queen Ice Cream Cake Ingredients
Let’s gather the delightful ingredients for your exciting Copycat Dairy Queen Ice Cream Cake that will surely impress!
For the Crunchy Base
• 15 Oreo cookies – Crush these classic cookies for that beloved crunchy layer.
• 3 Tbsp. unsalted butter, melted – This binds the cookie crumbs together, adding richness.
For the Chocolate Layer
• 1/2 cup semisweet chocolate chips (about 3 1/2 oz.) – These create a dreamy, chocolatey surprise in every bite.
• 1 Tbsp. refined coconut oil or vegetable shortening – This helps the chocolate stay glossy and smooth when melted.
For the Ice Cream Layers
• 1 1/2 qt. vanilla ice cream – This creamy base provides a sweet, mellow flavor that everyone adores.
• 1 1/2 qt. chocolate ice cream – Rich and indulgent, it perfectly complements the vanilla layer.
For the Hot Fudge
• 1 (11.5-oz.) jar hot fudge topping – Spreading this luscious fudge between layers adds a decadent twist!
For the Whipped Cream Topping
• 1 1/2 cups heavy whipping cream – Whip this to fluffy perfection for a light topping that enhances every slice.
• 1/4 cup confectioners’ sugar – This sweetens the cream perfectly without weighing it down.
• 1 1/2 tsp. pure vanilla extract – For an aromatic note that elevates the whipped cream.
For Finishing Touches
• Sprinkles, for decorating – Brighten the cake and add a festive flair that invites joy!
How to Make Copycat Dairy Queen Ice Cream Cake
Preheat your oven to 350°F and line a baking sheet with parchment paper. Chop the Oreo cookies into chickpea-sized pieces, toss them with melted butter, then spread them onto the prepared sheet. Bake until fragrant and crisp, about 5 to 8 minutes.
Melt chocolate chips in a medium heatproof bowl using a microwave. Heat them in 30-second increments, stirring in between, until fully melted and smooth—this should take around 60 to 90 seconds total. Stir in the coconut oil or vegetable shortening.
Combine the cookie crumbs with the melted chocolate mixture, tossing well to coat. Spread this mixture onto another parchment-lined sheet and refrigerate until hardened, which should be around 30 minutes. After that, chop it into small pieces for added crunch.
Prepare a 9″ springform pan by lining it with plastic wrap. In a large bowl, stir the vanilla ice cream until it’s smooth and spreadable. Spoon it into the bottom of the prepared pan and place it in the freezer for about 30 minutes to harden slightly.
Warm the fudge topping by microwaving it in 15-second increments, stirring in between each time, until it’s slightly warmed and spreadable. This should take about 30 to 45 seconds total.
Layer the chocolate crunchies on top of the frozen vanilla ice cream. Dollop the warm fudge across the crunchies and use an offset spatula to carefully spread it. Freeze the cake until slightly firm, approximately 15 to 30 minutes.
Stir the chocolate ice cream until it’s smooth and spreadable. Spoon it over the fudge layer and gently spread it until it’s smooth. Freeze until firm, which may take at least 4 hours or even a week if you’re prepping ahead.
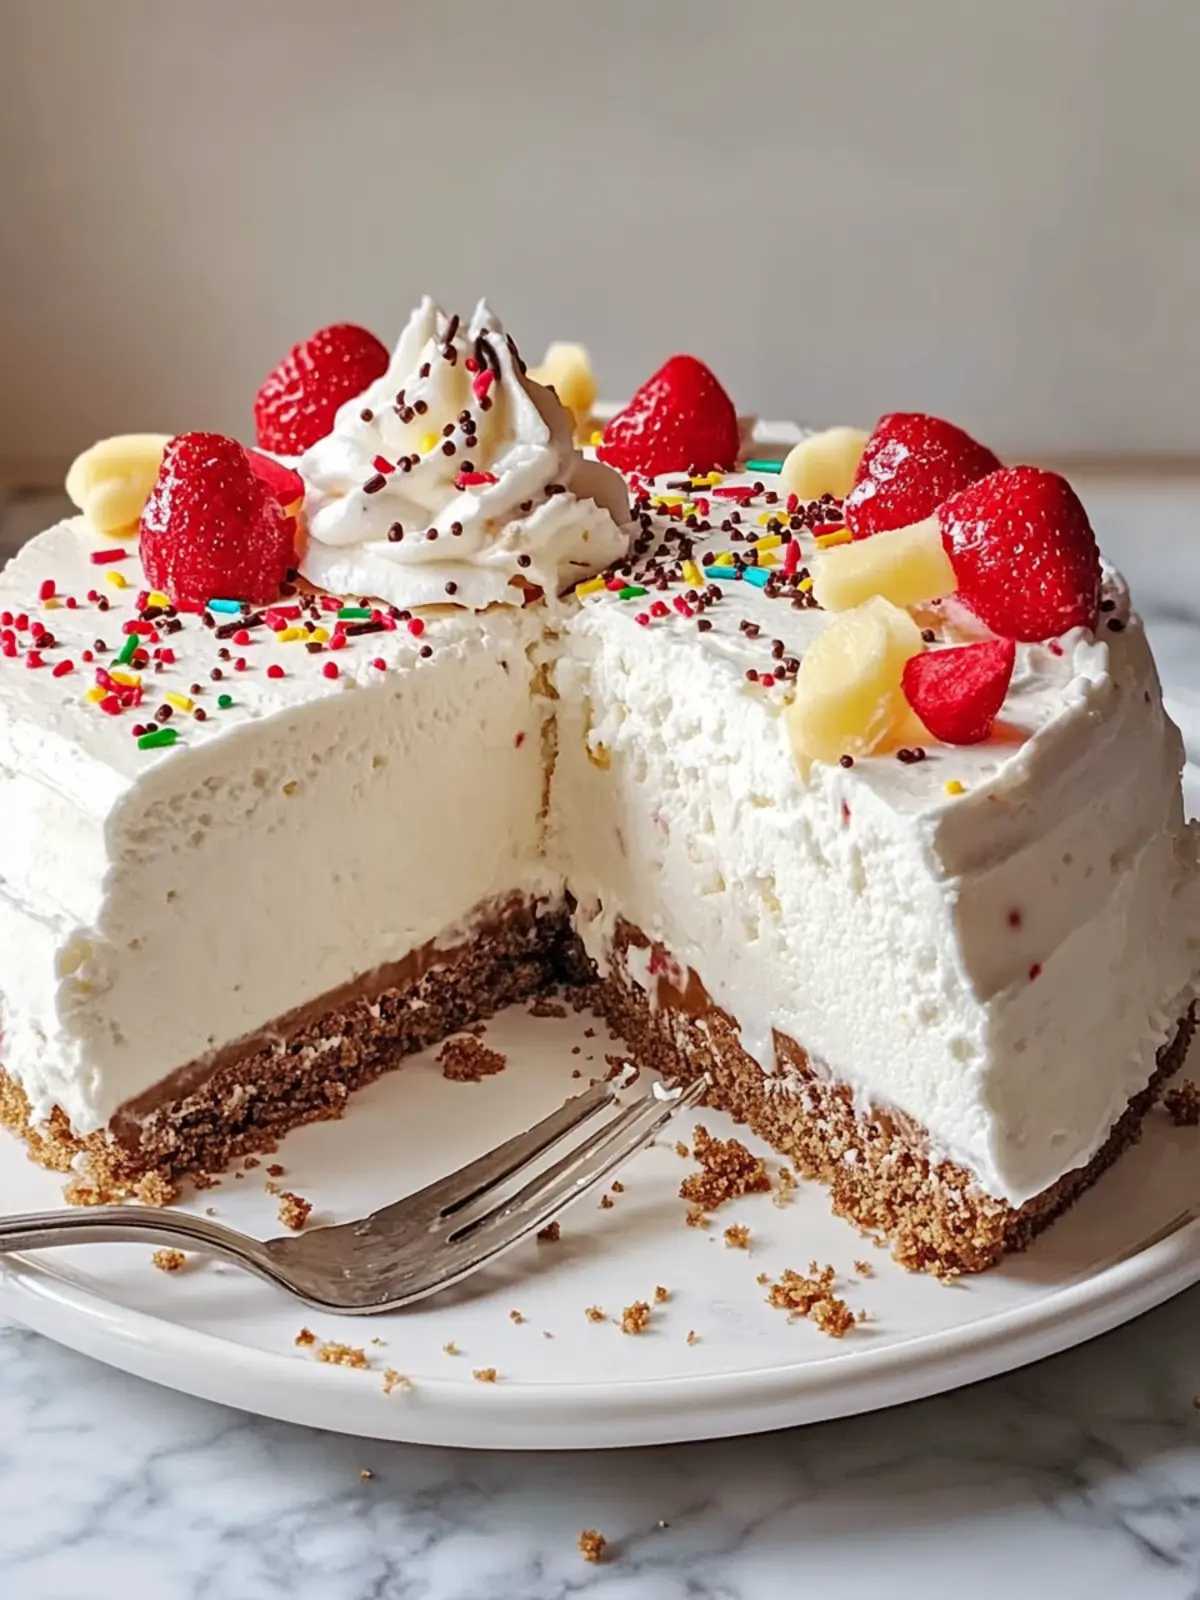
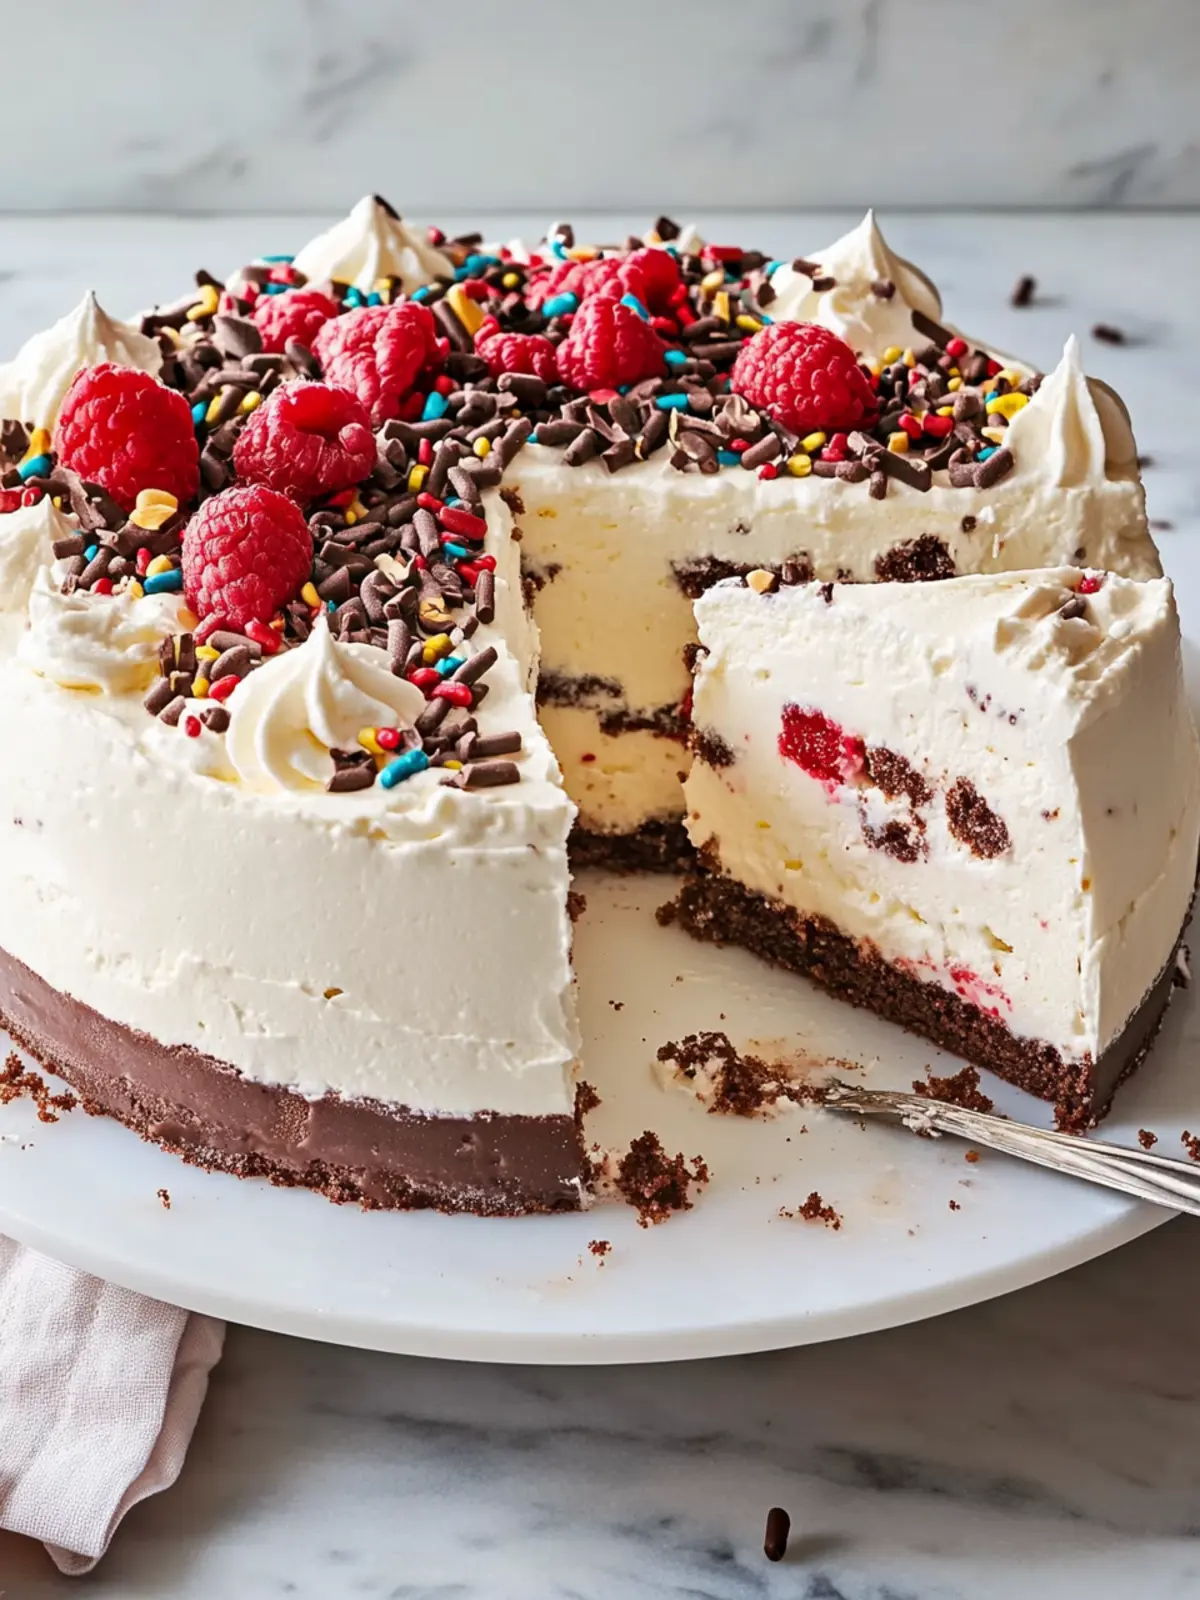
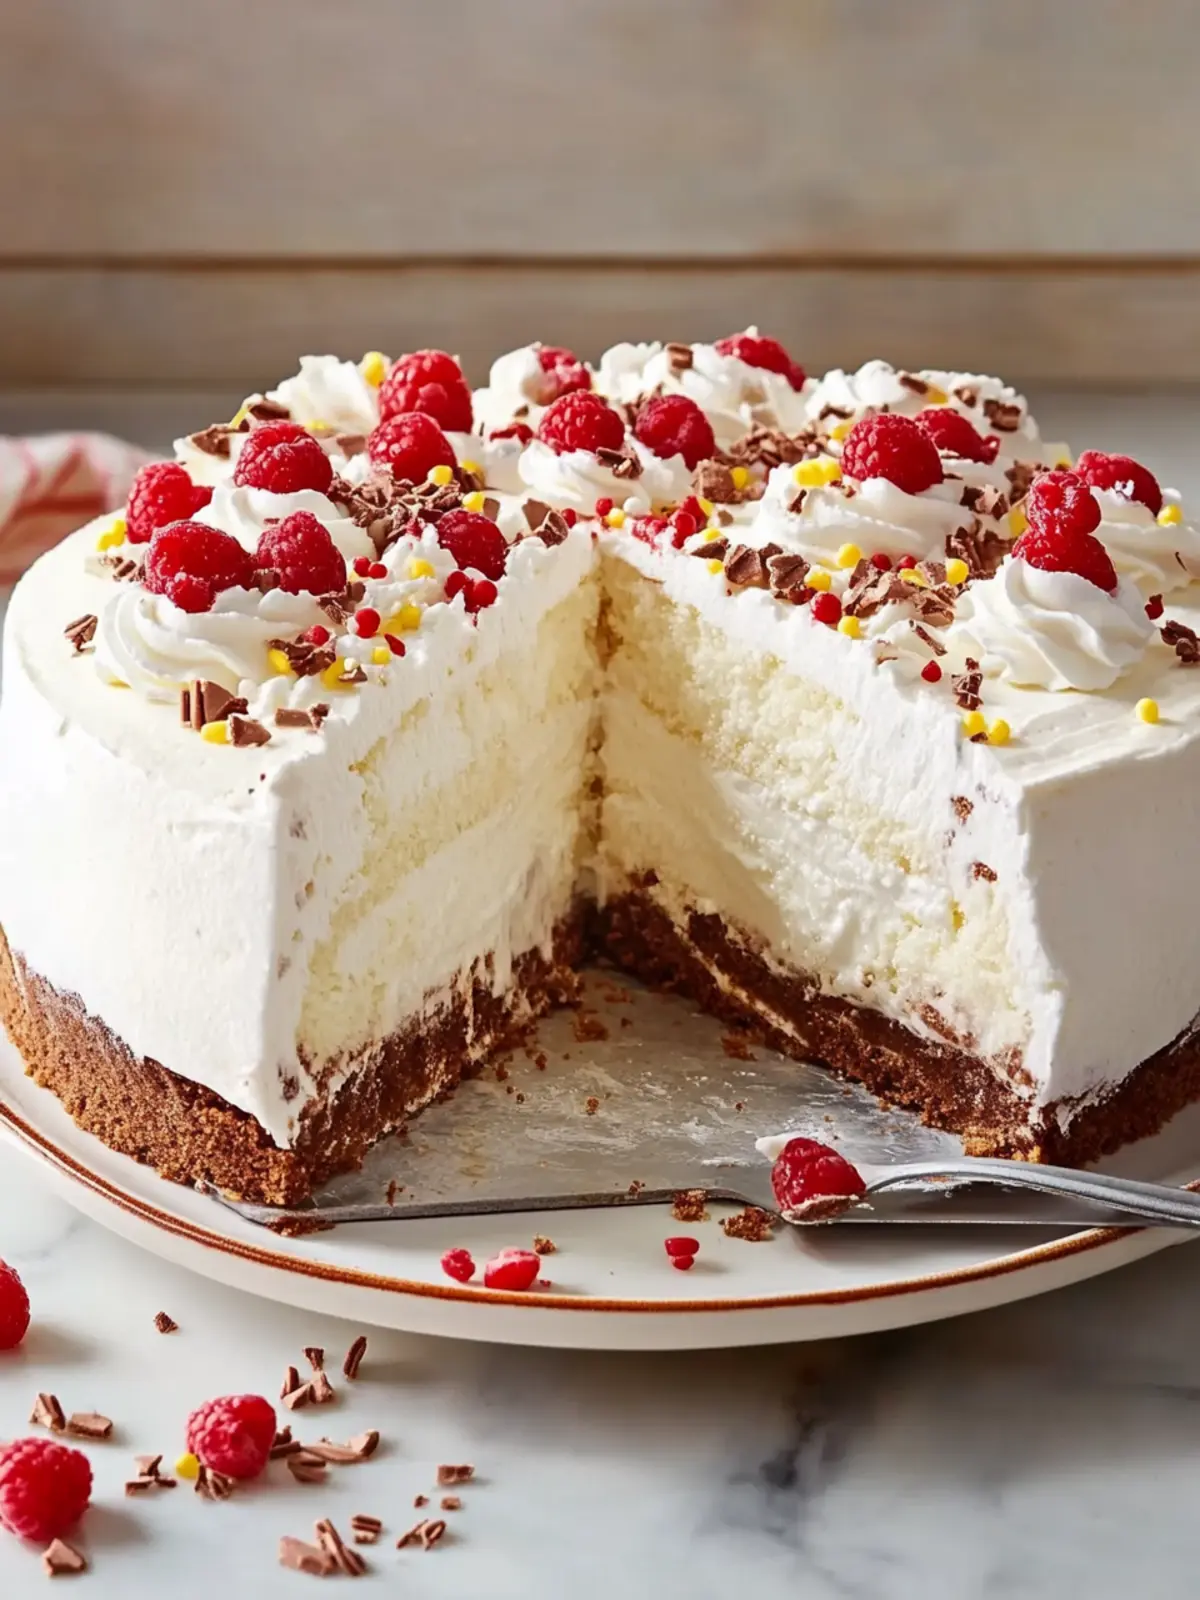
Invert the frozen cake onto a platter about 2 hours before serving. Peel off the top plastic wrap layer, making sure the chocolate layer is now at the bottom. Remove the sides of the springform pan and peel off the remaining plastic wrap. Return it to the freezer while you whip the cream.
Beat the heavy whipping cream, confectioners’ sugar, and vanilla extract in a large bowl until stiff peaks form. Transfer about one-third of the whipped cream into a piping bag fitted with a star tip for decoration.
Spread the remaining whipped cream generously over the top and sides of the cake. Pipe a decorative shell border around the top edge and base, if desired. Freeze the decorated cake uncovered for 1 to 2 hours before serving.
Decorate the edges and base of the cake with sprinkles just before serving. Allow it to sit at room temperature for about 5 minutes, then cut into slices using a sharp knife.
Optional: Top with fresh fruit for an extra burst of flavor!
Exact quantities are listed in the recipe card below.
What to Serve with Copycat Dairy Queen Ice Cream Cake?
Indulging in a slice of this creamy creation invites thoughts of delightful pairings to create a complete dessert experience.
Fresh Berries: Their natural sweetness and tartness offer a refreshing contrast to the rich creaminess of the cake.
Chocolate Sauce: Drizzling a warm chocolate sauce over each slice enhances the chocolatey richness, making every bite a sweet dream.
Coffee or Espresso: A hot cup of coffee balances the sweetness of the cake and can make each bite even more luxurious.
Mint Chocolate Chip Ice Cream: For those who love mint, the fresh flavors of mint chocolate chip create a delightful offset to the chocolate layers.
Homemade Whipped Cream: While the cake has its topping, adding extra whipped cream allows for a light, fluffy texture that elevates every slice.
Nutty Topping: A sprinkle of toasted almonds or hazelnuts adds a crispy texture, providing an exciting crunch that complements the soft ice cream layers.
Fudge Brownies: Pairing with warm fudge brownies creates a decadent dessert duo that is sure to leave everyone satisfied.
Gourmet Milkshake: A creamy milkshake on the side brings a nostalgic vibe and can be customized with flavors to match the cake.
For a whimsical twist, consider adding colorful sprinkles to your serving platter as a fun and inviting touch!
Make Ahead Options
These Copycat Dairy Queen Ice Cream Cakes are perfect for busy cooks looking to save time and effort! You can prepare the crunchy base and chocolate layer up to 3 days in advance. Simply bake the Oreos mixed with melted butter and let them cool completely before storing in an airtight container for optimal freshness. The ice cream layers can be spread and frozen up to 1 week ahead, allowing you to build the cake structure without a last-minute rush. When you’re ready to serve, just whip the cream and finish decorating it about 2 hours before you plan to dig in. This way, you’ll have a delicious, impressive dessert that’s just as delightful as if made on the same day!
Copycat Dairy Queen Ice Cream Cake Variations
Feel free to get creative with this delightful dessert and make it your own!
Dairy-Free: Substitute regular ice cream with coconut or almond-based ice cream for a delicious plant-based option.
Nutty Crunch: Add chopped nuts, like pecans or almonds, to the Oreo crust for an extra layer of crunchy texture and flavor. A little nutty goodness never hurt anyone!
Flavor Swaps: Experiment with different ice cream flavors such as strawberry or mint chocolate chip for a fun twist that surprises your taste buds.
Cookie Base Twist: Replace Oreos with another favorite cookie like chocolate chip or gluten-free cookies for a fun variation that suits your preference.
Fruit-Filled Delight: Add fresh fruits like sliced strawberries or bananas between layers for a fresh, fruity burst in every bite. A refreshing twist that adds a delicious dimension!
Spicy Kick: Drizzle with a swirl of spicy caramel or top with candied jalapeños for a unique ambiance of sweet and heat that’s truly unforgettable.
Vegan Option: Use coconut cream in place of heavy whipping cream and dairy-free ice cream for an entirely vegan treat that everyone can enjoy.
Chocolate Lover’s Dream: Mix in chocolate syrup with the whipped cream for an even richer topping that’s perfect for chocolate enthusiasts. With every spoonful, the decadence grows!
How to Store and Freeze Copycat Dairy Queen Ice Cream Cake
Fridge: Keep the cake wrapped tightly in plastic wrap or an airtight container for up to 3 days. This will help maintain its creamy texture and prevent freezer burn.
Freezer: You can freeze the ice cream cake for up to 1 week. Make sure it is covered well to avoid ice crystals forming on the surface, which can affect the taste.
Reheating: When ready to serve, let the cake sit at room temperature for about 5 minutes for easier slicing. Don’t worry if it softens slightly; this allows the flavors to shine!
Serving Tip: For best results, slice straight from the freezer using a sharp knife. If the cake is too firm, run your knife under hot water for a smooth cut. Enjoy the delightful layers of your Copycat Dairy Queen Ice Cream Cake!
Tips for the Best Copycat Dairy Queen Ice Cream Cake
Crumb Size Matters: Make sure your Oreo crumbs are about the size of chickpeas for an even crunch. Larger pieces may not mix well with the chocolate.
Melting Chocolate Strategy: Microwave the chocolate chips in 30-second intervals to prevent burning. A smooth melt is key for a luscious texture in your Copycat Dairy Queen Ice Cream Cake.
Layering Technique: When spreading ice cream, work quickly to maintain the cold temperature. If it starts to melt, return it to the freezer for a bit before proceeding.
Whipped Cream Perfection: Beat the cream just until stiff peaks form; overdoing it can lead to a grainy texture. Light and fluffy is the goal for topping this delicious cake!
Decoration Timing: Add sprinkles right before serving to keep them looking fresh and vibrant. Waiting until the last moment keeps their crunch intact!
Copycat Dairy Queen Ice Cream Cake Recipe FAQs
What kind of Oreo cookies are best for the crust?
Absolutely, standard Oreo cookies work best for this recipe! Their classic flavor and texture create the perfect crunchy base. If you prefer, you can experiment with different Oreo flavors for a fun twist.
How should I store leftover ice cream cake?
To store your Copycat Dairy Queen Ice Cream Cake, simply wrap it tightly with plastic wrap or place it in an airtight container. It will stay delicious in the fridge for up to 3 days. If you want to keep it longer, freeze it, where it will last for up to 1 week.
Can I freeze this ice cream cake for later?
Yes, indeed! To freeze, make sure your cake is tightly wrapped or covered. This prevents ice crystals from forming and keeps the cake’s texture creamy. Just remember to let it sit at room temperature for about 5 minutes before slicing, as this makes cutting much easier.
What if my whipped cream doesn’t thicken?
If you find that your whipped cream isn’t thickening, it might be due to warm ingredients or not chilling your bowl and beaters beforehand. Make sure to chill both your mixing bowl and beaters before whipping, and serve your Copycat Dairy Queen Ice Cream Cake chilled. If it still doesn’t work, you can add a bit of cream of tartar to help stabilize it during whipping.
Can I make this cake ahead of time?
Absolutely! You can prepare your ice cream cake up to a week in advance. Just follow all the steps and then freeze it once decorated. When your event comes around, simply remove it from the freezer and allow it to sit at room temperature for a few minutes to soften slightly before serving.
Is this recipe safe for pets?
While it’s a delicious treat for humans, this Copycat Dairy Queen Ice Cream Cake isn’t safe for pets. The sugars and high-fat content in ice cream can upset their stomachs. Always keep delicious treats like this one reserved for your human friends and family!
Copycat Dairy Queen Ice Cream Cake for Ultimate Summer Bliss
Ingredients
Equipment
Method
- Preheat your oven to 350°F and line a baking sheet with parchment paper. Chop the Oreo cookies into chickpea-sized pieces, toss them with melted butter, then spread them onto the prepared sheet. Bake until fragrant and crisp, about 5 to 8 minutes.
- Melt chocolate chips in a medium heatproof bowl using a microwave. Heat them in 30-second increments, stirring in between, until fully melted and smooth—this should take around 60 to 90 seconds total. Stir in the coconut oil or vegetable shortening.
- Combine the cookie crumbs with the melted chocolate mixture, tossing well to coat. Spread this mixture onto another parchment-lined sheet and refrigerate until hardened, which should be around 30 minutes. After that, chop it into small pieces for added crunch.
- Prepare a 9" springform pan by lining it with plastic wrap. In a large bowl, stir the vanilla ice cream until it's smooth and spreadable. Spoon it into the bottom of the prepared pan and place it in the freezer for about 30 minutes to harden slightly.
- Warm the fudge topping by microwaving it in 15-second increments, stirring in between each time, until it's slightly warmed and spreadable. This should take about 30 to 45 seconds total.
- Layer the chocolate crunchies on top of the frozen vanilla ice cream. Dollop the warm fudge across the crunchies and use an offset spatula to carefully spread it. Freeze the cake until slightly firm, approximately 15 to 30 minutes.
- Stir the chocolate ice cream until it’s smooth and spreadable. Spoon it over the fudge layer and gently spread it until it's smooth. Freeze until firm, which may take at least 4 hours or even a week if you’re prepping ahead.
- Invert the frozen cake onto a platter about 2 hours before serving. Peel off the top plastic wrap layer, making sure the chocolate layer is now at the bottom. Remove the sides of the springform pan and peel off the remaining plastic wrap. Return it to the freezer while you whip the cream.
- Beat the heavy whipping cream, confectioners' sugar, and vanilla extract in a large bowl until stiff peaks form. Transfer about one-third of the whipped cream into a piping bag fitted with a star tip for decoration.
- Spread the remaining whipped cream generously over the top and sides of the cake. Pipe a decorative shell border around the top edge and base, if desired. Freeze the decorated cake uncovered for 1 to 2 hours before serving.
- Decorate the edges and base of the cake with sprinkles just before serving. Allow it to sit at room temperature for about 5 minutes, then cut into slices using a sharp knife.