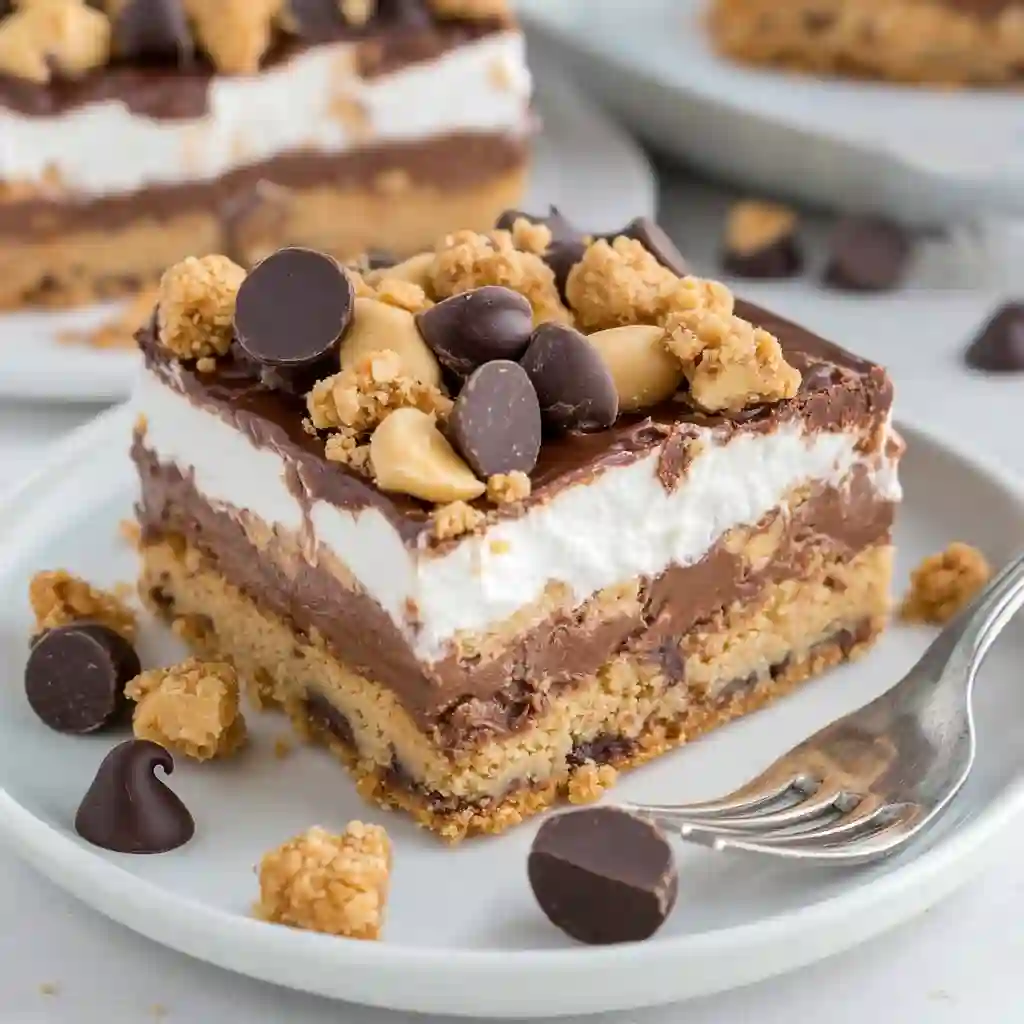
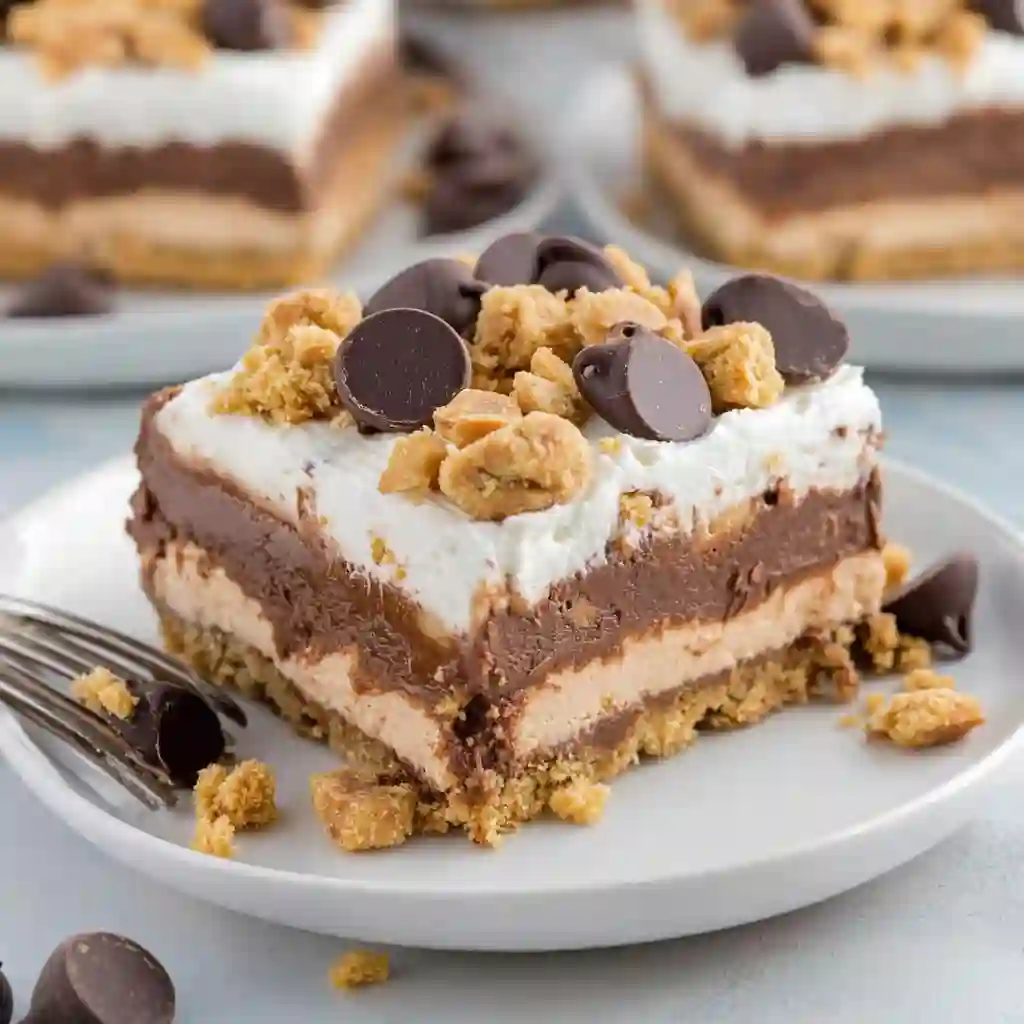
If you’re a fan of chocolate and peanut butter, these No-Bake Chocolate Peanut Butter Dream Bars are about to become your new favorite dessert! Made with layers of crushed peanut butter cookies, silky chocolate pudding, and a luscious peanut butter cheesecake filling, this easy, no-bake recipe is perfect for any occasion. Topped with fluffy whipped cream and sprinkled with chocolate and peanut butter chips, every bite is pure indulgence.
Ingredients You’ll Need
To make these Chocolate Peanut Butter Dream Bars, gather the following ingredients:

For the Crust:
- 16 oz peanut butter sandwich cookies (Nutter Butters or similar)
- 4 tbsp unsalted butter, melted
Peanut Butter Cheesecake Layer:
- 6 oz cream cheese, room temperature
- ½ cup confectioners’ sugar
- ⅓ cup creamy peanut butter
- ½ tsp pure vanilla extract
- 1 cup Cool Whip (or use homemade stabilized whipped cream)
Chocolate Pudding Layer:
- 3.9 oz instant chocolate pudding mix
- 1 ½ cups cold milk (not the 2 cups called for on the pudding box)
the Topping:
- Remaining Cool Whip (about 1 cup)
- ¼ cup milk chocolate chips
- ¼ cup peanut butter chips
- Remaining peanut butter cookies, crushed
Step-by-Step Instructions
Step1: Make the Crust
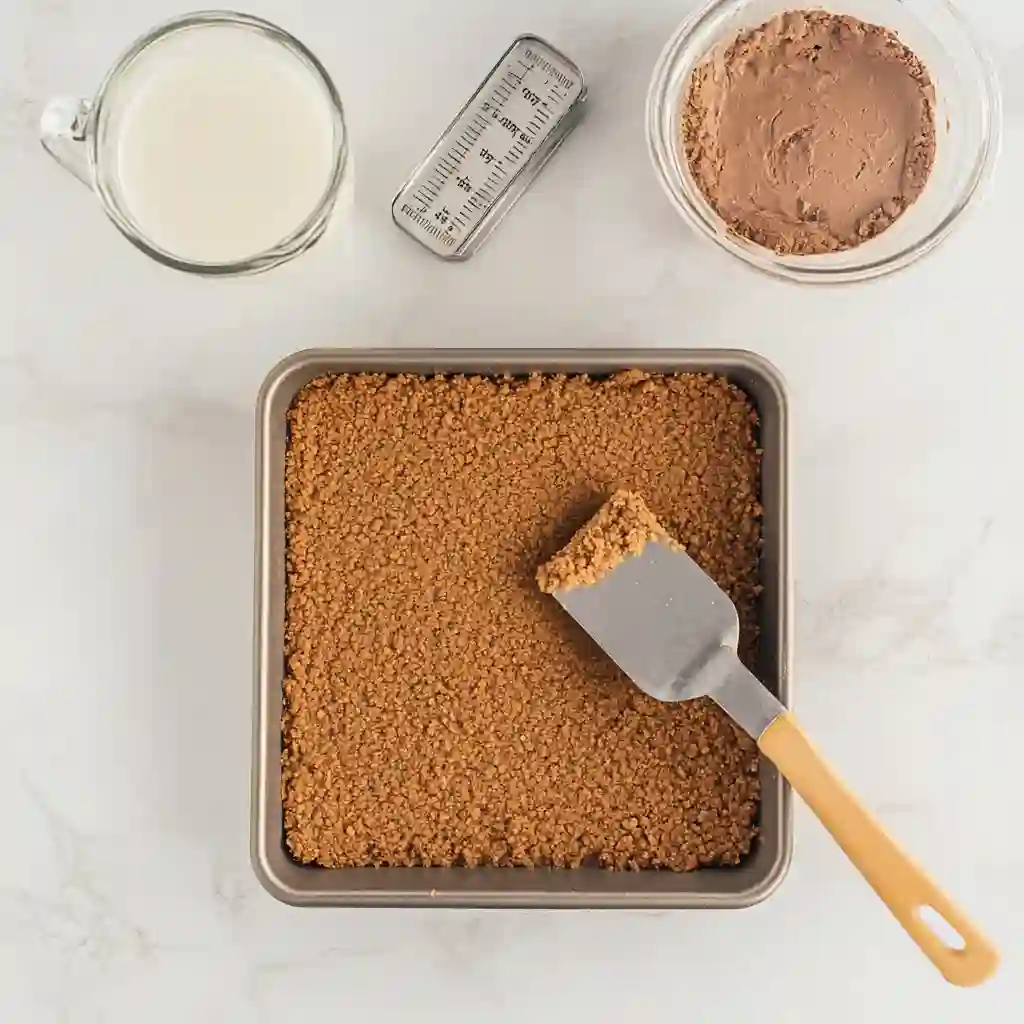
- Crush about 20 peanut butter sandwich cookies in a blender or food processor until finely ground.
- In a bowl, microwave 4 tablespoons of butter until fully melted. Next, thoroughly combine it with the remaining ingredients and mix well.
- Press the mixture firmly into an 8×8-inch baking pan lined with parchment paper, ensuring an even layer.
- Place the crust into the freezer and allow it to chill for a minimum of 30 minutes until firm.
Step2: Prepare the Chocolate Pudding
- In a small bowl, whisk together the chocolate pudding mix and 1 ½ cups of cold milk. (Use less milk than the box suggests for a firmer consistency.)
- Refrigerate the pudding while you prepare the next layer.
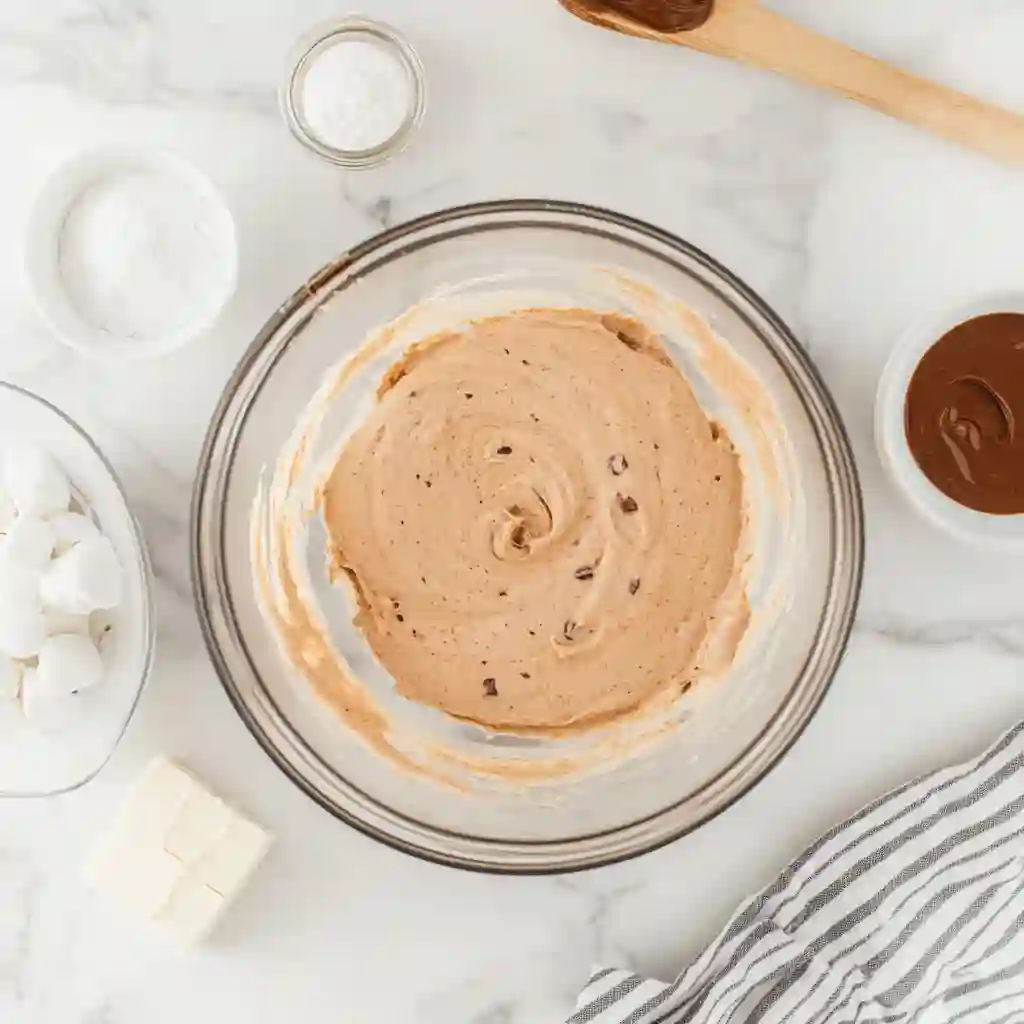
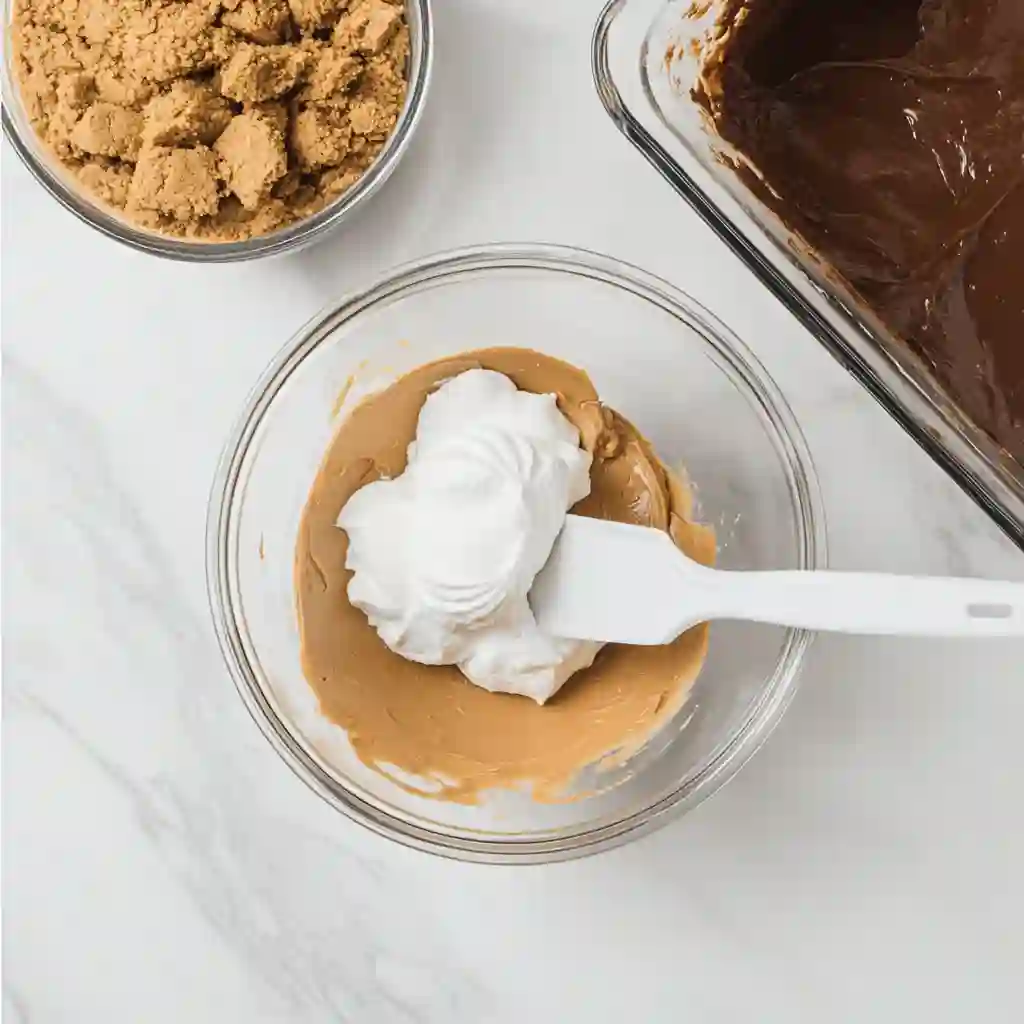
Step3: Make the Peanut Butter Cheesecake Layer
- In a mixing bowl, beat together the cream cheese, confectioners’ sugar, peanut butter, and vanilla extract until smooth.
- Gently fold in 1 cup of Cool Whip until fully combined.
Step4: Assemble the Layers
- Remove the crust from the freezer.
- Spread the peanut butter cheesecake mixture evenly over the crust using an offset spatula.
- Gently spread the chocolate pudding layer over the cheesecake layer.
- Top with the remaining Cool Whip, smoothing it out evenly.
- Refrigerate for at least 2 hours (or overnight for best results).
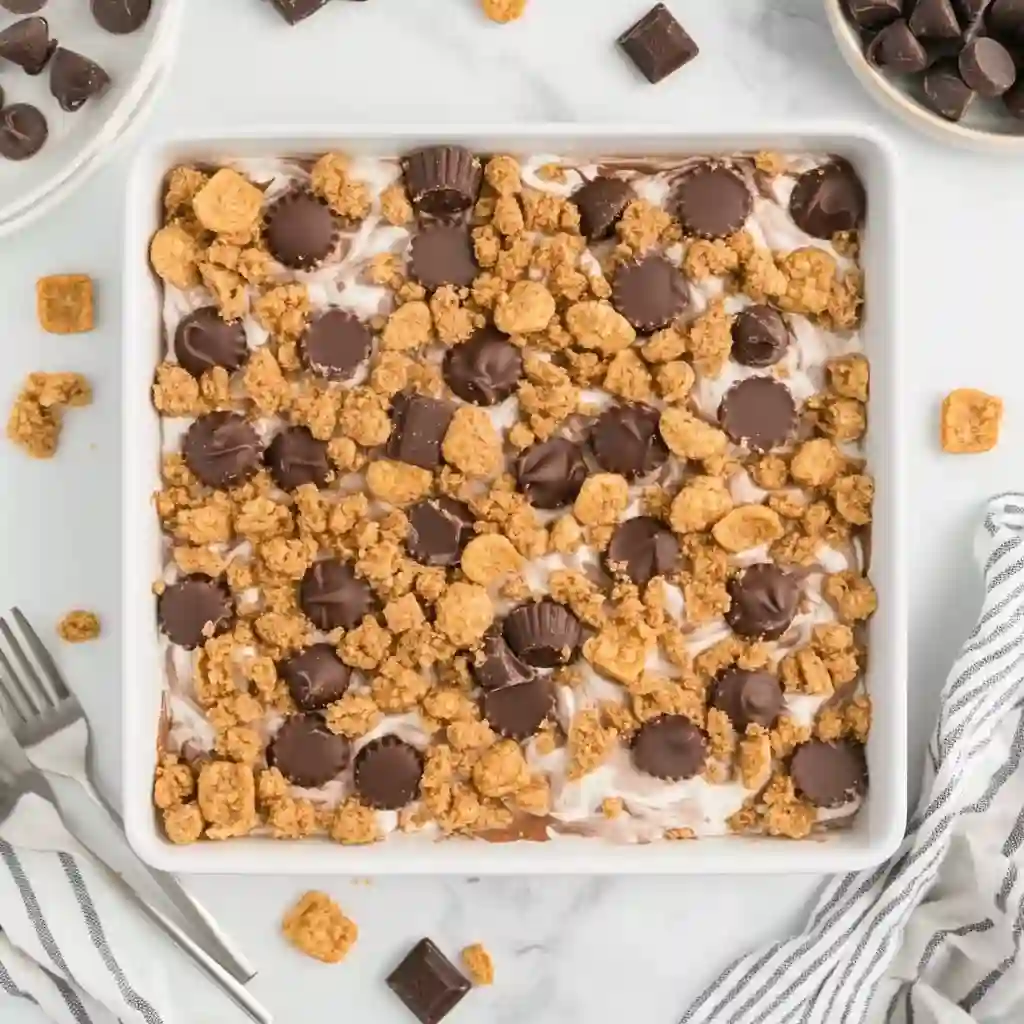
Step 5: Add the Toppings & Serve
- Before serving, crush the remaining cookies and sprinkle them over the top.
- Add the milk chocolate chips and peanut butter chips for extra flavor and texture.
- Slice into squares and enjoy!
Storage, Serving Tips & FAQs
How to Store Chocolate Peanut Butter Dream Bars
- Refrigerator: Cover the bars with plastic wrap or store them in an airtight container. They will stay fresh for up to a week in the fridge.
- Freezer: If you want to store them longer, place the bars in an airtight container and freeze for up to 2 months. Thaw in the refrigerator before serving.
Serving Tips
- Keep the bars chilled until ready to serve.
- To get clean slices, use a warm knife (dip it in hot water and wipe dry before cutting).
- Serve as-is or with an extra drizzle of melted chocolate or peanut butter sauce for extra indulgence!
FAQs
Can I make this in a bigger pan for a crowd?
Yes! Double the recipe and use a 9×13-inch baking dish instead of an 8×8 pan.
Can I use homemade whipped cream instead of Cool Whip?
Absolutely! If you prefer, make stabilized whipped cream for a fresh alternative.
Can I swap the peanut butter for another nut butter?
Yes! Try almond butter or cashew butter for a different flavor.
Is this dessert gluten-free?
No, but you can make it gluten-free by using gluten-free peanut butter cookies.
Nutrition Information
Each serving of Chocolate Peanut Butter Dream Bars (based on 9 servings) contains approximately:
- Calories: 576 kcal
- Carbohydrates: 67g
- Protein: 7g
- Fat: 31g
- Saturated Fat: 14g
- Sugar: 41g
- Cholesterol: 44mg
- Sodium: 551mg
These bars are rich, creamy, and indulgent, so enjoy in moderation!
Chocolate Peanut Butter Dream Bars
Ingredients
Equipment
Method
- Step 1: Prepare the Crust
- Crush 20 peanut butter sandwich cookies using a food processor or rolling pin.
- Melt 4 tablespoons of butter and mix with the crushed cookies until fully combined.
- Press the mixture firmly into an 8×8-inch baking pan lined with parchment paper.
- Freeze the crust for at least 30 minutes to set.
- Step 2: Make the Chocolate Pudding
- In a bowl, whisk together the chocolate pudding mix and 1 ½ cups of cold milk.
- Refrigerate the pudding while preparing the next layer.
- Step 3: Prepare the Peanut Butter Cheesecake Layer
- In a mixing bowl, beat together the cream cheese, confectioners’ sugar, peanut butter, and vanilla extract until smooth.
- Gently fold in 1 cup of Cool Whip until fully combined.
- Step 4: Assemble the Layers
- Remove the crust from the freezer. Spread the peanut butter cheesecake mixture evenly over the crust using an offset spatula.
- Gently spread the chocolate pudding over the cheesecake layer.
- Top with the remaining Cool Whip, smoothing it evenly.
- Refrigerate for at least 2 hours (or overnight for best results).
- Step 5: Add Toppings & Serve
- Before serving, crush the remaining cookies and sprinkle them over the dessert.
- Add the milk chocolate chips and peanut butter chips for extra flavor.
- Slice into squares and enjoy!
Notes
For a homemade alternative: Swap Cool Whip with stabilized whipped cream.
Make it gluten-free: Use gluten-free peanut butter cookies instead.
Storage: Keep covered in the refrigerator for up to a week or freeze for up to 2 months.
Final Thoughts
If you’re a fan of chocolate and peanut butter, this no-bake dessert is a must-try! It’s creamy, rich, and requires minimal effort—perfect for potlucks, parties, or whenever you crave something sweet.
Let me know if you try this recipe! Leave a comment below and share your thoughts. Happy baking! 😊 🍫🥜