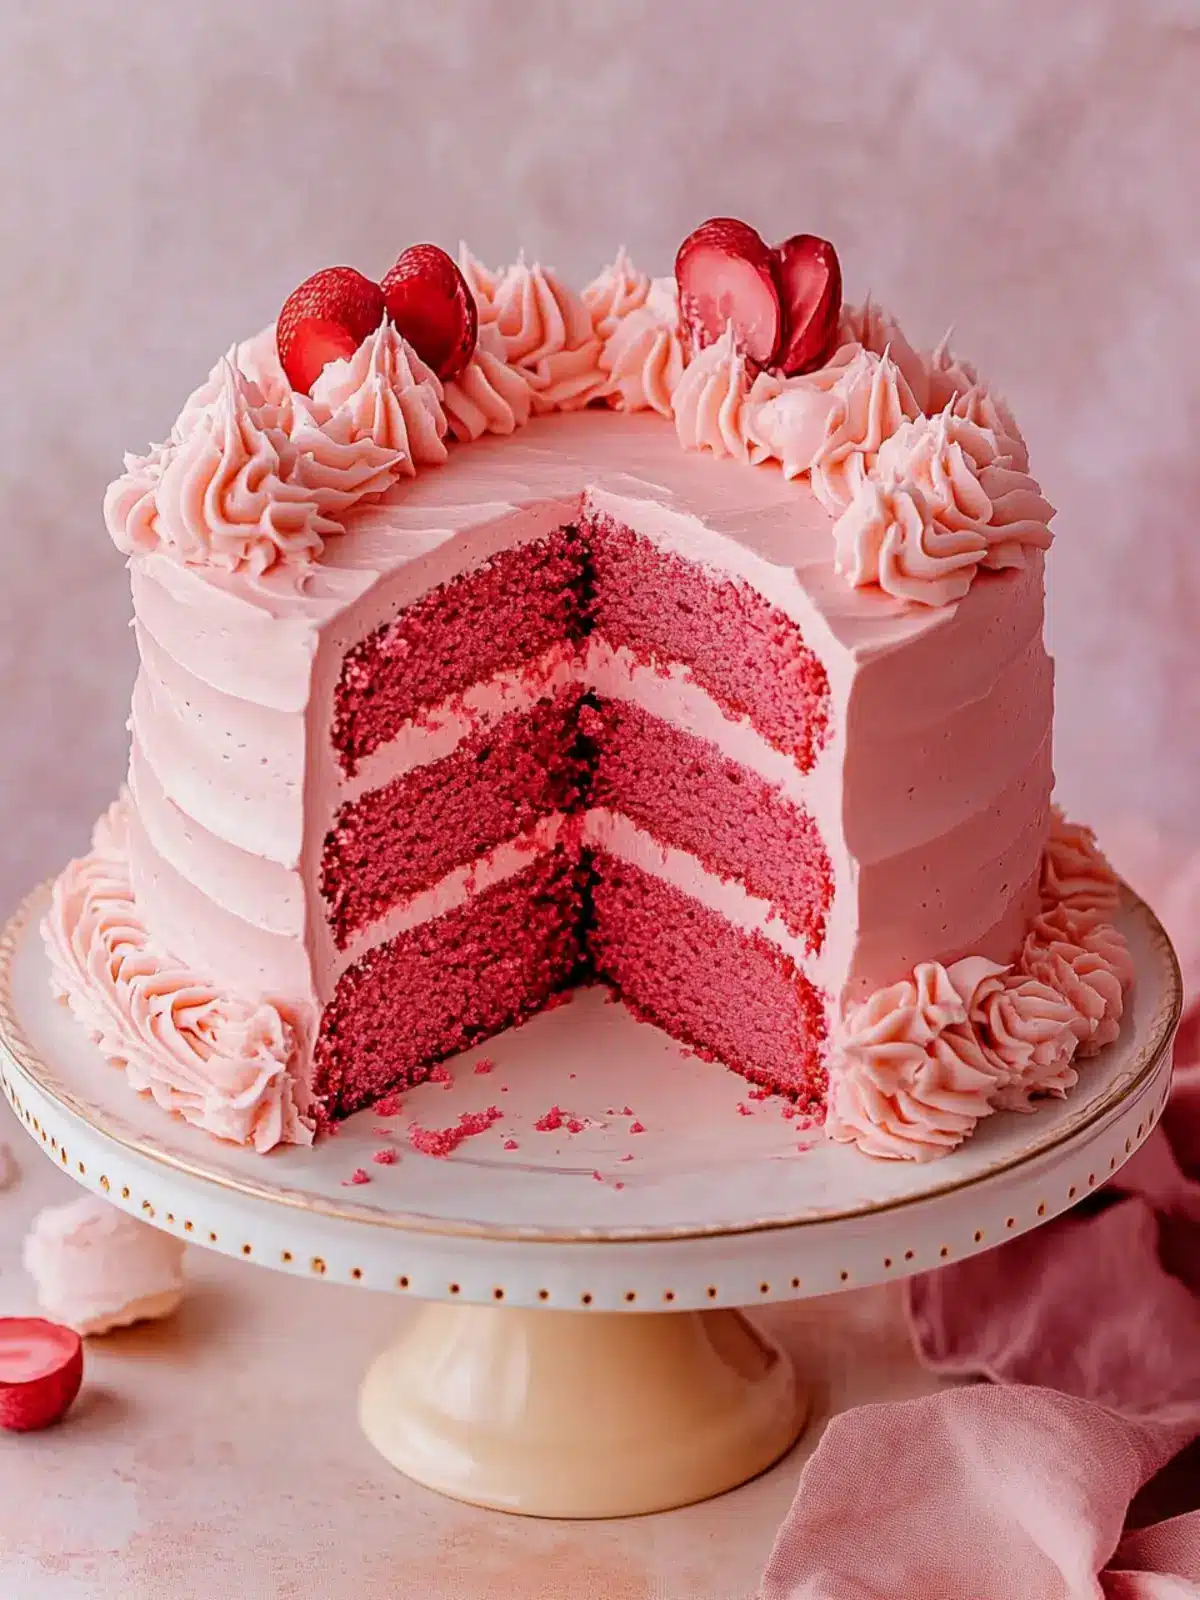
There’s something utterly enchanting about serving a cake that not only tantalizes your taste buds but also captivates your eyes. As the first slice of this Ultra Fluffy Pink Velvet Cake is revealed, a soft, inviting pink hue emerges, promising a delightful experience. I first crafted this stunning cake for a dear friend’s birthday, and the moment I combined the luscious cream cheese frosting with the tender layers, I knew it was destined to become a favorite in my recipe repertoire.
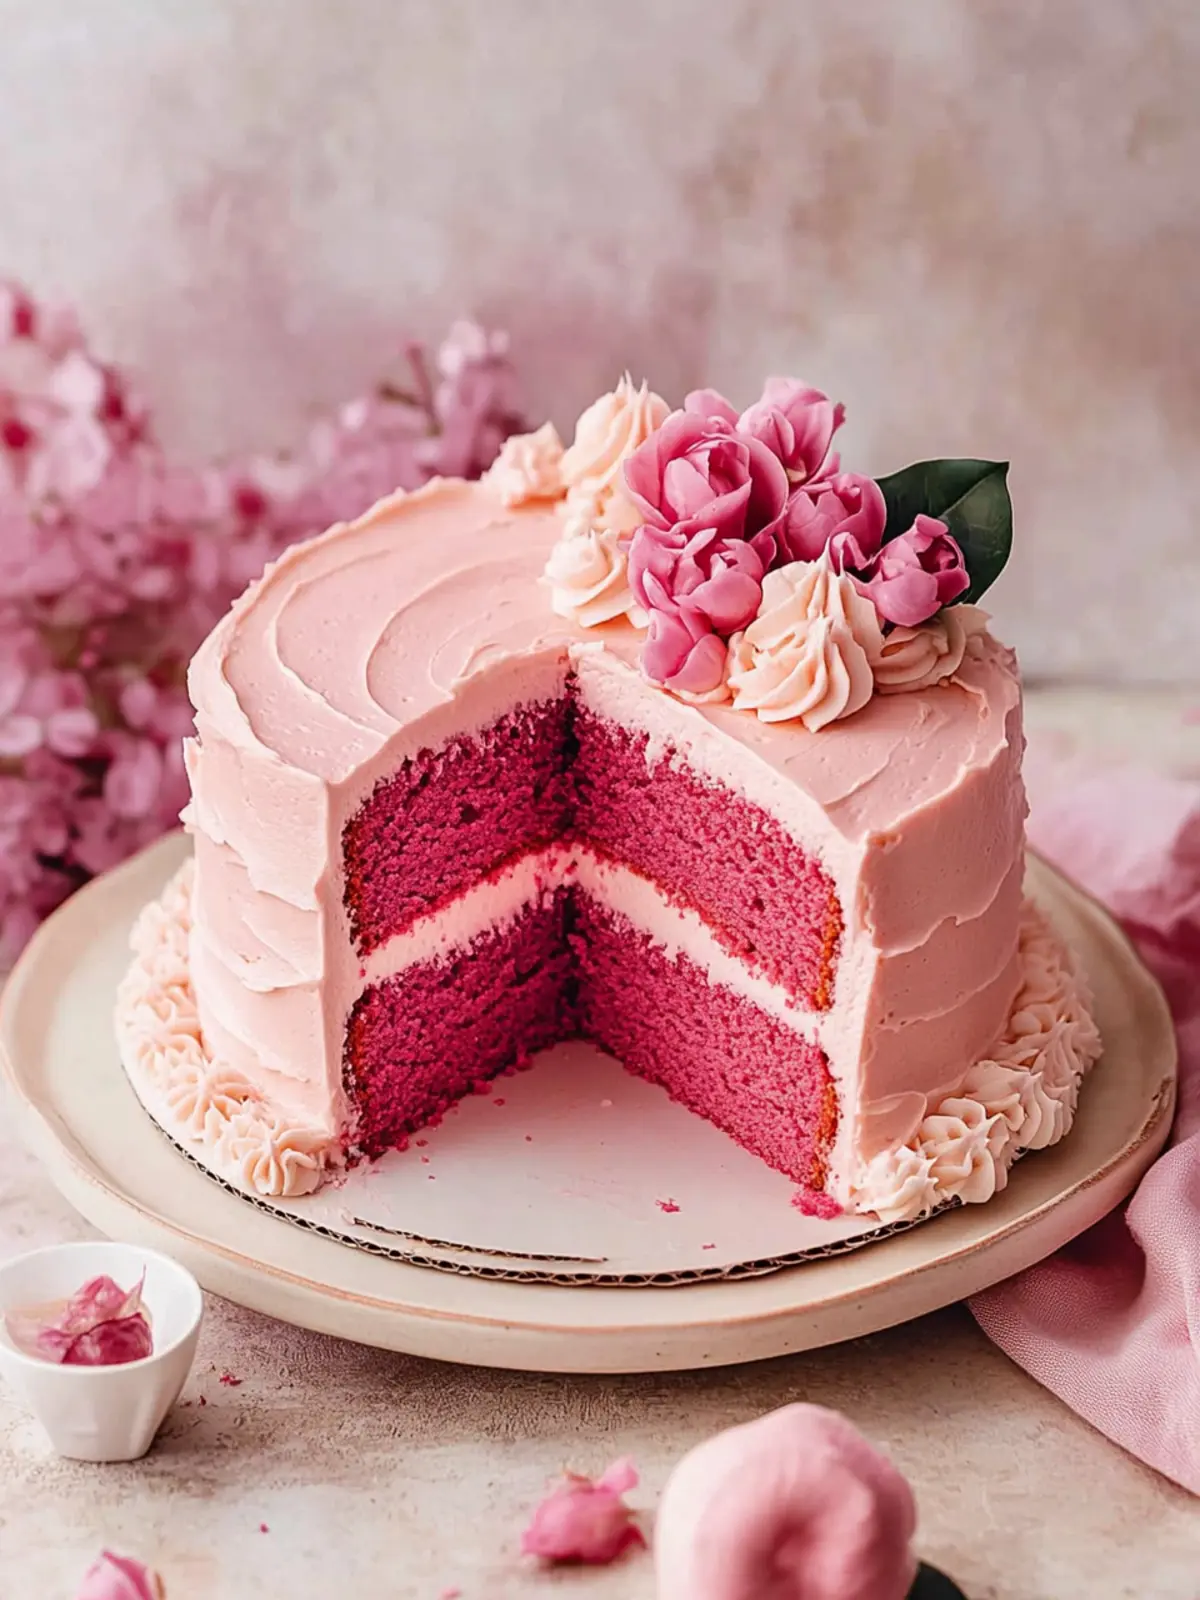
Perfect for celebrations, this vintage-inspired cake is so much more than just a feast for the senses; it speaks to the joy of gathering around the table with loved ones. With its subtle tang from buttermilk and a melt-in-your-mouth texture, each bite feels like a sprinkle of magic. Whether you’re planning a princess-themed party or simply wish to indulge in something special at home, this Pink Velvet Cake is sure to impress. Join me in making a dessert that transforms any occasion into a cherished memory!

Why is Pink Velvet Cake so special?
Irresistible Appearance: The vibrant hue of this cake makes it a stunning centerpiece for any gathering.
Decadent Cream Cheese Frosting: Each slice is smothered in rich, fluffy frosting that perfectly complements the cake’s texture.
Unique Flavor Profile: The subtle tang from buttermilk and vinegar adds an unexpected depth, elevating the classic cake experience.
Versatile for Occasions: Perfect for birthdays, tea parties, or just when you’re feeling adventurous in the kitchen.
Easy to Make: With simple ingredients and straightforward steps, even beginner bakers can create this masterpiece.
For more delicious cake ideas, check out my popular birthday cake collection!
Pink Velvet Cake Ingredients
For the Cake
- Unsalted Butter – Provides richness and moisture; substitute with margarine for a dairy-free option.
- Vegetable Oil – Adds moisture and tenderness; can be replaced with canola or sunflower oil.
- Granulated Sugar – Sweetness and structure provider; brown sugar can add depth to the flavor.
- Sea Salt – Enhances flavor; use kosher salt as an alternative.
- Large Egg Whites – Provides structure and lightness; whole eggs can change the color but are still an option.
- Pure Vanilla Extract – Adds aromatic sweetness; almond extract can be a flavorful alternative.
- Vinegar – Reacts with baking soda to help the cake rise; apple cider vinegar or lemon juice work well.
- Pink Gel Food Coloring – Necessary for achieving the cake’s eye-catching pink hue; natural alternatives may alter color post-baking.
- Cake Flour – Ensures a light, fluffy texture due to lower gluten content; substitute with all-purpose flour mixed with cornstarch.
- Baking Powder & Baking Soda – Essential leavening agents that aid in cake rise.
- Buttermilk – Contributes to tenderness and adds a delightful tang; use regular milk with a splash of vinegar as a substitute.
For the Cream Cheese Frosting
- Cream Cheese – Gives the frosting a rich and creamy texture; use full-fat for best results.
- Unsalted Butter – Ensures a silky smooth consistency; can be substituted with margarine.
- Powdered Sugar – Adds sweetness and structure; sift it to avoid lumps in the frosting.
- Vanilla Extract – Enhances the frosting’s flavor; can substitute with almond extract for a twist.
With these delightful Pink Velvet Cake ingredients at your disposal, you’re on your way to creating a whimsical and inviting dessert that will surely enchant your loved ones!
How to Make Pink Velvet Cake
Preheat your oven to 355°F (180°C). While it warms up, prepare three 8” round baking pans by greasing them with butter and lining the bottoms with parchment paper. This step ensures easy removal later.
Cream together the unsalted butter, vegetable oil, granulated sugar, and sea salt in a large mixing bowl until the mixture is lightened in color and fluffy, which usually takes about 3-5 minutes.
Incorporate the large egg whites one at a time, mixing well after each addition. Then, add the pure vanilla extract and vinegar, stirring until fully combined. This will help create a nice, airy structure.
Add the pink gel food coloring gradually, mixing until you achieve your desired rosy hue. Don’t be shy; this is what makes your Pink Velvet Cake pop with color!
Combine the sifted cake flour, baking powder, and baking soda into the batter alternately with the buttermilk. Make sure to fold gently, mixing just until combined to avoid overmixing, which can make it tough.
Divide the batter evenly among the prepared pans. Bake for 15-18 minutes, or until a toothpick inserted in the center comes out clean. Keep an eye on them toward the end!
Cool the layers in the pans for about 10 minutes before transferring them to a wire rack. Ensure they are completely cool. Don’t forget to trim the tops for even layers.
Beat the softened cream cheese and unsalted butter together in a mixing bowl until creamy. Gradually add powdered sugar, mixing until smooth and fluffy, then blend in a splash of vanilla extract.
Assemble your cake by layering the cooled cake layers with the cream cheese frosting in between. Spread a thin crumb coat around the sides and top, then chill in the refrigerator for about 30 minutes to set.
Decorate the chilled cake with more frosting, piping designs for a vintage effect if desired. The result will be a showstopper that’s also a joy to eat!
Optional: Try adding edible glitter or sprinkles for an extra festive touch!
Exact quantities are listed in the recipe card below.
Pink Velvet Cake Variations
Get creative and personalize your Pink Velvet Cake with these delightful twists!
Dairy-Free: Substitute cream cheese with a vegan cream cheese alternative and margarine for the frosting for a dairy-free delight.
Feel free to explore the world of plant-based ingredients; their unique flavors will surprise you!Flavor Infusion: Add almond extract for a nutty twist that complements the traditional flavors beautifully.
This subtle change can elevate the cake’s aroma, making it even more inviting!Fruit Filling: Layer with raspberry or lemon curd to add a tart zing between the cake layers.
The fruity sweetness will create a heavenly contrast with the creamy frosting, making each bite a party!Chocolate Drizzle: Top with a rich chocolate ganache for an indulgent finish that balances the sweetness.
The contrast between the pink and dark chocolate makes for a stunning presentation—truly a feast for the eyes!Layering Varieties: Consider creating a two-tone cake by swirling different colored batter into the pans.
This striking effect will not only impress guests but also add an exciting flavor explosion!Zesty Frosting: Mix in some grated lemon or orange zest into the cream cheese frosting for a zesty brightening flavor.
The citrus notes will refresh your palate, making this cake feel light and celebratory!Booming Spice: Add a pinch of cardamom or cinnamon to the cake batter for a warm spice that complements its sweetness.
These aromatic spices will create a cozy atmosphere, perfect for gatherings and intimate celebrations alike!Nutty Texture: Fold in chopped pecans or walnuts into the batter for an added crunch.
Nuts can bring a whole new texture to the cake, transforming it into a delightful experience with every bite!
Make Ahead Options
Preparing your Pink Velvet Cake in advance can save valuable time, especially for busy celebrations! You can bake the cake layers up to 3 days ahead and store them at room temperature, wrapped tightly in plastic wrap to maintain their moisture. For the cream cheese frosting, it can be made 24 hours in advance; just store it in an airtight container in the refrigerator. When you’re ready to assemble, allow the frosting to soften at room temperature for about 30 minutes before spreading it between the layers. This way, you’ll have a stunning cake that’s just as delicious and fluffy, making your event stress-free and enjoyable!
Expert Tips for Pink Velvet Cake
Use Cake Flour: Using cake flour helps to achieve the lightest texture possible. Measure it accurately to avoid a dense cake.
Room Temperature Ingredients: Allow butter and egg whites to reach room temperature before mixing for a better emulsion and airy structure in your Pink Velvet Cake.
Avoid Overmixing: When combining the dry ingredients with the wet, fold gently to maintain the cake’s fluffy texture. Overmixing can lead to a tougher cake.
Use Full-Fat Cream Cheese: For the frosting, opt for brick-style full-fat cream cheese; it creates a thick and smooth consistency, preventing the frosting from becoming too runny.
Trim Browned Edges: To ensure a beautiful presentation, trim any browned edges from the cake layers before stacking them; this will give your cake a clean look.
Refrigerate for Stability: Store your frosted Pink Velvet Cake in the refrigerator, as the cream cheese frosting needs it. Allow it to sit at room temperature for a bit before serving to enhance flavor.
What to Serve with Pink Velvet Cake?
Delightful options to pair with this stunning dessert can elevate your special occasion to new heights.
Fresh Berries: The tartness of strawberries, raspberries, or blueberries contrasts beautifully with the sweetness of the cake, adding a refreshing bite. They also add a pop of color to your dessert table.
Vanilla Ice Cream: A scoop of creamy vanilla ice cream complements the rich cream cheese frosting, creating a harmonious balance of flavors that melts in your mouth.
Sparkling Water with Citrus: A light and refreshing drink, sparkling water infused with lemon or lime adds a zesty note that can cleanse the palate between bites.
Chocolate-dipped Strawberries: These sweet bites are perfect for a festive touch, bringing both elegance and flavor that pairs well with the cake’s vintage vibe.
Creamy Lemon Curd: A zesty lemon curd filling tucked between cake layers would add a pleasant brightness and moisture, enhancing each bite’s indulgence. Try serving it on the side!
Mini Cheesecakes: Individual cheesecakes provide a delightful contrast with their smooth texture and tangy flavor, making them a decadent addition to your dessert spread.
Treat yourself and your guests to the luscious experience of Pink Velvet Cake alongside these tantalizing accompaniments, and watch the smiles bloom around the table!
Storage Tips for Pink Velvet Cake
Fridge: Store your frosted Pink Velvet Cake in the refrigerator for up to 3 days. Cover it with a cake carrier to maintain its freshness and prevent drying out.
Room Temperature: If you’ve baked the layers ahead, they can be kept at room temperature for up to 2 days. Ensure they are well-wrapped in plastic wrap to keep moisture in.
Freezer: For longer storage, freeze unfrosted cake layers in an airtight container for up to 2 months. Thaw overnight in the refrigerator before frosting.
Reheating: When ready to enjoy, allow the cake to sit at room temperature for about 30 minutes to bring back its fluffy texture before serving.

Pink Velvet Cake Recipe FAQs
How do I select ripe ingredients for my Pink Velvet Cake?
Absolutely! When choosing your ingredients, make sure your buttermilk is fresh and has a pleasant tang. Look for egg whites that are clean and free from any specks. For butter, a good test is to see if it feels slightly soft but still firm when you press it. As for your pink gel food coloring, opt for a well-known brand to achieve that vibrant hue without an off-taste.
What is the best way to store my frosted Pink Velvet Cake?
To keep your frosted Pink Velvet Cake fresh, store it in the refrigerator for up to 3 days. Make sure to cover it with a cake carrier or wrap it gently with plastic wrap to lock in moisture. If you’re planning to enjoy it later, let it come to room temperature for about 30 minutes before serving; this makes the flavors more vibrant and the cake even fluffier!
Can I freeze my Pink Velvet Cake?
Certainly! If you wish to freeze the unfrosted cake layers, allow them to cool completely, then wrap each layer tightly in plastic wrap and place them in an airtight container. You can store them in the freezer for up to 2 months. When you’re ready to frost, simply thaw the layers in the refrigerator overnight before decorating. It’s a great way to prepare ahead for a special occasion!
What if my cake turns out too dense or doesn’t rise?
Very! If your Pink Velvet Cake is dense, it might be due to overmixing the batter or not using cake flour, which is essential for a fluffy texture. Always mix the wet and dry ingredients just until combined. If your cake doesn’t rise properly, double-check that your baking powder and baking soda are fresh and active. They should create bubbles when mixed with wet ingredients; old leaveners can lead to less rise.
Can I make this cake dairy-free or gluten-free?
You absolutely can! For a dairy-free version, substitute unsalted butter with dairy-free margarine, and use plant-based milk with vinegar instead of buttermilk. For a gluten-free option, you can swap cake flour with a gluten-free blend or use all-purpose flour mixed with cornstarch. Just keep in mind that the texture might differ slightly, but you’ll have a cake that everyone can enjoy!
Is the Pink Velvet Cake safe for pets or people with allergies?
It’s very important to be cautious! This cake contains ingredients like eggs, dairy, and sugar that are not suitable for pets like dogs and cats. For those with allergens, check if they have sensitivities to certain ingredients, like gluten or dairy, and make substitutions accordingly. Always communicate with your guests to ensure everyone has a safe and delightful experience enjoying your delicious Pink Velvet Cake!
Fluffy Pink Velvet Cake with Creamy Frosting Bliss
Ingredients
Equipment
Method
- Preheat your oven to 355°F (180°C). While it warms up, prepare three 8” round baking pans by greasing them with butter and lining the bottoms with parchment paper.
- Cream together the unsalted butter, vegetable oil, granulated sugar, and sea salt in a large mixing bowl until fluffy, about 3-5 minutes.
- Incorporate the large egg whites one at a time, mixing well after each addition. Add the vanilla extract and vinegar, stirring until fully combined.
- Add the pink gel food coloring gradually, mixing until you achieve your desired rosy hue.
- Combine the sifted cake flour, baking powder, and baking soda alternately with the buttermilk, folding gently until just combined.
- Divide the batter evenly among the prepared pans. Bake for 15-18 minutes, or until a toothpick inserted in the center comes out clean.
- Cool the layers in the pans for about 10 minutes before transferring them to a wire rack to cool completely.
- Beat the softened cream cheese and unsalted butter together until creamy. Gradually add powdered sugar, mixing until smooth, then blend in vanilla extract.
- Assemble the cake by layering the cooled cake layers with the cream cheese frosting between. Spread a thin crumb coat around the sides and top, then chill for about 30 minutes.
- Decorate the chilled cake with more frosting, piping designs for a vintage effect if desired.