There’s something wonderfully therapeutic about the process of making your own sourdough starter. It all begins with just two humble ingredients: flour and water. As you combine them, a magical transformation takes place, sparking the beginning of a kitchen adventure that fills your home with the rich, enticing aroma of freshly baked bread. This easy sourdough starter recipe is perfect for those who are new to baking or seasoned pros looking to revisit the basics.
As I embarked on my journey to create this bubbly, tangy starter, I found it to be not just a method, but a meaningful ritual that connects us to ancient baking traditions. More than simply leavening, my starter has become a flavorful companion in the kitchen, bringing versatility to everything from crusty loaves to fluffy pancakes. Whether you’re tired of the same quick meals or yearning for the satisfaction of homemade goodness, this recipe promises to elevate your baking game without overwhelming you. Join me as we dive into the world of sourdough—your taste buds will thank you!

Why is this sourdough starter easy recipe perfect?
Ease of Use: This sourdough starter easy recipe is perfect for beginners, utilizing just flour and water for fuss-free preparation.
Rich Flavor: The fermentation process develops a delightful tang, giving your baked goods a depth of flavor that can’t be matched by store-bought alternatives.
Versatile Applications: Transform your starter into crusty bread, fluffy pancakes, or even delicious pizzas, making it a staple in your culinary repertoire.
Time-Saving: Once established, your starter requires minimal maintenance—just feed it weekly and use it as needed!
Culinary Connection: Embrace the art of traditional baking as you create your starter, connecting with generations of home bakers who have perfected this craft.
Sourdough Starter Easy Recipe Ingredients
For the Starter
- Organic Unbleached All-Purpose Flour – This provides the essential sugars needed for fermentation; consider incorporating whole wheat or rye flour for faster fermentation.
- Water – Vital for activating the flour and hydrating the mix; use dechlorinated room temperature water for optimal growth and avoid warm water to prevent over-fermentation.
How to Make Sourdough Starter Easy Recipe
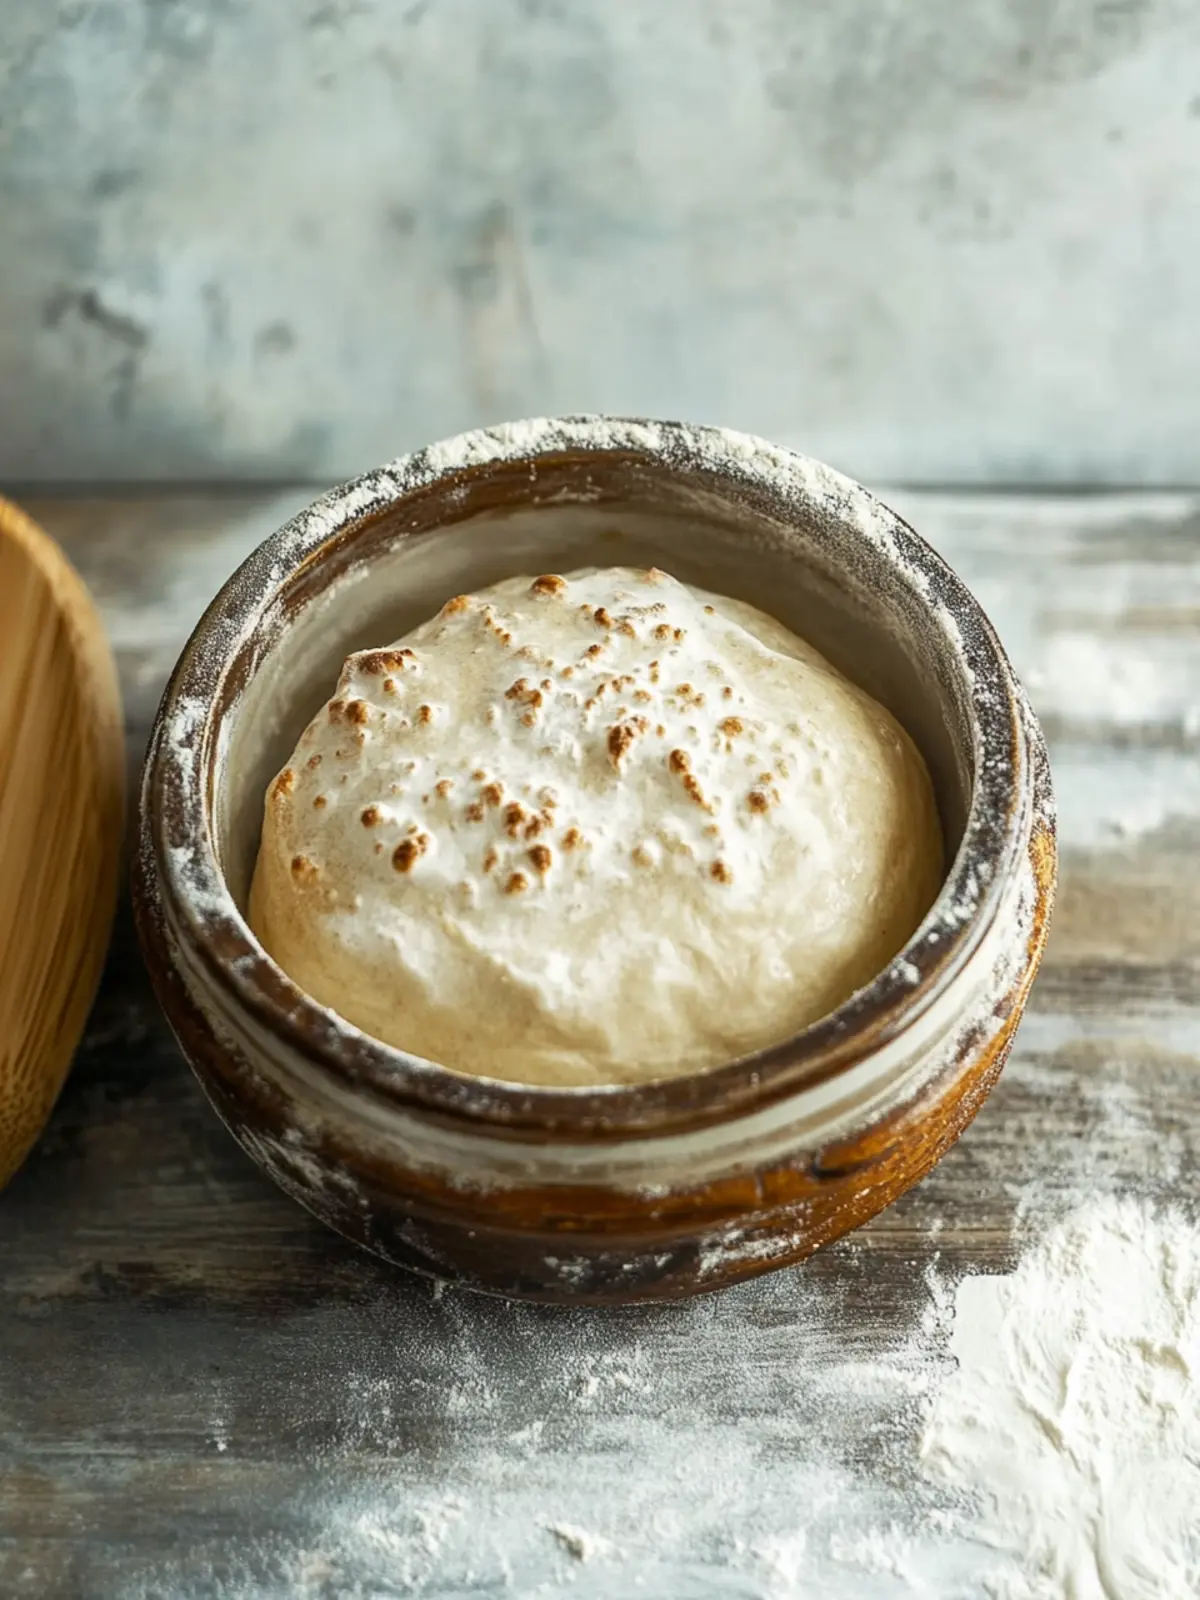
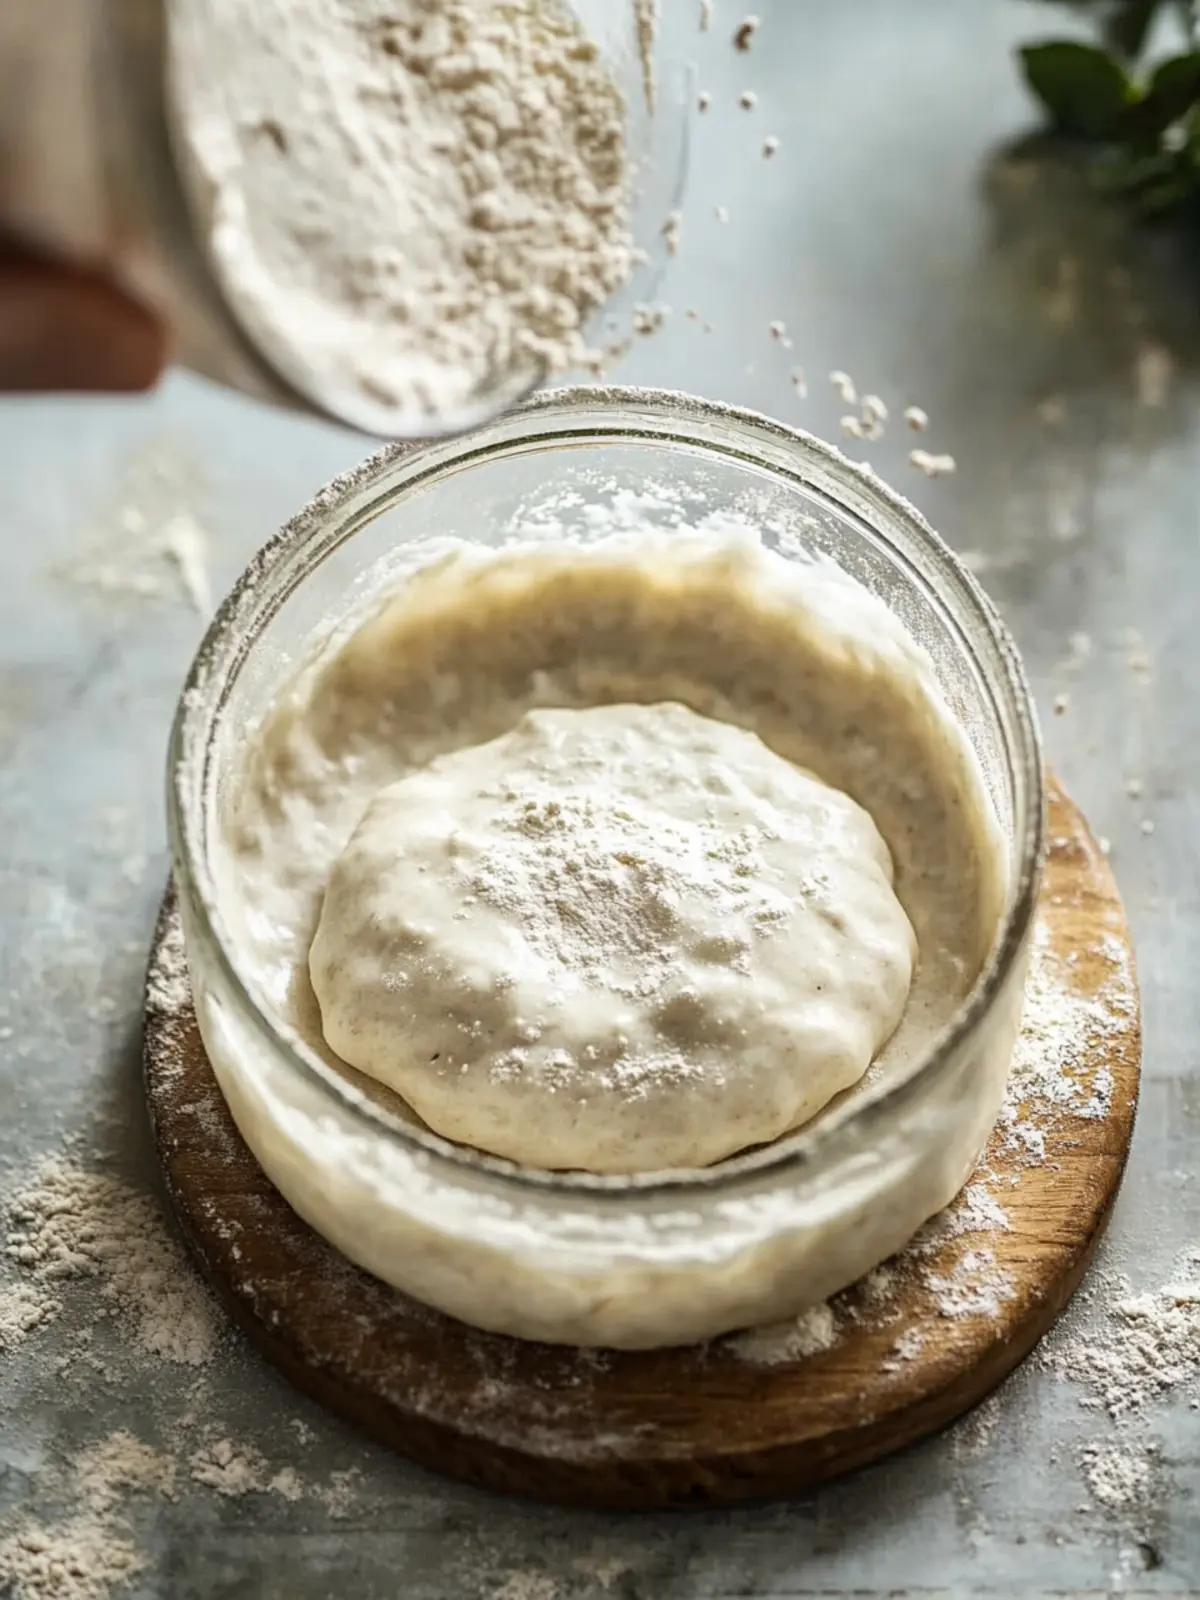
Combine Ingredients: In a clean glass jar, blend ½ cup of organic unbleached all-purpose flour with ¼ cup of room temperature, dechlorinated water. Stir gently until every bit of dry flour disappears, resulting in a thick pancake batter-like texture.
Cover and Rest: Loosely cover the jar with a lid or cloth. Place it in a warm spot, ideally around 68-85°F (20-29°C), and let it rest undisturbed for 24 hours to initiate fermentation.
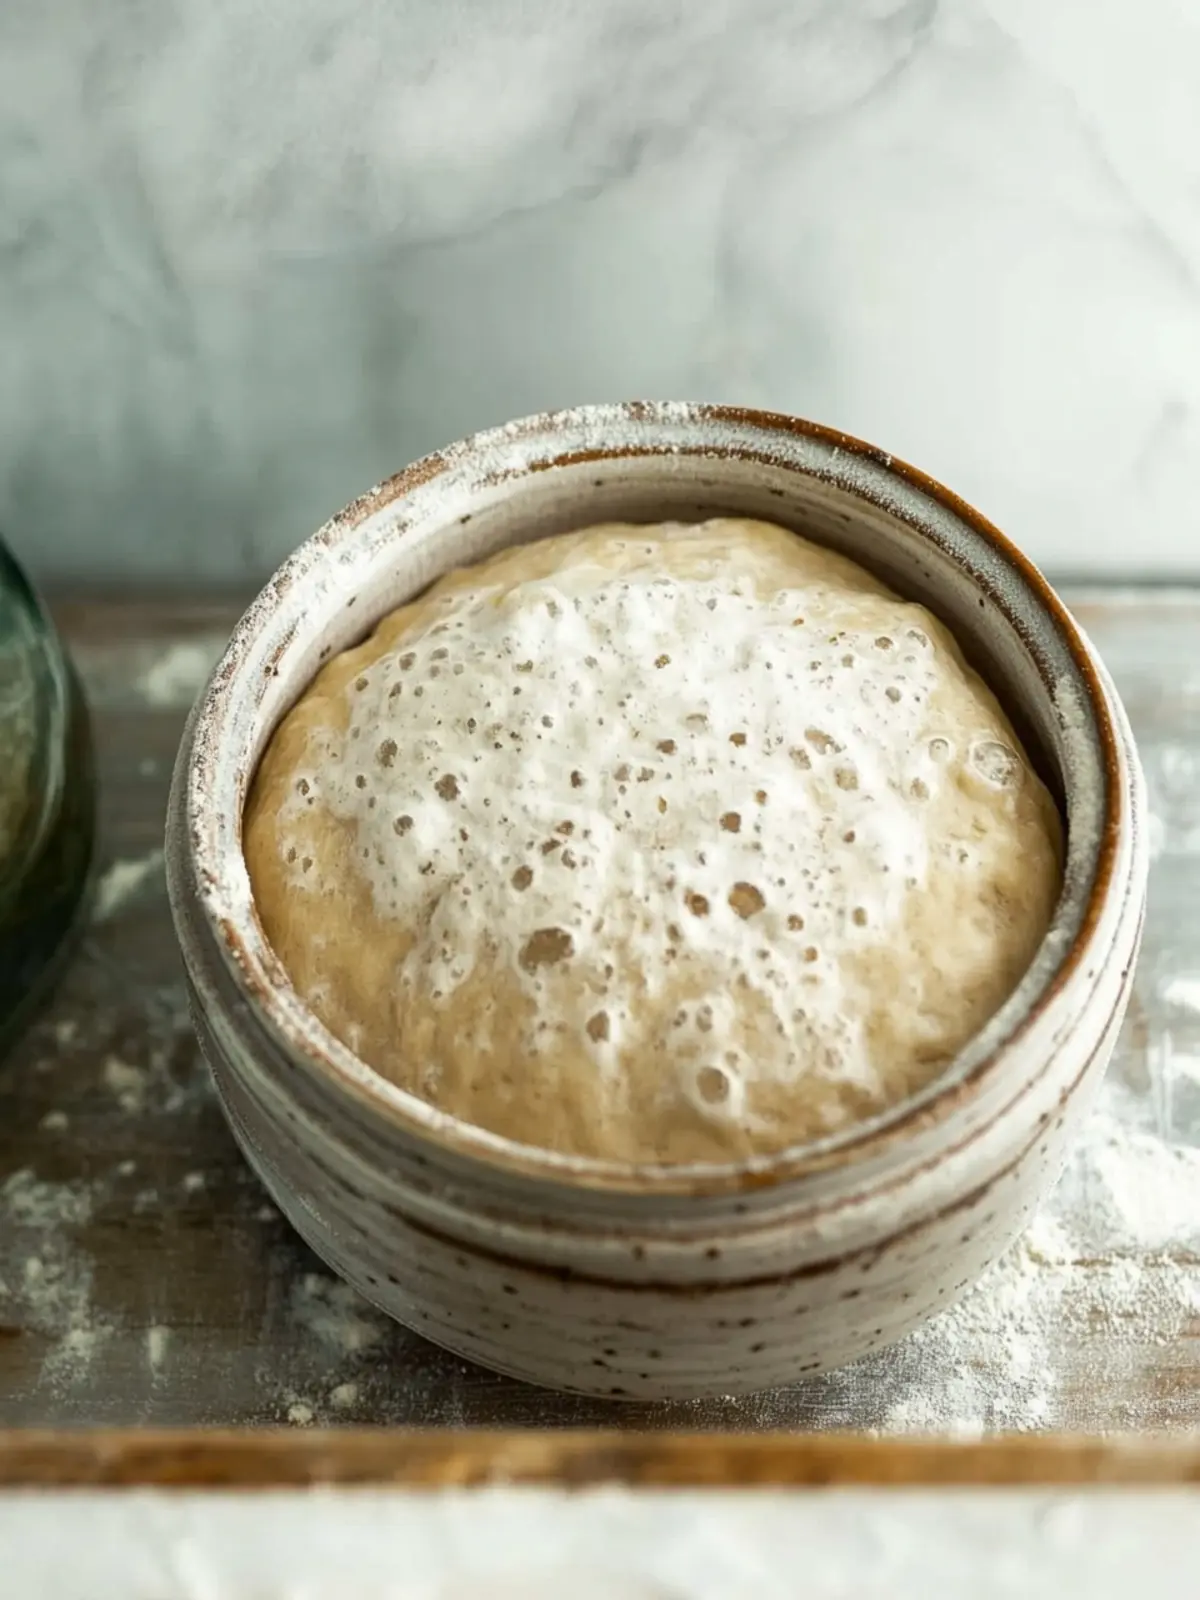
Feed the Starter: After 24 hours, it’s time to care for your starter! Discard about half of it—this keeps the growth manageable. Add back the same amount you removed, feeding with another ½ cup of flour and ¼ cup of water. Stir well and repeat this feeding every 24 hours.
Watch for Activity: Over the next 7 to 14 days, keep an eye on your starter. Look for bubbles and a pleasant, tangy aroma—this means fermentation is working its magic! You can also conduct a float test; if a spoonful floats in water, it’s ready for baking!
Store for the Long Haul: Once your starter is established, store it in the refrigerator if you’re not baking regularly. For long-term health, remember to feed it weekly by discarding half and replenishing with fresh flour and water.
Optional: For best results, always use non-reactive utensils to mix and store your starter.
Exact quantities are listed in the recipe card below.
Expert Tips for Sourdough Starter Easy Recipe
Perfect Temperature: Keep your starter in a warm spot. Cooler temperatures slow fermentation, leading to less bubbly results.
Non-Metal Utensils: Always use glass or plastic mixing utensils. Metal can react with the acids in the starter, affecting flavor and growth.
Feeding Frequency: If your starter rises too quickly, reduce feeding intervals to every 12 hours. This will ensure strong fermentation and vibrant activity, making your sourdough starter easy to maintain.
Observation is Key: Look for signs of activity, like bubbles and a tangy scent. If it doesn’t rise or develop smell, adjust temperature and feeding.
Embrace Discard: Don’t waste any of that precious starter when discarding! Use it in pancakes, muffins, or flatbreads to minimize waste and add flavor.
Sourdough Starter Easy Recipe Variations
Feel free to get creative with your sourdough starter as you embark on this baking adventure!
Whole Wheat: Substitute all-purpose flour with whole wheat to enhance flavor and nutrition while fostering robust fermentation. It adds a delightful nutty essence to your starter.
Rye Flour: Integrate rye flour for a more vigorous fermentation process—rye thrives on wild yeasts, improving the activity in your starter. This yields a beautifully rich and aromatic bread.
Extra Hydration: Increase the water content slightly to create a more liquid starter, which can yield a lighter, airier texture in your baked goods. Just a touch can make a huge difference!
Add Honey or Maple Syrup: Introducing a bit of natural sweetness can kickstart fermentation and introduces a subtle sweetness that pairs wonderfully with various breads.
Fruit Peel Infusion: Infuse your starter with the peels of organic apples or grapes to add natural yeast and enhance the fermentation process. This lends a unique flavor profile to your starter.
Herb-Infused: Stir in finely chopped fresh herbs like rosemary or thyme to give your starter a fragrant herbal twist, perfect for savory baked goods.
Spicy Kick: Add a pinch of cayenne or chili powder when mixing your starter for a subtle warmth that can elevate your bread or pancakes.
Sourdough Discard Recipes: Use discard in creative ways—think pancakes, waffles, or pasta for a tangy flavor experience, and reduce waste in the kitchen while enjoying delicious alternatives!
Let each variation inspire your next baking endeavor!
How to Store and Freeze Sourdough Starter
Fridge: Keep your sourdough starter in the refrigerator if not baking regularly; it can last up to 2 weeks without feeding, but be sure to feed it weekly for best results.
Freezer: For long-term storage, scoop out a portion of your active starter and place it in an airtight container; a frozen starter can last for up to 3 months.
Reactivation: To reactivate frozen sourdough starter, simply thaw it in the fridge overnight and feed it equal parts flour and water for 24 hours before using.
Feeding: When bringing your starter back into regular use, remember to discard half and feed it every 12 hours until it becomes bubbly and active again.
What to Serve with Sourdough Starter Easy Recipe?
Nothing enhances your sourdough adventure quite like delightful pairings that elevate your homemade creations.
- Crusty Sourdough Bread: Freshly baked bread from your starter provides a warm, chewy texture, serving as the perfect canvas for countless toppings.
- Homemade Pancakes: Use discard from your starter to whip up fluffy pancakes, adding a slight tang that elevates breakfast to new heights.
- Savory Flatbreads: Transform your starter into delicious flatbreads, ideal for wrapping around grilled vegetables or meats, fulfilling both heartiness and flavor.
- Artisan Pizza: Craft your own pizza dough with your active starter for a tender crust that highlights your favorite toppings with a gourmet touch.
- Buttery Soft Pretzels: The distinct sour notes from the dough make for pretzels that are both soft on the inside and crisp on the outside—perfect for snacking!
- Cheese Board Companions: Pair slices of your homemade bread with an array of cheeses and charcuterie for an inviting, shareable spread that’s hard to resist.
- Fresh Garden Salad: Balance the hearty aspects of your baked goods with a vibrant, crunchy salad, adding brightness and freshness to your meal.
- Craft Beer: Pair your sourdough creations with a refreshing craft beer, its hoppy notes complementing the tangy flavor of your baked goods beautifully.
- Homemade Jam: Slather your crusty bread with sweet homemade jam or preserves, offering a delightful contrast to the savory notes of sourdough.
- Warm Apple Crisp: End your meal on a sweet note with a delicious homemade apple crisp, a warm and comforting dessert to enjoy after your baking endeavors.
Make Ahead Options
These sourdough starter easy recipe tips are perfect for busy home cooks looking to save time! You can prepare the initial mixture of flour and water up to 24 hours in advance. Just combine ½ cup of flour and ¼ cup of room temperature, dechlorinated water in a clean glass jar and let it rest at room temperature. After this period, you can also establish your starter and store it in the refrigerator, which allows it to thrive for up to 2 weeks without feeding. When ready to use, simply take your starter out, discard half, and feed it with the usual measurements before baking. This way, you’ll enjoy fresh, homemade sourdough with minimal effort and just as delicious results!
Sourdough Starter Easy Recipe FAQs
What kind of flour should I use for my sourdough starter?
I recommend using organic unbleached all-purpose flour for a balanced fermentation process. However, you can incorporate whole wheat or rye flour, especially in the initial feedings, to jumpstart yeast activity, as they contain more natural sugars.
How should I store my sourdough starter?
Once your sourdough starter is established, store it in the refrigerator if you’re not baking frequently. It can last up to 2 weeks without feeding. To maintain its activity, I suggest feeding it weekly by discarding half and replenishing with fresh flour and water.
Can I freeze my sourdough starter?
Absolutely! To freeze your sourdough starter, scoop out a portion of your active starter and place it in an airtight container. A frozen starter can last for up to 3 months. When you’re ready to use it again, simply thaw it in the fridge overnight, then feed it equal parts flour and water for 24 hours.
What if my sourdough starter isn’t bubbling?
If your starter isn’t bubbling, check its temperature and feeding schedule. It may need a warmer spot, as too cool of an environment can slow fermentation. Ensure you’re feeding it regularly and always discard half before replenishing. If it’s been inactive for a while, try increasing feedings to every 12 hours until you see activity.
Is sourdough starter safe for pets?
Great question! Generally, sourdough starter can be safe for pets in small amounts, but consult your vet to be sure, especially if they have specific dietary needs or allergies. Always keep in mind that ingredients other than the starter itself (like added sugars or seasonings) might not be suitable for pets.
Can I use the discard in other recipes?
Yes, don’t let that discard go to waste! Use it in pancakes, waffles, or flatbreads. It adds a unique flavor and texture to dishes! Simply replace some of the flour and liquid in these recipes with your discard, and enjoy minimizing waste while still baking delicious goodies.
Sourdough Starter Easy Recipe for Effortless Baking Delight
Ingredients
Equipment
Method
- Combine Ingredients: In a clean glass jar, blend ½ cup of organic unbleached all-purpose flour with ¼ cup of room temperature, dechlorinated water. Stir gently until every bit of dry flour disappears, resulting in a thick pancake batter-like texture.
- Cover and Rest: Loosely cover the jar with a lid or cloth. Place it in a warm spot, ideally around 68-85°F (20-29°C), and let it rest undisturbed for 24 hours to initiate fermentation.
- Feed the Starter: After 24 hours, discard about half of the starter. Add back ½ cup of flour and ¼ cup of water. Stir well and repeat this every 24 hours.
- Watch for Activity: Over the next 7 to 14 days, look for bubbles and a pleasant, tangy aroma. Conduct a float test to see if it’s ready for baking!
- Store for the Long Haul: Once established, store in the refrigerator if not baking regularly. Feed it weekly.