Imagine sinking your teeth into a velvety, luscious cheesecake filling that whispers of white chocolate’s creamy sweetness, then following it with the bright, tangy burst of fresh kiwi. Now shrink that experience down into a perfect two-bite mini cheesecake—and you’ve got a dessert that’s as elegant for dinner parties as it is delightful for everyday treats.
In this post, we’ll explore everything you need to know to master these White Chocolate and Kiwi Mini Cheesecakes, from ingredient breakdowns and step-by-step technique to pro tips, creative variations, styling and serving suggestions, storage advice, and answers to your most pressing FAQs. Let’s dive in!
Why Mini Cheesecakes?
- Portion control – No guilt over a giant slice.
- Elegance – Individually portioned desserts always impress.
- Versatility – Easily adapted to different flavors and toppings.
- Make-ahead friendly – Bake now, garnish later.
Whether you’re hosting a bridal shower, planning a weekend brunch, or simply craving a sweet-tart pick-me-up, mini cheesecakes deliver maximum impact in minimal form.
Table of Contents
- The Story Behind This Recipe
- Ingredient Deep Dive
- Equipment You’ll Need
- Step-by-Step Instructions
- Pro Tips for Perfect Mini Cheesecakes
- Flavor Variations & Mix-Ins
- Styling & Serving Suggestions
- Make-Ahead, Storage & Freezing
- Nutritional Snapshot
- Troubleshooting & FAQs
- Final Thoughts
1. The Story Behind This Recipe

Cheesecake is a perennial favorite in many cultures—its origins trace back to ancient Greece, where a simple cake made of cheese, flour, and honey was served to athletes during the first Olympic Games in 776 BCE. Fast-forward through centuries of culinary evolution, and you arrive at the classic New York-style cheesecake: dense, rich, and unapologetically indulgent.
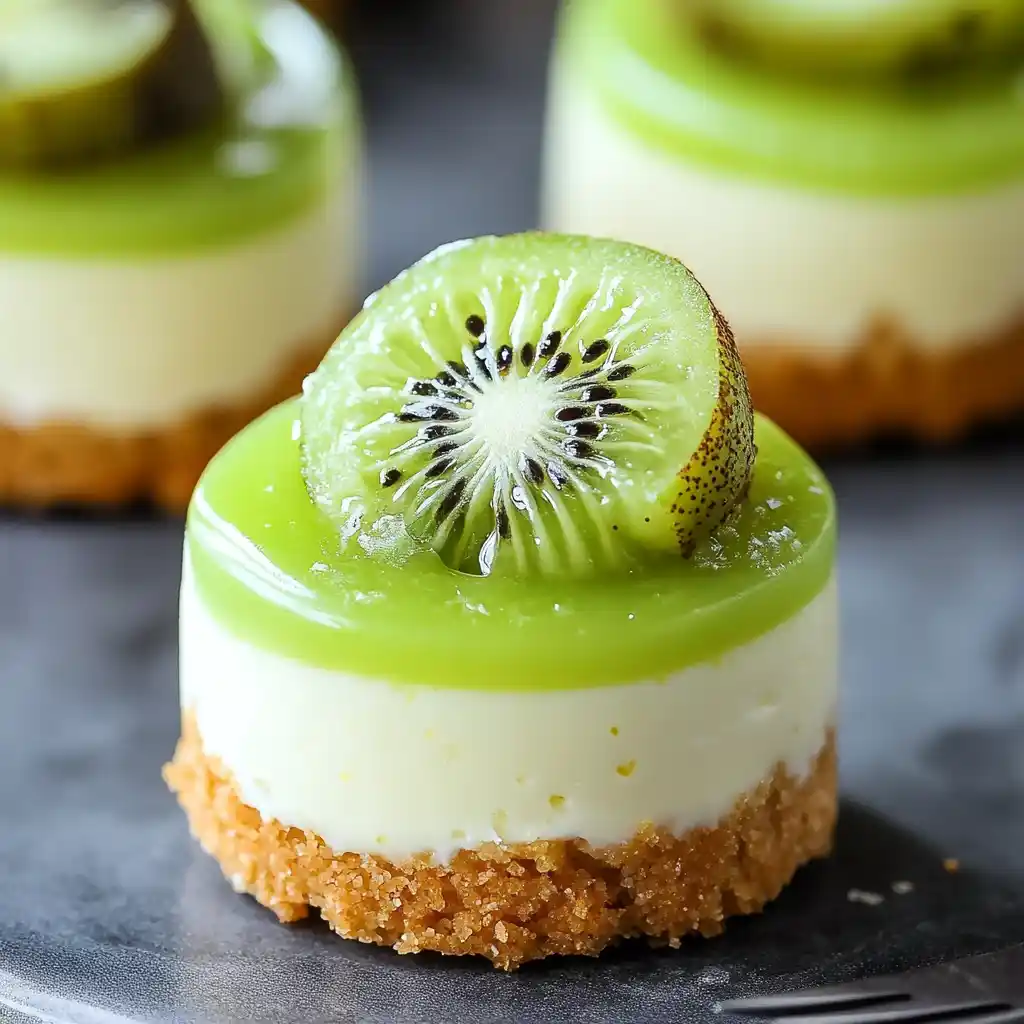
Mini cheesecakes, however, are a more modern reinvention—perfect for entertaining, portion control, and endless creativity. In this version, we marry the sweetness of white chocolate with the fresh acidity of kiwi, creating a flavor contrast that feels both elegant and playful. The bright green kiwi on top isn’t just for looks; it provides a refreshing counterpoint that keeps each bite balanced.
2. Ingredient Deep Dive
| Ingredient | Role in the Recipe | Pro Tips & Substitutions |
|---|---|---|
| Graham cracker crumbs (1½ cups) | Forms the buttery, crunchy crust. | Substitute digestive biscuits or vanilla wafers for variation. |
| Unsalted butter (¼ cup, melted) | Binds crumbs; adds richness. | Use salted butter—just omit any extra salt in filling. |
| Cream cheese (8 oz, softened) | The creamy base of the cheesecake filling. | Full-fat yields best texture; Neufchâtel for lower fat. |
| Granulated sugar (¼ cup) | Sweetens and stabilizes filling. | Swap for coconut sugar or maple sugar (adds slight molasses note). |
| Vanilla extract (½ tsp) | Enhances overall flavor. | Use vanilla bean paste for speckles and intense aroma. |
| White chocolate (4 oz, melted) | Adds luscious sweetness and smooth texture. | Use high-quality couverture chocolate for best melt. |
| Heavy cream (¼ cup) | Lightens filling, improves mouthfeel. | Half-and-half works in a pinch, but texture will be slightly denser. |
| Fresh kiwis (4–5, peeled & sliced) | Topping that adds tangy brightness and visual pop. | Substitute thin slices of strawberry, mango, or passion fruit. |
Why white chocolate?
Unlike dark or milk chocolate, white chocolate is made from cocoa butter, sugar, and milk solids—no cocoa solids—so it lends a delicate, sweet creaminess that pairs beautifully with tart fruit.
Why kiwi?
Kiwi brings a tropical zing, vitamin C boost, and gorgeous chartreuse color. Its fine seeds offer a pleasant textural contrast.
3. Equipment You’ll Need
- Standard muffin tin (12-cup)
- Paper liners or reusable silicone liners
- Mixing bowls (one for crust, one for filling)
- Electric hand mixer or stand mixer with paddle attachment
- Small saucepan or double boiler (for melting white chocolate)
- Measuring cups & spoons
- Spatula and scoop (for portioning filling)
Optional but helpful:
- Offset spatula for smoothing tops
- Piping bag to pipe filling neatly
4. Step-by-Step Instructions

4.1 Prep & Crust (5 minutes)
- Preheat oven to 325 °F (160 °C).
- Line each muffin cup with a paper liner.
- Combine 1½ cups graham cracker crumbs + ¼ cup melted butter in a bowl. Stir until evenly moistened.
- Press about 1 Tbsp of crumb mixture into the bottom of each liner, forming a compact crust.
4.2 Filling (10 minutes)
- Beat 8 oz softened cream cheese, ¼ cup sugar, and ½ tsp vanilla on medium speed until smooth and creamy (about 2 minutes).
- Melt 4 oz white chocolate in a small saucepan over low heat (or double boiler), stirring constantly. Let cool slightly.
- Add melted white chocolate and ¼ cup heavy cream to the cream cheese mixture. Beat on low until combined, then on medium until fully incorporated and silky.
4.3 Bake (15–18 minutes)
- Divide filling evenly among the 12 crusts (about 2 Tbsp each). Smooth tops.
- Bake for 15–18 minutes, until the edges are set and centers still jiggle slightly.
- Cool in the pan on a wire rack to room temperature (about 30 minutes).
4.4 Chill & Top (2 hours +)
- Refrigerate for at least 2 hours (or overnight) to let flavors meld and texture firm up.
- Top each mini cheesecake with a drizzle of white chocolate ganache (optional: melt extra white chocolate with 1 Tbsp cream) and a fresh kiwi slice.
- Serve chilled.
Total time: 2 hrs 35 mins (20 mins prep, 15 mins bake, 2 hrs chill). Makes 12 mini cheesecakes.
5. Pro Tips for Perfect Mini Cheesecakes
- Room-temperature ingredients: Ensures a lump-free filling.
- Don’t overmix: Overbeating can incorporate air, leading to cracks. Mix until just smooth.
- Bain-marie hack (optional): Place the muffin tin on a larger baking pan filled with an inch of hot water—this gentle steam helps prevent cracking.
- Jiggle test: Centers should wobble slightly when done; they’ll firm up as they cool.
- Cooling gradually: After the oven, leave cheesecakes in turned-off oven with door ajar for 15 minutes to avoid sudden temperature changes.
- Neat tops: Use an offset spatula or pipe filling for perfectly smooth surfaces.
- Sharp knife for slicing kiwi: Ensures clean, attractive fruit slices.
6. Flavor Variations & Mix-Ins
- Berry Bliss: Swap kiwi for raspberries or blueberries; swirl in a spoonful of raspberry coulis.
- Tropical Twist: Top with mango cubes and shredded coconut; sprinkle toasted coconut flakes.
- Citrus Zing: Fold in zest of ½ lemon or lime into the filling; top with candied citrus segments.
- Matcha Magic: Add 1 tsp matcha powder to filling for subtle green tea flavor; garnish with kiwi and edible flowers.
- Chocolate Hazelnut: Drizzle Nutella or melted dark chocolate; sprinkle chopped toasted hazelnuts.
Feel free to experiment: these mini cheesecakes are a perfect canvas for seasonal fruits, flavored extracts (almond, coconut), or liqueurs (Grand Marnier, Chambord).
7. Styling & Serving Suggestions
- Garnish ideas: Mint sprigs, edible flowers, toasted coconut, citrus zest.
- Plating: Arrange on a white or glass platter for color contrast.
- Accompaniments: Serve alongside a dollop of lightly sweetened whipped cream or a small scoop of sorbet (kiwi, lemon, or raspberry).
- Beverage pairings:
- Champagne or Prosecco – the bubbles cut through richness.
- Green tea – complements kiwi’s freshness.
- Iced coffee – for a sweet-tart afternoon pick-me-up.
8. Make-Ahead, Storage & Freezing
| Storage Method | Duration | Tips |
|---|---|---|
| Refrigerator | Up to 3 days | Store in an airtight container; add kiwi just before serving. |
| Freezer (untopped) | Up to 1 month | Freeze on a tray, then transfer to freezer bag. Thaw overnight in fridge. |
| Make-ahead assembly | Bake & chill up to 24 hrs ahead | Keep fruit toppings separate until serving. |
9. Nutritional Snapshot (per mini cheesecake, approximate)

- Calories: 230 kcal
- Fat: 16 g
- Carbohydrates: 18 g
- Protein: 3 g
- Sugar: 10 g
Note: Values vary based on brands and exact portion sizes.
10. Troubleshooting & FAQs
Q1: Why did my cheesecake crack?
A: Likely from overmixing (too much air) or sudden temperature change. Use gentle mixing and allow gradual cooling (oven door ajar).
Q2: My filling is grainy—what went wrong?
A: White chocolate can seize if overheated. Melt gently over low heat or a double boiler, stirring constantly.
Q3: Can I use low-fat cream cheese?
A: You can, but texture may be less creamy and more dense. Full-fat yields best results.
Q4: How can I make ganache drizzles neat?
A: Warm ganache to a pourable consistency, then use a small spoon or piping bag with a tiny tip for controlled drizzles.
Q5: Kiwi slices brown quickly—any workaround?
A: Brush kiwi with a thin glaze of warmed apricot jam or simple syrup to seal and preserve color.
11. Final Thoughts
White Chocolate and Kiwi Mini Cheesecakes strike the perfect balance between indulgent creaminess and bright, fruity zing. Their individual size makes them an entertainer’s dream—elegant, customizable, and crowd-pleasing. With simple pantry staples and fresh kiwis, you can transform an ordinary gathering into a memorable celebration.
Whether you stick to the classic recipe or explore one of the many flavor variations, these mini cheesecakes will quickly become a favorite in your dessert repertoire. Give them a try, and don’t forget to share your creations—because life’s too short not to savor every sweet, tangy bite!