There’s something utterly enchanting about the way crispy kataifi pastry transforms into a warm, gooey masterpiece when layered with mozzarella cheese. This kunafa recipe makes it possible to bring that magic right into your kitchen, combining ease and elegance in a single delightful dish. I first encountered this Middle Eastern treat during a festive gathering, where the sweet aroma and golden strands captivated my senses, and I’ve been hooked ever since.
What I love most is just how accessible kunafa can be—no frying involved, and you can whip it up with just 15 minutes of prep time. Whether you’re hosting a special celebration or simply indulging in a sweet craving, this crispy, cheesy delight is sure to impress everyone at the table. Plus, there’s a charming option to create mini kunafa treats that are perfect for sharing. So, let’s dive into the world of homemade kunafa and sweeten our lives one delicious layer at a time!

Why is this kunafa recipe a must-try?
Accessibility: This kunafa recipe makes it easy for anyone to recreate the magic of Middle Eastern desserts without any frying needed!
Quick Prep: With only 15 minutes of prep time, you’ll have a delightful dish ready in no time.
Versatile: Feel free to experiment with different fillings or make mini kunafa for bite-sized gatherings.
Crowd-Pleasing: The combination of crispy layers and gooey mozzarella cheese is sure to impress family and friends.
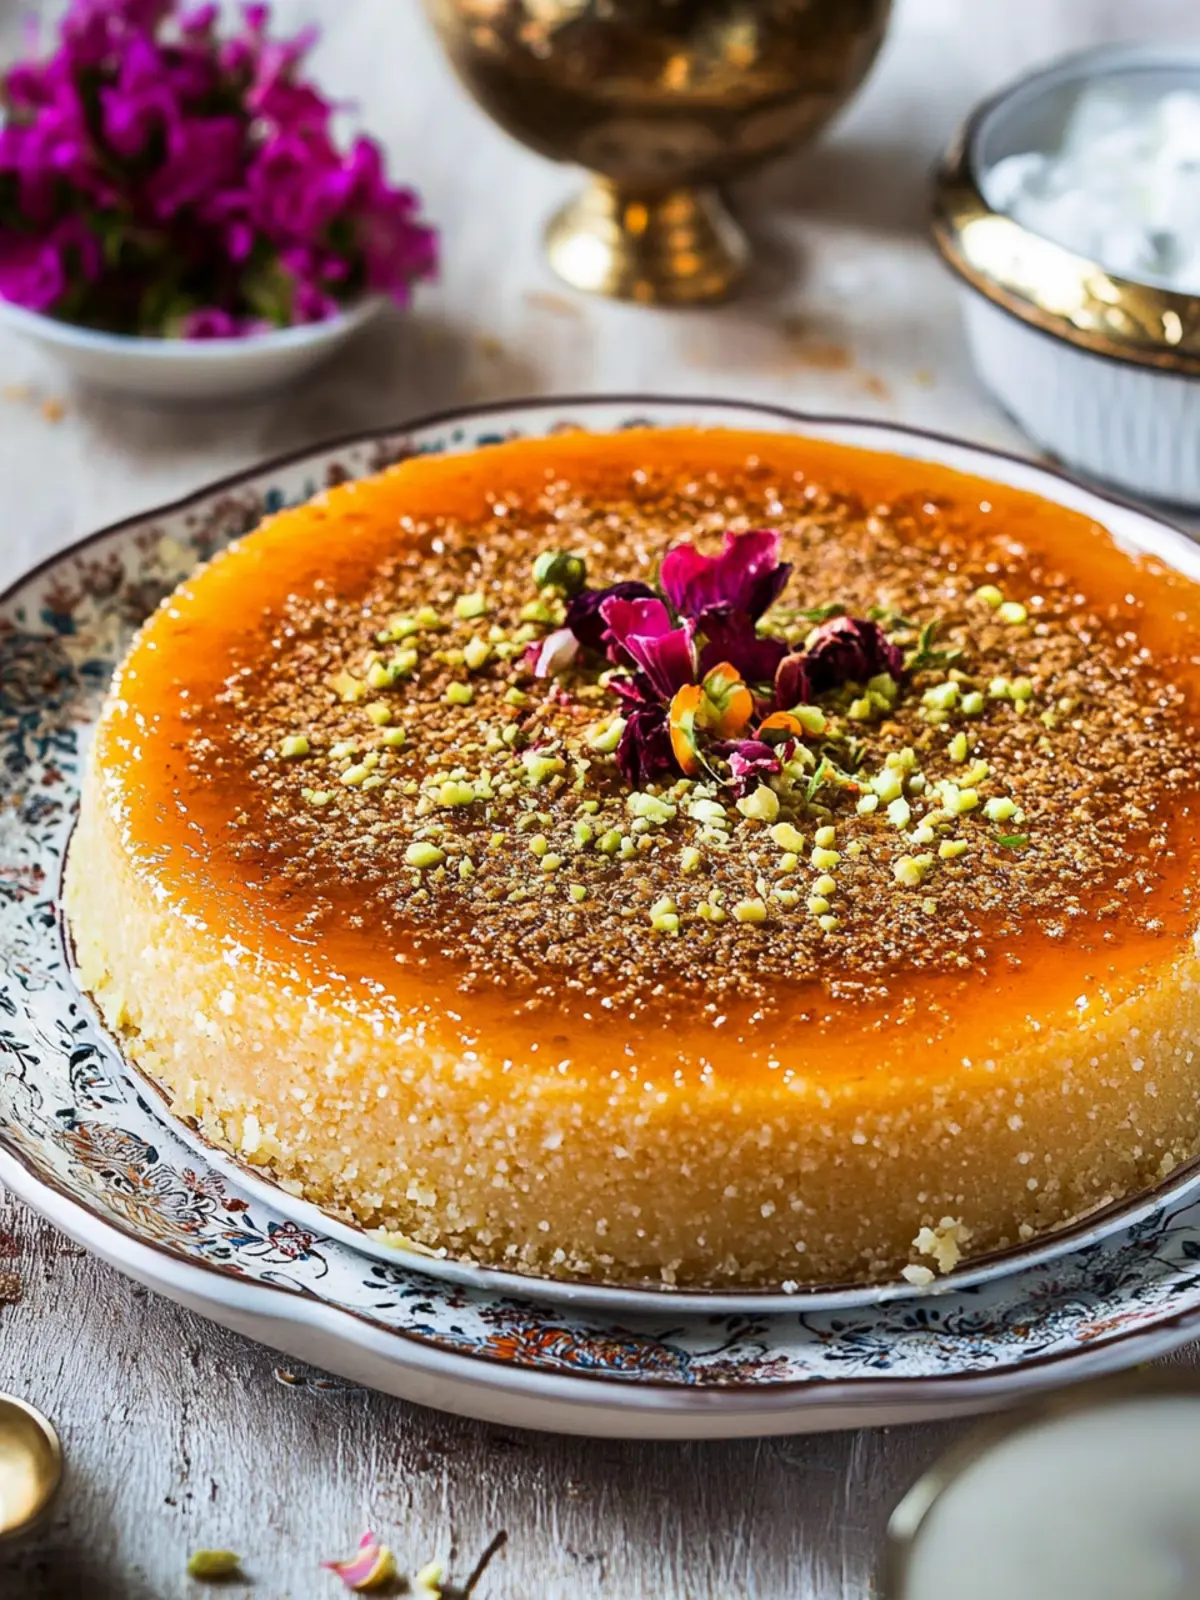
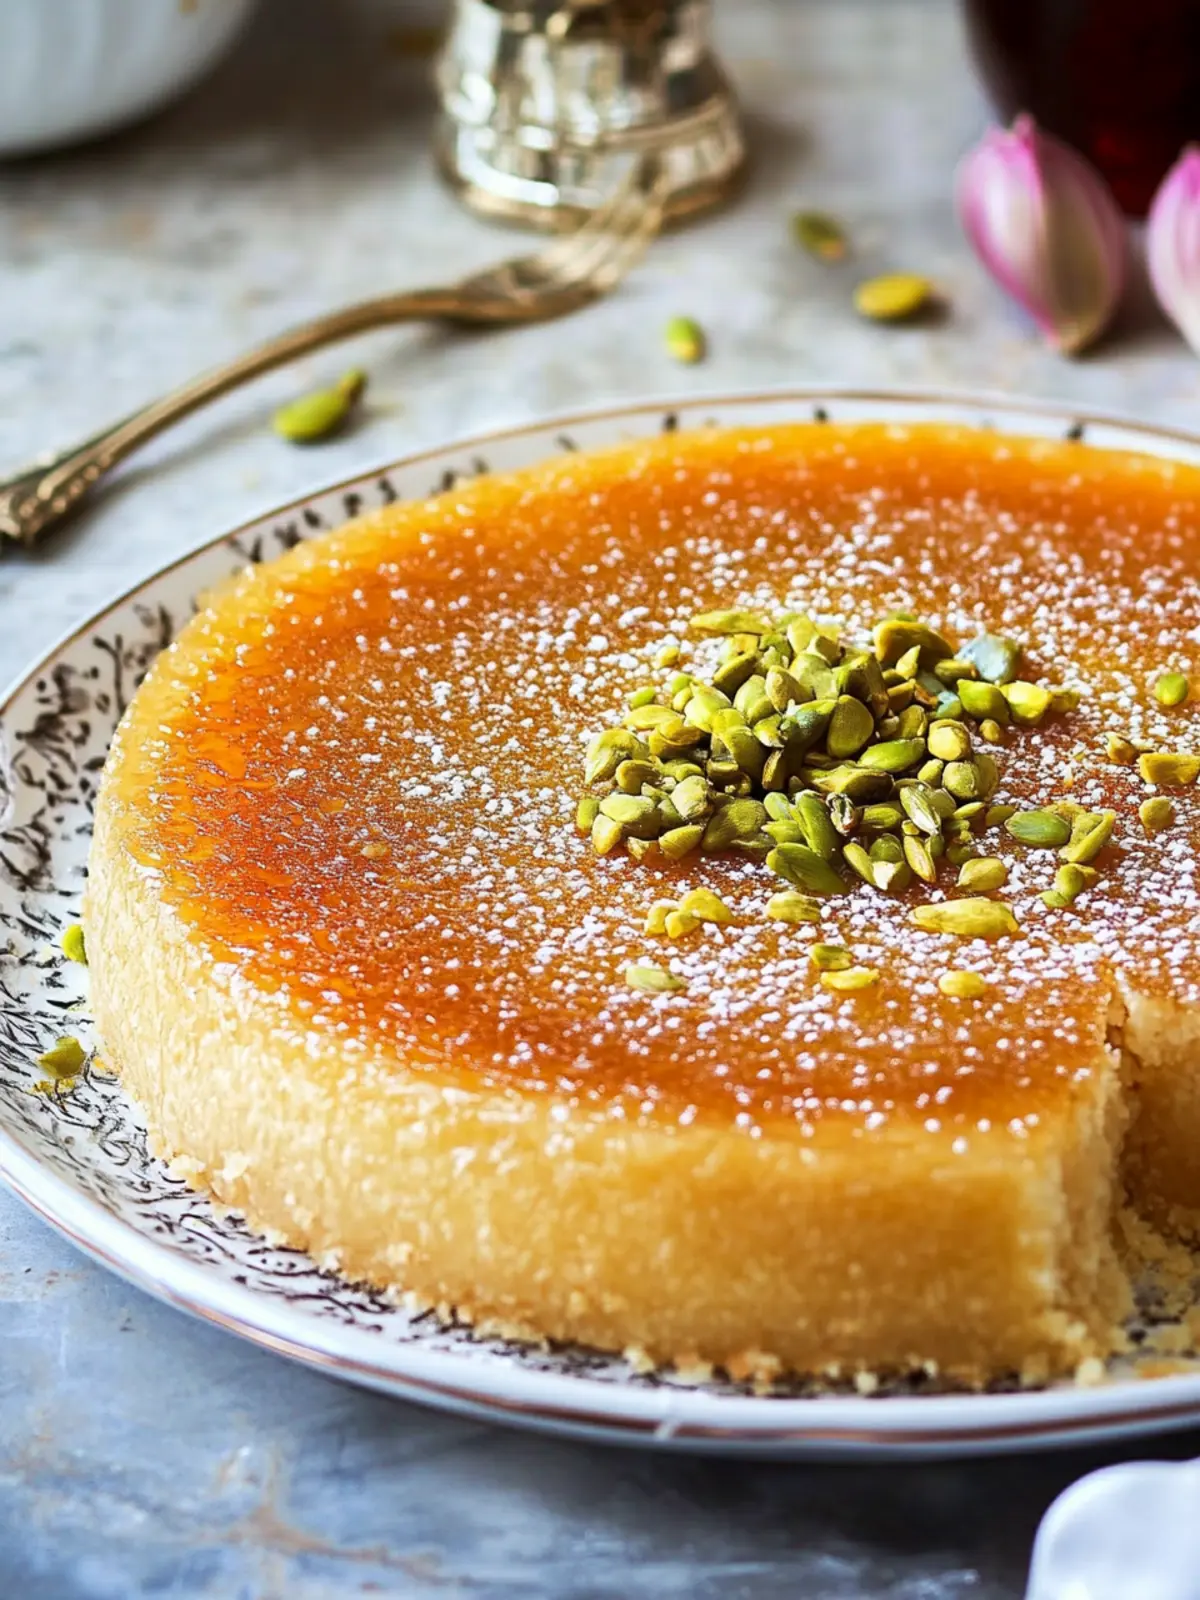
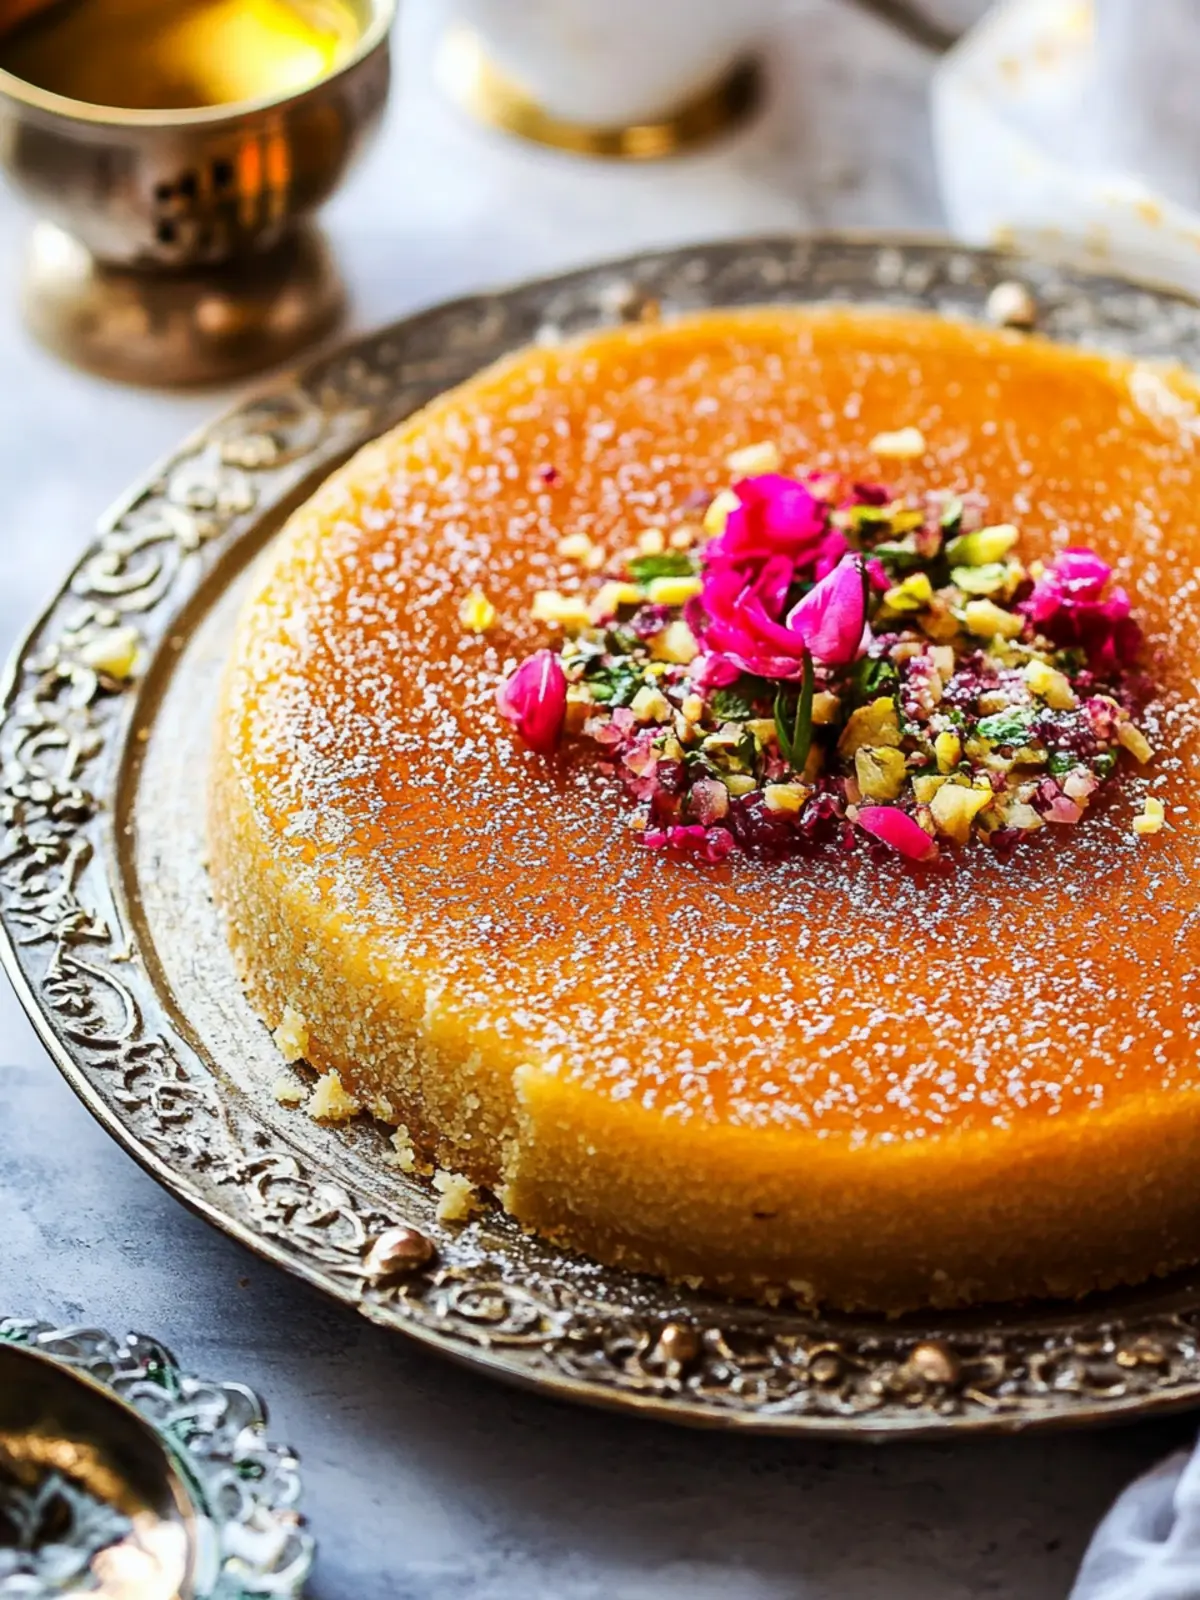
Elegant Presentation: Garnished with crushed pistachios and a drizzle of syrup, this kunafa looks as delightful as it tastes!
Easy kunafa recipe Ingredients
For the Kunafa
• Kataifi Dough – Shredded phyllo pastry providing a crispy base; remember to defrost it before use!
• Mozzarella Cheese – Adds that luscious, gooey texture; opt for high-moisture mozzarella (50% or more) for best results.
• Melted Butter – Essential for binding the kataifi; ensure every strand is well coated for optimal crunch.
• Thick Cream – Introduces richness to the filling; can be swapped with ricotta for a different flavor profile.
For the Simple Syrup
• Sugar – Sweetens your syrup; vital for balancing the dessert’s flavors.
• Water – Mixes with sugar to create the syrup consistency; use fresh for the best flavor.
• Lemon Juice – Cuts through the sweetness and enhances flavor.
• Rose Water or Orange Blossom Water (optional) – Infuses a delightful floral aroma into your syrup.
For Garnishing
• Crushed Pistachios – Provides a lovely textural contrast and bright color for presentation.
• Dry Rose Petals (optional) – Elevates the dessert’s elegance, perfect for special occasions.
How to Make Kunafa
Prepare Simple Syrup: Combine water, sugar, and lemon juice in a saucepan. Bring to a boil, then reduce heat and simmer for about 10 minutes. Once cooled, add rose water for fragrance.
Thaw Kataifi Dough: Remove frozen kataifi dough from the freezer and let it sit at room temperature for one hour to ensure it’s pliable and easy to work with.
Preheat Oven: Set your oven to 350°F (175°C) to get it ready for baking your delicious kunafa.
Prepare Cheese Mix: Shred the mozzarella cheese and blend it with thick cream until well combined, creating a rich and gooey filling.
Break Up Dough: Place the kataifi dough into a food processor or simply use your hands to break it into smaller, manageable pieces. This will help with even layering.
Coat Dough: Pour melted butter over the shredded kataifi and mix thoroughly. Each strand should be well coated to ensure maximum crispiness when baked.
Layer in Pan: Spoon half of the kataifi mixture into a buttered baking pan, packing it down lightly. Spread the cheese mixture evenly on top, then cover it with the remaining kataifi, again packing it gently.
Bake: Place in the oven and bake for 40-50 minutes, or until the top is beautifully golden brown and crispy.
Drizzle Syrup: Remove the kunafa from the oven and pour ¾ of the cooled syrup over it. Let the syrup soak into the hot kunafa, saving some for serving.
Invert and Garnish: Allow the kunafa to cool for a few minutes, then carefully invert it onto a platter. Finish by garnishing with crushed pistachios for added visual appeal and texture, and serve warm.
Optional: Add a sprinkle of dry rose petals for an elegant touch.
Exact quantities are listed in the recipe card below.
How to Store and Freeze Kunafa
Room Temperature: Store leftover kunafa at room temperature in an airtight container for up to 2 days to maintain its delightful texture.
Fridge: If not consumed within two days, place the kunafa in the refrigerator in an airtight container. It can stay fresh for up to 5 days, though it may lose some crispiness.
Freezer: For longer storage, freeze individual pieces of kunafa wrapped tightly in plastic wrap, then placed in a freezer bag. It can last up to 2 months; just remember to label them!
Reheating: To restore crispiness, reheat the kunafa in a preheated oven at 350°F (175°C) for about 10-15 minutes. Enjoy this tasty kunafa recipe at its best!
What to Serve with Kunafa with Mozzarella Cheese?
To create a delightful spread that enhances your kunafa experience, consider these tempting pairings that bring balance and flavor to the table.
- Mint Tea: The refreshing notes of mint tea beautifully complement the sweetness of kunafa, making it a classic pairing for Middle Eastern desserts.
- Baklava Bites: Adding more layers of flavor, these nutty, syrup-soaked treats contrast the soft cheese filling for an irresistible dessert duo.
- Fresh Fruits: Seasonal fruits like pomegranate or citrus provide a bright, juicy contrast, cleansing the palate between bites of rich kunafa.
- Arabic Coffee: With its aromatic spices, Arabic coffee balances the sweetness of your kunafa and offers a warm, comforting finish to the meal.
- Yogurt Sauce: A dollop of smooth, tangy yogurt with a sprinkle of cayenne provides a unique twist that cuts through the sweetness. The creaminess pairs surprisingly well.
- Chocolate Mousse: For an indulgent dessert table, light and airy chocolate mousse delivers a rich yet airy texture that balances the dense kunafa.
- Rose Sorbet: Refreshingly cool with hints of floral, this sorbet not only complements the flavors but also offers a whimsical touch to the dessert experience.
- Crushed Nuts: A sprinkle of toasted almonds or walnuts on top of your kunafa enhances texture and adds a delightful crunch to every bite.
- Cinnamon Ice Cream: This creamy treat brings warmth and spice, harmonizing beautifully with the kunafa’s crispy layers and gooey filling.
Explore these pairings to create a memorable feast that celebrates the magic of your homemade kunafa!
Make Ahead Options
These kunafa recipe preparations are perfect for busy home cooks seeking to save time! You can prepare the simple syrup and refrigerate it for up to 3 days ahead of time, allowing the flavors to marry beautifully. Additionally, you can assemble the kunafa, layering the cheese mixture within the kataifi, and cover it tightly with plastic wrap to refrigerate for up to 24 hours before baking. This ensures that your kunafa is just as delicious but saves you valuable time on the day of serving. When you’re ready to bake, simply preheat the oven and follow the baking instructions, ensuring a warm, crispy dessert that will wow your guests!
Expert Tips for Kunafa Recipe
• Keep Dough Moist: Ensure kataifi strands remain adequately moist but not overly wet; too much butter can make them greasy.
• Watch the Bake: Check the kunafa regularly while baking; if it browns too fast, cover with foil to prevent burning.
• Syrup Soaking: Allow the kunafa to absorb the syrup while it’s hot; this enhances the sweet flavor and texture.
• Experiment with Fillings: Feel free to mix in nuts or dried fruits with the cheese; it adds an exciting twist to your kunafa recipe.
• Mini Versions: For petite portions, bake in muffin tins; adjust the baking time to avoid overcooking.
Kunafa Recipe Variations
Feel free to explore these delightful twists that will add a personal touch to your kunafa experience!
- Cheese Swap: Try using ricotta for a creamier texture instead of mozzarella. It’s a luscious alternative that will intrigue your taste buds.
- Nutty Addition: Mix chopped walnuts or almonds into the cheese layer for a pleasing crunch that pairs beautifully with the gooey filling.
- Fruit Infusion: Add some dried fruits, like raisins or apricots, into the filling for a burst of natural sweetness and flavor.
- Herb Breeze: Enhance the syrup with a hint of fresh mint or basil for an unexpected herbal note that freshens up your dessert.
- Cocoa Twist: For a chocolatey version, stir in some cocoa powder into the cheese mix. The chocolatey surprise will elevate your kunafa into a whole new realm!
- Mini Kunafa: Use muffin tins to create adorable mini kunafa bites. Perfect for parties, these individual portions are delightful and easy to share.
- Spicy Kick: Add a pinch of cinnamon or cardamom to the sugar syrup for a warm flavor that dances on your palate.
- Vegan Option: Substitute the butter with coconut oil and use a plant-based cream to create a vegan version that everyone can enjoy!
No matter which variation you choose, your kunafa will always remain a heartwarming treat!
Kunafa with Mozzarella Cheese Recipe FAQs
What type of kataifi dough should I use for this kunafa recipe?
You should use high-quality shredded phyllo pastry, commonly referred to as kataifi dough. It is essential to defrost it well before using to ensure it retains its texture and crisps beautifully when baked. Leaving the frozen dough at room temperature for about an hour usually does the trick!
How should I store leftover kunafa?
To keep your leftover kunafa at its best, store it at room temperature in an airtight container for up to 2 days. If you notice any loss of crunchiness, simply reheat in a preheated oven at 350°F (175°C) for about 10-15 minutes before serving.
Can I freeze kunafa once it’s baked?
Absolutely! To freeze your kunafa, first allow it to cool completely. Then, wrap individual pieces tightly in plastic wrap, and place them in a freezer bag or airtight container. They can last up to 2 months—just don’t forget to label them for easy identification!
What if my kunafa is too soggy or not crispy enough?
If you find that your kunafa is a bit soggy, it could be due to excess butter or not enough baking time. Ensure that the kataifi is well-coated but not dripping, and always bake it until golden brown and crispy. If the top browns too quickly, cover it loosely with foil and continue baking until it’s fully cooked through.
Is there a way to make this kunafa recipe suitable for those with allergies?
Certainly! You can substitute the mozzarella cheese with dairy-free cheese alternatives for a non-dairy version. Additionally, if you have gluten sensitivities, look for gluten-free kataifi dough or consider creating a base using ground nuts or gluten-free flours. Just be sure to check ingredient labels for potential allergens!
How long does it take to prepare this kunafa recipe?
This delicious kunafa recipe requires only about 15 minutes of prep time before it goes into the oven. With some organization and readiness, you’ll be indulging in this delightful Middle Eastern treat before you know it!
Kunafa Recipe: Quick Cheesy Delight in Just 15 Minutes
Ingredients
Equipment
Method
- Combine water, sugar, and lemon juice in a saucepan. Bring to a boil, then reduce heat and simmer for about 10 minutes. Once cooled, add rose water for fragrance.
- Remove frozen kataifi dough from the freezer and let it sit at room temperature for one hour.
- Set your oven to 350°F (175°C) to preheat.
- Shred the mozzarella cheese and blend it with thick cream until well combined.
- Break the kataifi dough into smaller pieces.
- Pour melted butter over the shredded kataifi and mix thoroughly.
- Spoon half of the kataifi mixture into a buttered baking pan, pack it lightly. Spread the cheese mixture on top, then cover with remaining kataifi.
- Bake in the oven for 40-50 minutes, until golden brown and crispy.
- Pour ¾ of the cooled syrup over the kunafa and let it soak.
- Invert the kunafa onto a platter and garnish with crushed pistachios.