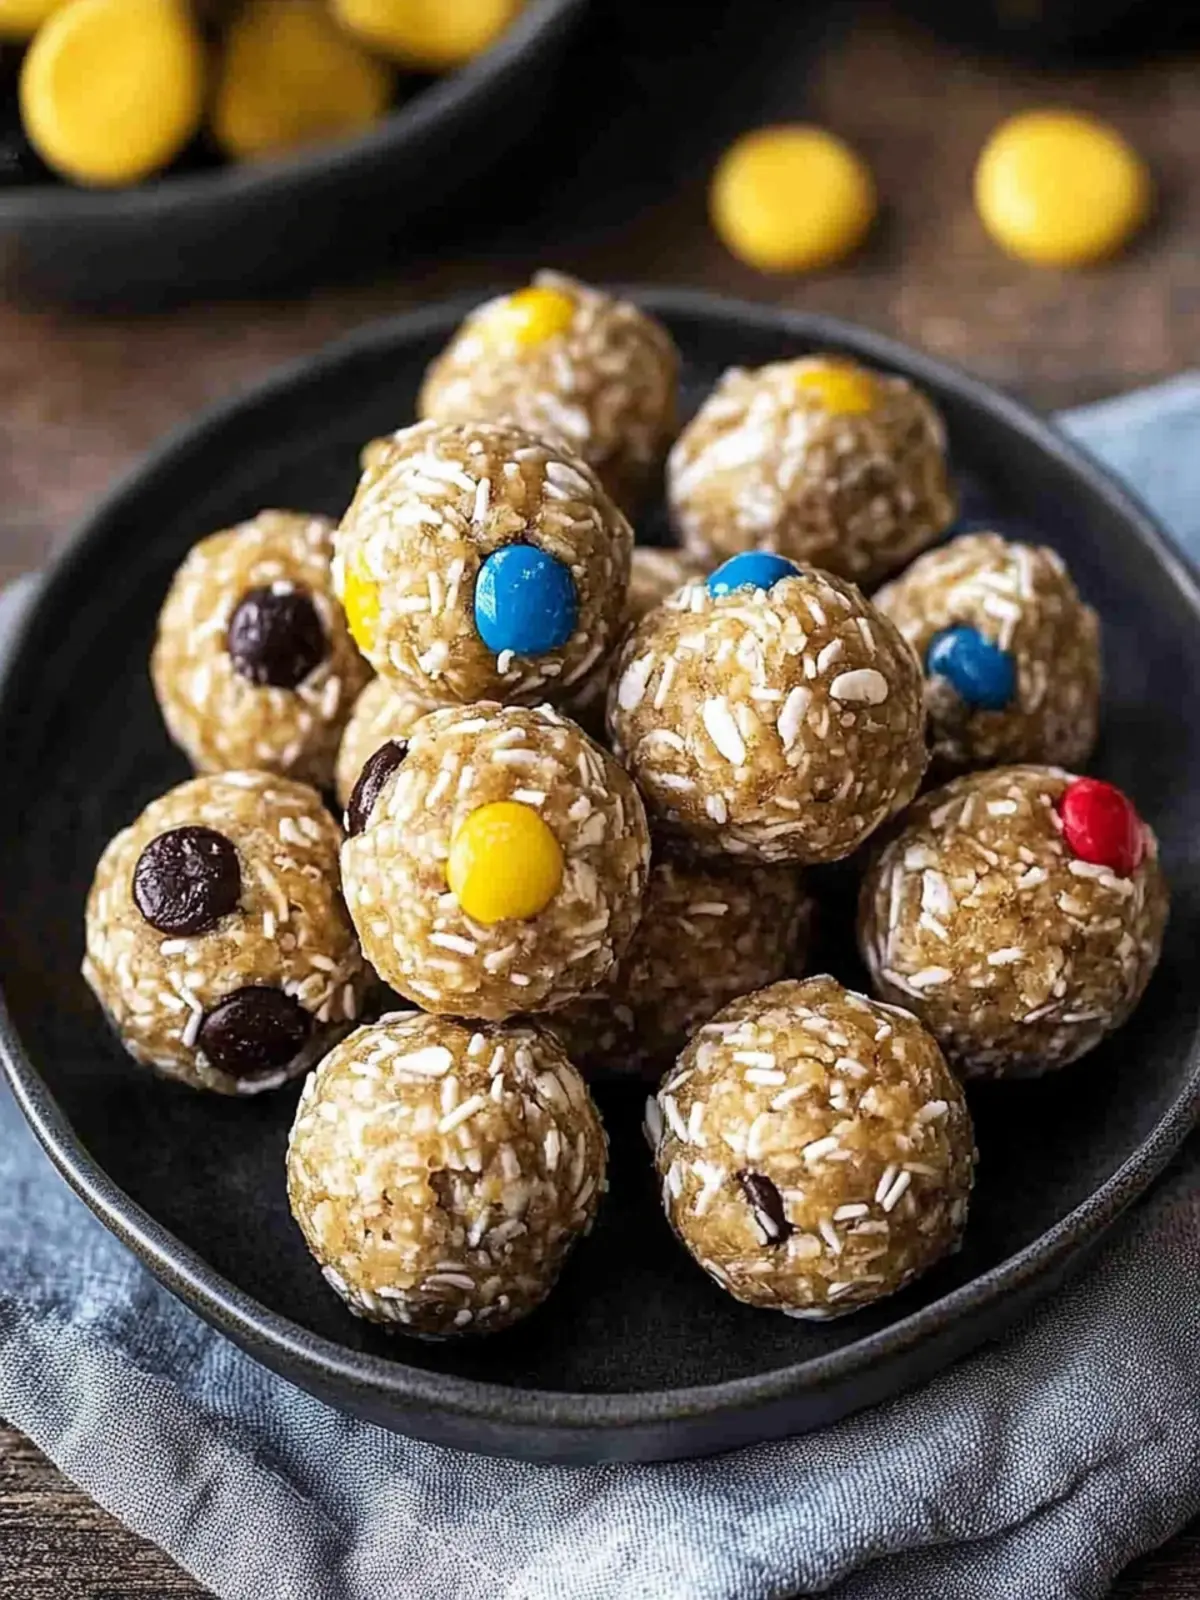
There’s something utterly satisfying about creating a snack that’s both delicious and nutritious, especially when it takes just 15 minutes to whip up. Imagine no-bake Monster Cookie Protein Balls that echo the fun flavors of treasured childhood treats, packed with the goodness of peanut butter, oats, and a pop of colorful chocolate candies. I first stumbled upon this recipe while searching for a quick, kid-friendly solution for post-workout cravings and busy afternoons, and it quickly became a family favorite.
These protein balls perfectly balance chewy and crunchy textures, crafting a delightful bite that satisfies even the pickiest eaters. They are not only great for kids but also make a power-packed snack for adults who need a boost throughout the day. Best of all, these treats can easily fit into meal-prepping routines, ensuring you always have a healthy snack on hand. Ready to dive into a world of flavor that’s as fun to make as it is to eat? Let’s get started!

Why are protein balls a must-try?
Deliciously Versatile: These protein balls are adaptable to your taste! Swap peanut butter for almond or sunflower seed butter to cater to allergies or preferences.
Kid-Friendly Fun: Kids love their colorful appearance and sweet taste, making them a perfect snack for lunchboxes or after-school treats.
Quick to Make: In just 15 minutes, you can whip up a batch that provides lasting energy for busy days.
Meal Prep Delight: Perfect for on-the-go snacking, these protein-packed treats can be made ahead for a week of convenience.
Nutrient-Rich: They bridge the gap between taste and nutrition, ensuring you satisfy craving without guilt. Ideal for the health-conscious!
Discover more about making other nutritious snacks, and keep those taste buds tingling!
Protein Balls Ingredients
For the Batter
- Peanut Butter – Provides richness and binds ingredients; opt for natural peanut butter for the best consistency.
- Protein Powder – Adds nutritional value and helps structure; use a familiar brand to avoid dryness.
- Rolled Oats – Serve as the base for texture and heartiness; whole rolled oats work best.
- Honey – Acts as a natural sweetener and binder; maple syrup works as a vegan substitute.
- Vanilla Extract – Enhances flavor; choose pure vanilla extract for the best taste.
- Chia Seeds (optional) – Adds fiber and omega-3s; can be swapped for flaxseeds if desired.
- Mini Chocolate Chips – Adds sweetness and chocolate flavor; semi-sweet or dark chocolate are excellent options.
- M&Ms – Provide color and fun; any candy-coated chocolate can be used for a similar effect.
These protein balls promise a delightful mix of flavors and textures that will be a hit with the entire family!
How to Make Protein Balls
Combine Ingredients: In a medium bowl, mix together peanut butter, protein powder, rolled oats, optional chia seeds, honey, vanilla extract, and a pinch of salt. Use a wooden spoon or your hands to combine well.
Mix Thoroughly: Stir until a cohesive dough starts to form. Don’t rush—take your time to ensure all ingredients are evenly blended, creating a thick and gooey mixture.
Adjust Consistency: If the mixture feels too dry, add a few teaspoons of water, one at a time, until it reaches a perfect, moldable texture without being sticky.
Scoop and Roll: Use a 1-tablespoon scoop to portion the dough, then roll each portion into a smooth ball between your palms. Keep them uniform in size for easy snacking.
Store Properly: Place the formed protein balls into an airtight container. Refrigerate them for up to 1 week or freeze for up to 3 months for a quick, nutritious snack later on.
Optional: Roll in shredded coconut or crushed nuts for an extra touch!
Exact quantities are listed in the recipe card below.

Make Ahead Options
These No-Bake Monster Cookie Protein Balls are perfect for meal prep enthusiasts looking to save time on busy days! You can easily prepare the mixture up to 24 hours in advance; simply combine all the ingredients and store the dough in an airtight container in the refrigerator. For longer storage, roll the protein balls and freeze them for up to 3 months—just make sure to separate them with parchment paper to prevent sticking. When ready to enjoy, take them out of the fridge or freezer and allow them to sit at room temperature for a few minutes before serving. With these simple make-ahead tips, you’ll always have a healthy snack ready to go!
Protein Balls Variations
Feel free to get creative with these protein balls; customization is part of the fun!
- Nut-Free: Substitute almond butter or peanut butter with sunflower seed butter to make a school-friendly, nut-free option.
- Sweet Twist: Add in a handful of dried fruit like cranberries or raisins for a delightful burst of sweetness and chewiness in every bite.
- Plant-Based: Replace honey with agave nectar or pure maple syrup for a completely vegan version of these treats.
- Texture Boost: Incorporate a tablespoon of shredded coconut or crushed nuts for an extra crunch that enhances the overall texture.
- Chocolate Lovers: Swap mini chocolate chips for dark chocolate chunks or even white chocolate for a different flavor experience.
- Protein Kick: Boost the protein content by adding a scoop of nut flour or more protein powder—just adjust other ingredients accordingly.
- Spicy Surprise: For a hint of warmth, toss in a pinch of cinnamon or a dash of cayenne pepper—an unexpected twist that complements the sweetness!
- Flavor Fusion: Experiment with flavor extracts, such as almond or coconut, to give these protein balls an exciting new dimension!
With these variations, you can tailor each batch to your taste and mood, ensuring that snack time never gets boring!
What to Serve with Monster Cookie Protein Balls?
These delightful bites are perfect for creating a balanced and satisfying meal or snack spread.
Creamy Greek Yogurt: This adds a refreshing tang that beautifully complements the sweetness of the protein balls. Top it with a drizzle of honey for extra flavor!
Fresh Fruit Skewers: Colorful and juicy, these provide a natural sweetness and a burst of freshness that pairs perfectly with the chewy texture of the protein balls.
Nutty Trail Mix: A crunchy mix of nuts and seeds enhances the protein punch while giving an added layer of crunch that contrasts wonderfully with the soft protein balls.
Mini Smoothie Bowls: Whip up a quick smoothie bowl topped with granola and fresh fruits. The creamy base with crunchy toppings pairs beautifully with the chewy protein treats.
Oatmeal Cups: Serve these alongside a warm bowl of oatmeal for a delightful breakfast or brunch combination that’s hearty and nutritious.
Chocolate Milk: The rich, comforting flavor of chocolate milk is a playful drink that brings back childhood memories and balances the wholesome snack vibes.
Cold Brew Coffee: For an afternoon snack, pair these protein balls with a refreshing cold brew coffee. The coffee’s richness contrasts with the sweet and nutty flavors of the balls.
Homemade Granola Bars: Offer a couple of these nutritious bars for a delightful, energy-boosting pairing. Their crunchy, chewy texture complements the protein balls in an exciting way.
How to Store and Freeze Protein Balls
Fridge: Store your protein balls in an airtight container for up to 1 week. This prevents them from drying out and keeps them fresh for daily snacking.
Freezer: For long-term storage, freeze the protein balls in a single layer on a baking sheet, then transfer them to a freezer bag. They’ll stay good for up to 3 months.
Thawing: When ready to enjoy, simply take them out of the freezer and let them thaw in the fridge for a few hours, or enjoy them directly from the freeze for a chilled snack!
Reheating: If you prefer a soft treat, you can microwave them for a few seconds—just make sure not to overheat to avoid changing the texture.
Expert Tips for Protein Balls
Room Temperature Peanut Butter: Ensure your peanut butter is at room temperature for easier mixing, leading to smoother dough and better consistency.
Avoid Overmixing: Mix just until combined to maintain the texture; overmixing can make the protein balls tough instead of chewy.
Damp Hands: Use slightly damp hands when rolling the balls to prevent sticking, making the process quicker and less messy.
Check Consistency: If the mixture is too crumbly, add water sparingly until it holds together. This will help you achieve the perfect protein balls.
Customize Flavors: Feel free to add your favorite mix-ins like dried fruits or nuts, but remember to maintain balance so they don’t overpower the flavors!
No-Bake Monster Cookie Protein Balls Recipe FAQs
How can I ensure my ingredients are fresh and ripe?
Absolutely! When selecting your peanut butter, make sure it’s natural and well-stirred without added oils and sugars. For oats, choose whole rolled oats for the best texture. If you’re using fruits or other add-ins, look for vibrant colors and avoid any that show signs of spoilage, like dark spots or an off smell.
What’s the best way to store protein balls?
To keep your protein balls fresh and delicious, store them in an airtight container in the refrigerator for up to 1 week. This helps them maintain their texture and flavors, ensuring they’re always ready for a snack!
Can I freeze protein balls? If so, how?
Very much so! For freezing, place the protein balls in a single layer on a baking sheet to avoid sticking. Once firm, transfer them to a freezer bag or airtight container. They can be frozen for up to 3 months! When you want to enjoy one, simply thaw in the fridge for a few hours or eat straight from the freezer for a refreshing treat.
What if my mixture is too dry?
No worries! If your protein ball mixture feels crumbly, just add a few teaspoons of water, one at a time, mixing until you achieve a cohesive, moldable texture. This adjustment is key to creating that perfect chewy bite. Aim for a balance where it holds together without becoming sticky.
Are there any dietary restrictions I should consider?
Definitely! If you’re making these for school, you might want to substitute peanut butter with sunflower seed butter to ensure they’re nut-free. Additionally, for vegan options, maple syrup works excellently in place of honey. Always check ingredient labels for potential allergens, especially with items like protein powder and chocolate chips.
How can I customize these protein balls?
The more the merrier! You can easily mix in your favorite ingredients, like dried fruits for extra sweetness or different nut butters to change the flavor profile. Just make sure any additions won’t overpower the other delightful flavors!

Simple No-Bake Protein Balls Packed with Fun Flavor Burst
Ingredients
Equipment
Method
- In a medium bowl, mix together peanut butter, protein powder, rolled oats, optional chia seeds, honey, vanilla extract, and a pinch of salt. Use a wooden spoon or your hands to combine well.
- Stir until a cohesive dough starts to form. Don’t rush—take your time to ensure all ingredients are evenly blended, creating a thick and gooey mixture.
- If the mixture feels too dry, add a few teaspoons of water, one at a time, until it reaches a perfect, moldable texture without being sticky.
- Use a 1-tablespoon scoop to portion the dough, then roll each portion into a smooth ball between your palms. Keep them uniform in size for easy snacking.
- Place the formed protein balls into an airtight container. Refrigerate them for up to 1 week or freeze for up to 3 months for a quick, nutritious snack later on.