Picture this: a warm afternoon where the sun’s golden rays peek through the kitchen window, filling the space with a comforting glow. That’s when I often find myself craving something quick, delicious, and a little indulgent. Enter the Crispy Chicken Caesar Wrap—the perfect remedy for your busy lifestyle. This simple yet satisfying recipe combines the irresistible crunch of panko-breaded chicken with a creamy, homemade Caesar dressing that elevates a classic to something beyond ordinary.
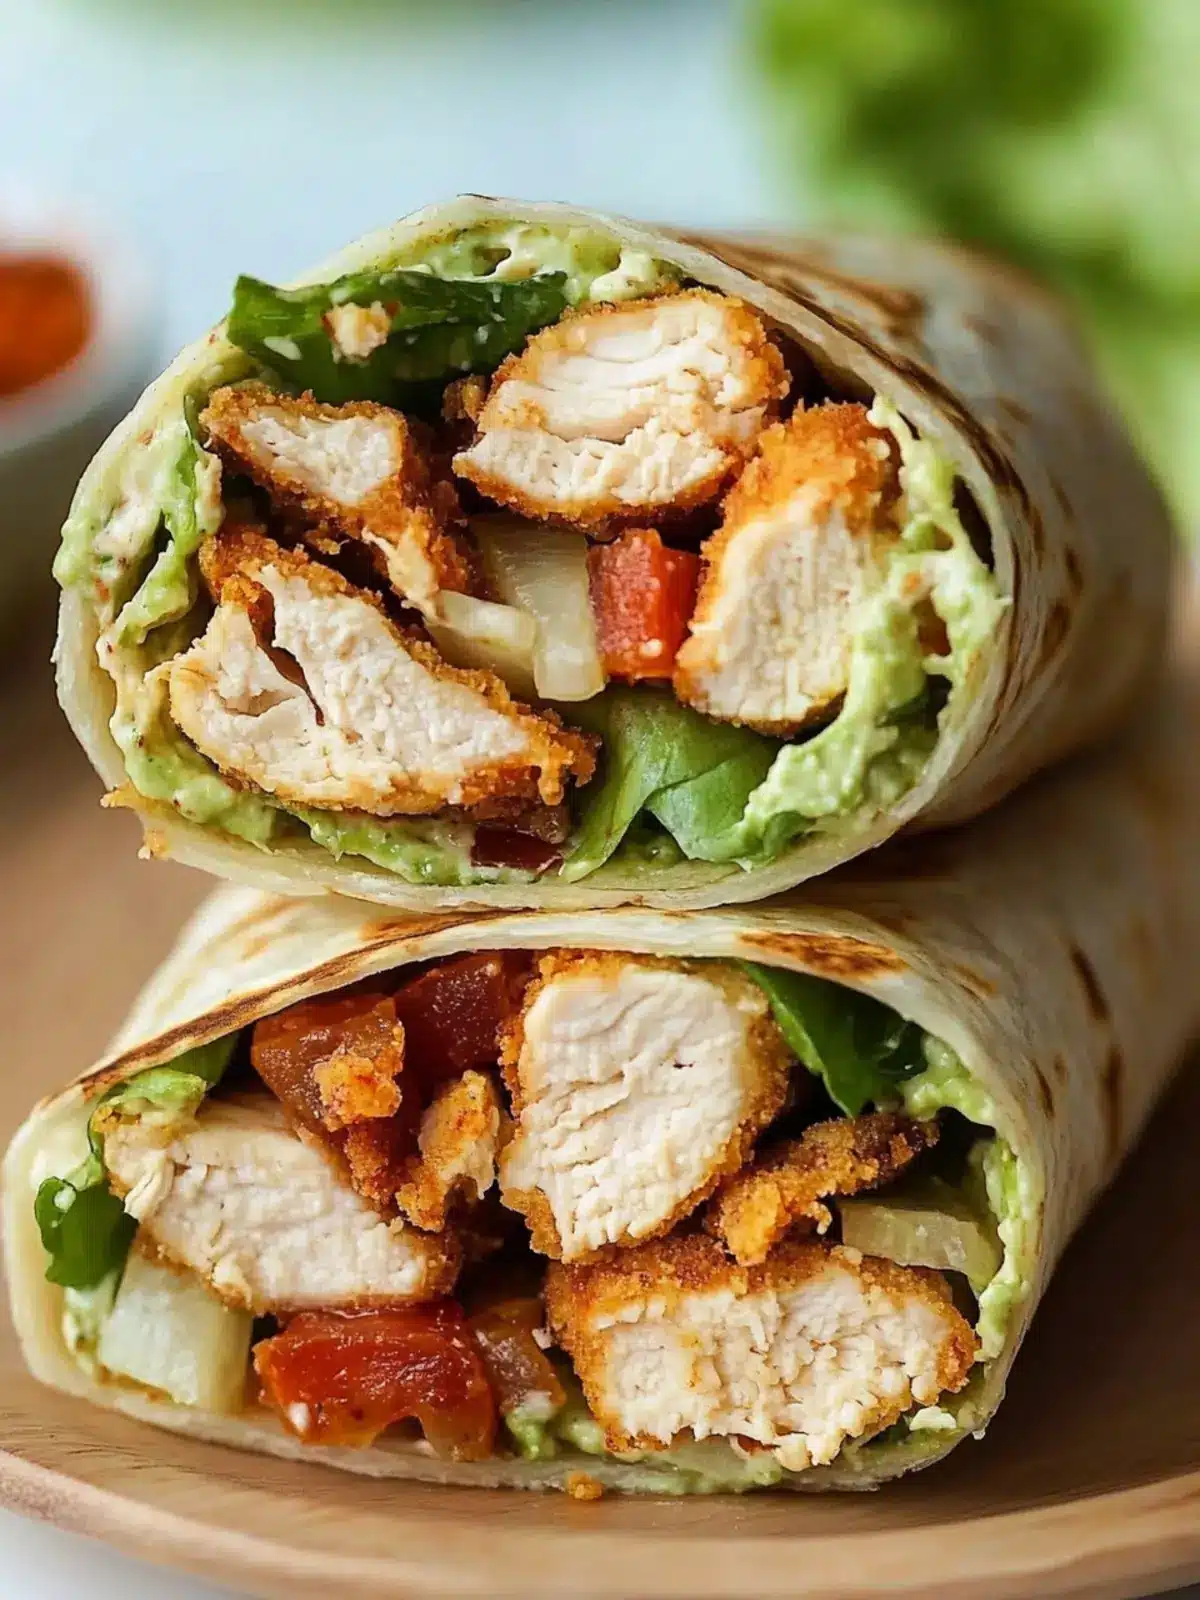
I stumbled across this gem during a hectic week when fast food had become my go-to, and I knew I had to break the cycle. With just a few ingredients and minimal effort, you can turn your kitchen into a haven of gourmet flavors. Imagine biting into this wrap, where crispy bacon meets fresh romaine and rich parmesan, all wrapped snugly in a warm tortilla. It’s more than just a meal; it’s a celebration of flavors that will impress your family and friends while keeping dinner easy and hassle-free. Ready to dive into this crispy delight? Let’s get cooking!

Why will you love this Chicken Caesar Wrap?
Crispy perfection: The golden-brown panko crust on the chicken adds an addictive crunch that elevates every bite.
Creamy tanginess: With homemade Caesar dressing, you’ll enjoy a rich, zesty flavor that perfectly complements the chicken.
Easy prep: In just 30 minutes, you can whip up this satisfying meal—ideal for weeknight dinners or lunch on-the-go.
Versatile dining: Whether it’s a quick family lunch or a gourmet picnic treat, this wrap fits all occasions.
Crowd-pleaser: Impress your friends with a dish that transforms a classic salad into a hearty wrap—they won’t be able to resist asking for seconds! For a complete meal experience, consider serving this with a side of delicious sweet potato fries.
Chicken Caesar Wrap Ingredients
For the Dressing
• Anchovies – finely chopped, they add a depth of umami flavor that enhances the dressing.
• Garlic – brings a bold, aromatic element to your homemade Caesar dressing.
• Dijon Mustard – offers a tangy kick, balancing the richness of the other ingredients.
• Worcestershire Sauce – this adds a savory depth that makes the dressing crave-worthy.
• Lemon Juice – brightens up the dressing; fresh is always best!
• Egg Yolk – helps create a creamy texture in your dressing.
• Olive Oil – extra virgin is ideal for a flavorful and smooth emulsion.
• Parmesan Cheese – finely grated for a rich, cheesy flavor that ties everything together.
• Freshly Ground Black Pepper – to taste, enhances the dressing’s flavors.
For the Chicken
• Boneless Chicken Breast – the star of the show, provides lean protein cooked to crispy perfection.
• All-Purpose Flour – for coating, helps the egg and breadcrumbs adhere to the chicken.
• Garlic Powder – adds an extra layer of flavor to the flour mixture.
• Ground Cumin – offers a warm, earthy note, a wonderful unexpected twist.
• Paprika – enhances the color and adds a subtle smokiness to the chicken.
• Salt and Pepper – to taste, essential for seasoning.
For the Breading
• Eggs – beaten, they create a binding layer for the breadcrumbs.
• Panko Breadcrumbs – for that ultimate crispy texture; regular breadcrumbs can be used if needed.
For Assembly
• Bacon – cooked until crispy, brings a savory crunch that complements the wrap beautifully.
• Romaine Lettuce – chopped, adds freshness and crunch to the wrap.
• Wheat Tortilla – a large one is perfect for wrapping everything snugly.
• Shaved Parmesan – to serve, an optional but highly welcome finishing touch!
This Chicken Caesar Wrap is not just a meal; it’s an experience, packed with diverse textures and flavors! Enjoy the vibrant journey in every bite.
How to Make Chicken Caesar Wrap
Combine the Dressing: In a small bowl, add the finely chopped anchovies, garlic, Dijon mustard, Worcestershire sauce, lemon juice, and egg yolk. Whisk thoroughly until well combined and set aside.
Emulsify the Dressing: While whisking continuously, slowly drizzle in the extra virgin olive oil until the dressing is smooth and emulsified.
Add Cheese and Pepper: Stir in the finely grated Parmesan cheese along with a pinch of freshly ground black pepper. This creamy dressing is what makes the Chicken Caesar Wrap irresistible!
Prepare the Coating: In a shallow bowl, mix together the all-purpose flour, garlic powder, ground cumin, paprika, and salt and pepper. This will provide a flavorful coating for the chicken.
Coat the Chicken: Take each boneless chicken breast and coat it first in the flour mixture, then dip it into the beaten eggs, and finally press it into the panko breadcrumbs until fully covered and ready to fry.
Fry the Chicken: Heat oil in a large skillet to 350°F (175°C) and carefully fry the chicken for 4–5 minutes on each side. Look for golden brown and crispy to know it’s perfectly cooked. Transfer to a paper towel-lined plate to drain any excess oil.
Cook the Bacon: In a separate pan, cook two slices of bacon over medium heat until crispy. Drain on paper towels, then break it into large, bite-sized pieces that will add crunch to your wrap.
Mix the Lettuce: In a medium bowl, toss the chopped romaine lettuce with about 2 tablespoons of your homemade Caesar dressing until lightly coated, adding freshness to each bite.
Warm the Tortilla: Gently warm the large wheat tortilla in a dry pan or microwave for a few seconds until it’s soft and pliable, making it easier to wrap your delicious filling.
Assemble the Wrap: Spread 1 tablespoon of dressing down the center of the tortilla. Layer the dressed lettuce, crispy bacon pieces, sliced chicken, and shaving of Parmesan on top for a flavorful finish.
Wrap It Up: Fold the bottom edge of the tortilla over the filling, then tuck in the two sides and roll it away from you into a tight cylinder that holds all the delicious goodies inside.
Toast the Wrap: Heat a clean skillet over medium heat. Place the wrap seam-side down and toast for 1–2 minutes, then flip and toast the other side until both sides are golden brown and perfectly crispy.
Optional: Serve with extra shaved Parmesan for an added touch of indulgence.
Exact quantities are listed in the recipe card below.
How to Store and Freeze Chicken Caesar Wrap
- Room Temperature: Enjoy your Chicken Caesar Wrap fresh for the best flavor and texture. If left out, it’s best to consume within 2 hours.
- Fridge: Store any leftovers in an airtight container for up to 3 days. Reheat the wrap in a skillet for a few minutes to regain its crispness.
- Freezer: For longer storage, wrap the Chicken Caesar Wrap tightly in plastic wrap and then aluminum foil. It will keep well in the freezer for up to 2 months.
- Reheating: Thaw in the fridge overnight before reheating. Warm in a skillet or oven for about 15 minutes at 350°F (175°C) until heated through and crispy.
Make Ahead Options
These Crispy Chicken Caesar Wraps are perfect for busy weeknights when time is of the essence! You can prepare the homemade Caesar dressing and bread the chicken up to 24 hours in advance. Just store the dressing in an airtight container in the refrigerator to maintain its freshness. For the chicken, refrigerate the breaded pieces until you’re ready to cook them. When it’s time to serve, simply fry the chicken until golden brown and crispy, mix the romaine lettuce with the dressing, and assemble your wrap. This way, you’ll have a delightful meal ready in no time, ensuring you enjoy the same irresistible flavors with minimal effort!
Chicken Caesar Wrap Variations
Feel free to play around with this recipe and discover new flavors and textures that you love!
- Gluten-Free: Substitute all-purpose flour and breadcrumbs with gluten-free alternatives for a delightful wrap without gluten.
- Spicy Kick: Add sliced jalapeños or a dash of hot sauce to the dressing for an exciting spicy twist that brings out the flavor.
- Chicken Alternatives: Swap chicken for grilled shrimp or tofu for a quick variation that caters to different dietary preferences.
- Cheese Lovers: Experiment with different cheeses like feta or blue cheese for a unique flavor profile that elevates each bite.
- Romaine Swap: Use spinach or kale instead of romaine lettuce for added nutrients and a slightly different taste experience.
- Add Veggies: Include sliced cucumbers or roasted red peppers in your wrap for a refreshing crunch and burst of flavor.
- Vegan Option: Replace the chicken with chickpeas and use a vegan mayo or cashew cream for a creamy and satisfying vegan version.
- Herbed Dressing: Infuse the Caesar dressing with fresh herbs like basil or parsley to brighten up the flavor and add depth.
Creating your own version of the Chicken Caesar Wrap is like painting on a blank canvas—get creative and savor your unique masterpiece!
What to Serve with Crispy Chicken Caesar Wrap?
Create a delightful dining experience that perfectly complements the flavors and textures of your wrap with these mouthwatering sides.
- Sweet Potato Fries: These crispy delights bring a sweet contrast to the savory flavors of the wrap, adding a nice crunch that everyone’s sure to love.
- Caesar Salad: Elevate your meal with a refreshing Caesar salad on the side, allowing the classic flavors to shine alongside your wrap without losing the essence of the dish.
- Garlic Bread: With its buttery, toasty goodness, garlic bread makes a perfect accompaniment, bringing bold flavors and delightfully contrasting textures to your table.
- Grilled Vegetables: Seasonal veggies grilled to perfection not only enhance your meal’s nutrition but also offer a charred, smoky flavor that balances the wrap’s richness.
- Coleslaw: A tangy, creamy coleslaw adds a refreshing crunch to your meal, introducing bright flavors and a contrast to the dense filling of your wrap.
- Lemonade or Iced Tea: Refreshing beverages like homemade lemonade or iced tea can cleanse the palate between bites, enhancing your overall dining experience with a zesty splash of flavor.
Enjoy the harmonious blend of textures and tastes that will make your dinner truly unforgettable!
Expert Tips for the Best Chicken Caesar Wrap
- Crispy Chicken: Make sure your oil is hot enough (350°F/175°C) before frying; this will ensure a golden, crispy coating without leaving the chicken greasy.
- Coat Well: Don’t rush the coating process—ensure the chicken is fully covered in flour, egg, and panko to achieve the perfect crispy chicken Caesar wrap.
- Season to Taste: Be generous with salt and pepper in the breading; seasoning is key to flavor, and you can easily adjust it to your preference.
- Fresh Ingredients: Use fresh ingredients for your Caesar dressing and lettuce to enhance flavor and overall freshness of your chicken Caesar wrap.
- Wrap Smart: When folding, ensure the filling is tightly packed, which prevents spills and keeps your wrap intact during cooking.
- Optional Add-ins: Feel free to add in extras like cherry tomatoes or avocado for a personal touch that kicks this chicken Caesar wrap up a notch!
Crispy Chicken Caesar Wrap Recipe FAQs
What type of chicken should I use for my wrap?
I recommend using boneless, skinless chicken breast as it’s lean and cooks up beautifully crispy when breaded and fried. You can also try chicken thighs for a juicier alternative, but be mindful of cooking times as they might vary slightly.
How do I store leftovers of the Chicken Caesar Wrap?
Place any leftover wraps in an airtight container and store them in the refrigerator for up to 3 days. When you’re ready to enjoy them again, reheat in a skillet on medium heat for a few minutes to restore their crunchiness.
Can I freeze my Chicken Caesar Wrap?
Absolutely! To freeze, tightly wrap each Chicken Caesar Wrap in plastic wrap, then in aluminum foil to protect it from freezer burn. This will keep them fresh for up to 2 months. When you’re ready to eat, thaw them overnight in the fridge and reheat in a skillet or oven for about 15 minutes at 350°F (175°C).
What should I do if my chicken isn’t crispy?
If your chicken isn’t coming out crispy, it might be due to the oil temperature being too low. Make sure your oil reaches 350°F (175°C) before frying. Also, ensure that the chicken is fully coated in flour, egg, and panko for that perfect crispy texture. If possible, fry in smaller batches to maintain the oil’s temperature.
Are there any dietary considerations for this recipe?
This wrap can be made gluten-free by substituting all-purpose flour and breadcrumbs with gluten-free alternatives. Additionally, if you’re watching your sodium intake, consider using low-sodium bacon and choosing a small amount of dressing, as the flavor can still shine through even with lighter options.
Crispy Chicken Caesar Wrap You’ll Crave for Every Meal
Ingredients
Equipment
Method
- In a small bowl, combine anchovies, garlic, Dijon mustard, Worcestershire sauce, lemon juice, and egg yolk. Whisk until well combined.
- While whisking, slowly drizzle in olive oil until smooth and emulsified.
- Stir in Parmesan cheese and season with black pepper.
- In a shallow bowl, mix all-purpose flour, garlic powder, ground cumin, paprika, and salt and pepper.
- Coat each chicken breast in the flour mixture, dip in beaten eggs, and press into panko breadcrumbs.
- Heat oil in a skillet to 350°F (175°C) and fry chicken for 4-5 minutes on each side until golden brown.
- Cook bacon until crispy and break it into large pieces.
- In a bowl, mix chopped romaine with about 2 tablespoons of Caesar dressing.
- Warm the tortillas in a pan or microwave.
- Spread 1 tablespoon of dressing on each tortilla, layer with lettuce, bacon, chicken, and Parmesan.
- Fold bottom edge over filling, tuck sides, and roll tightly.
- Toast the wrap in a skillet until golden brown on both sides.