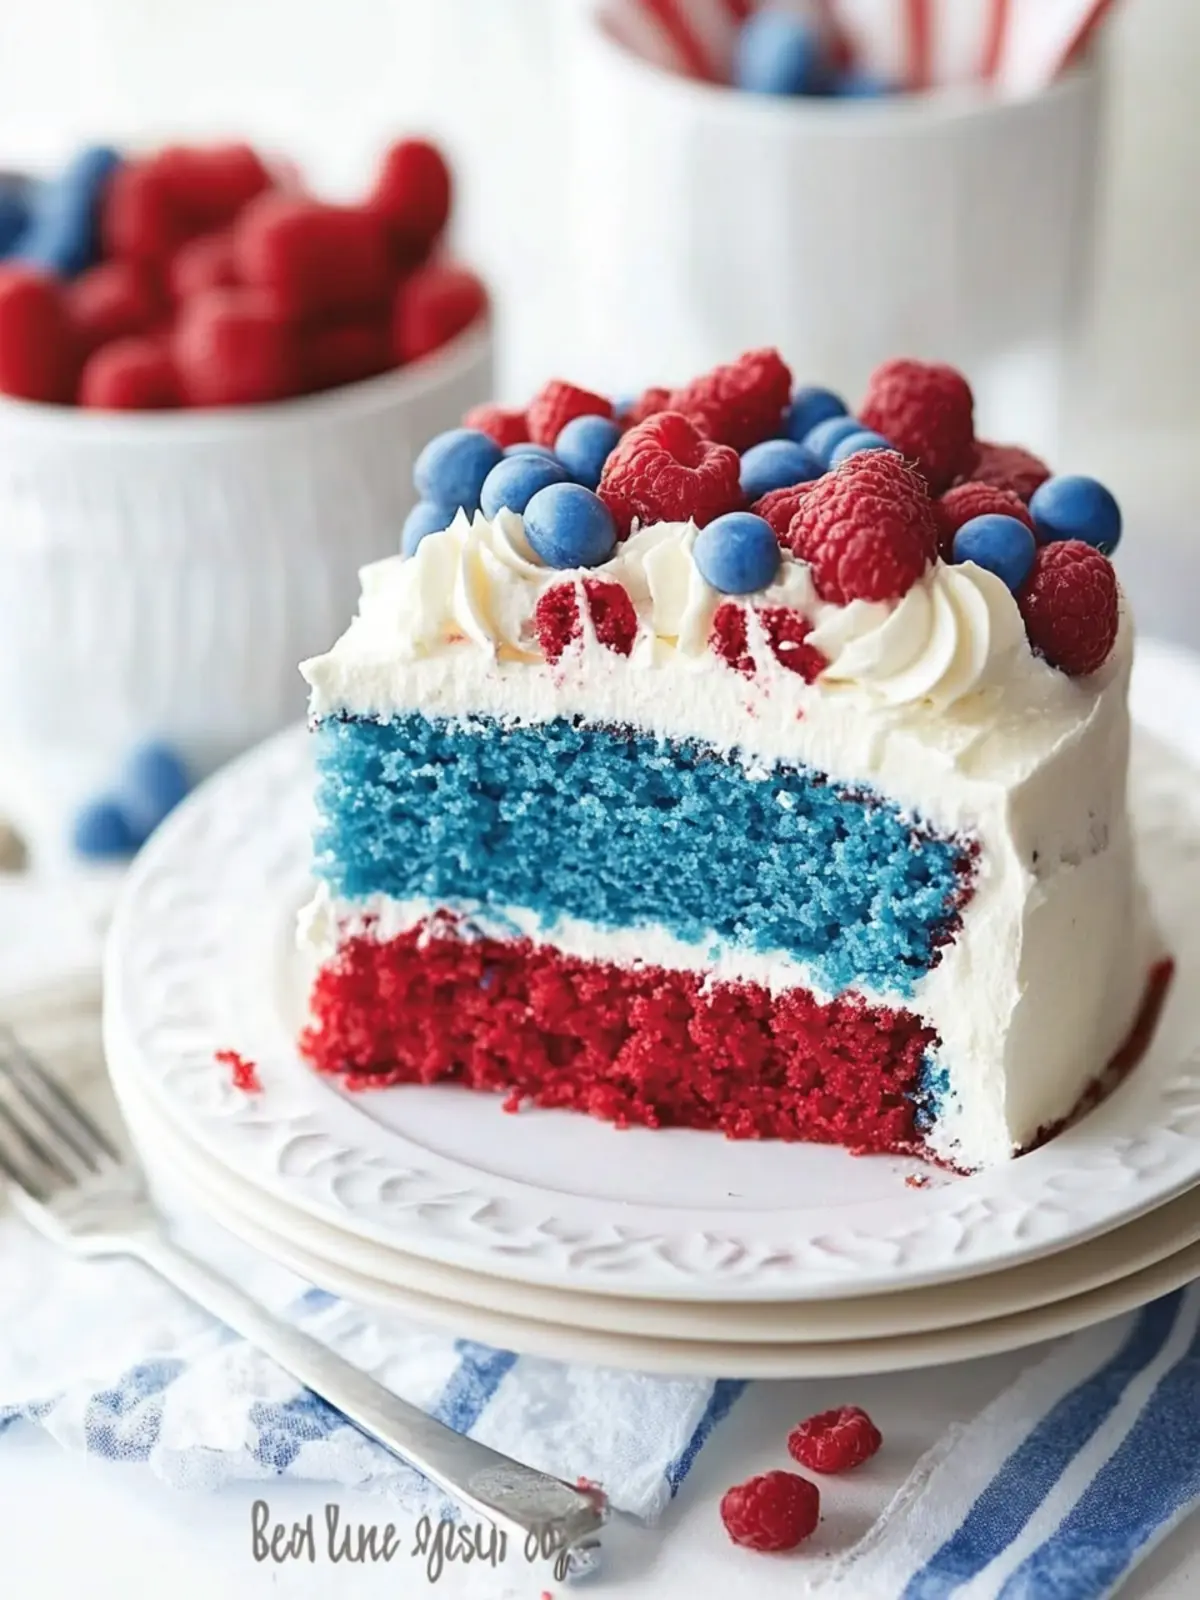
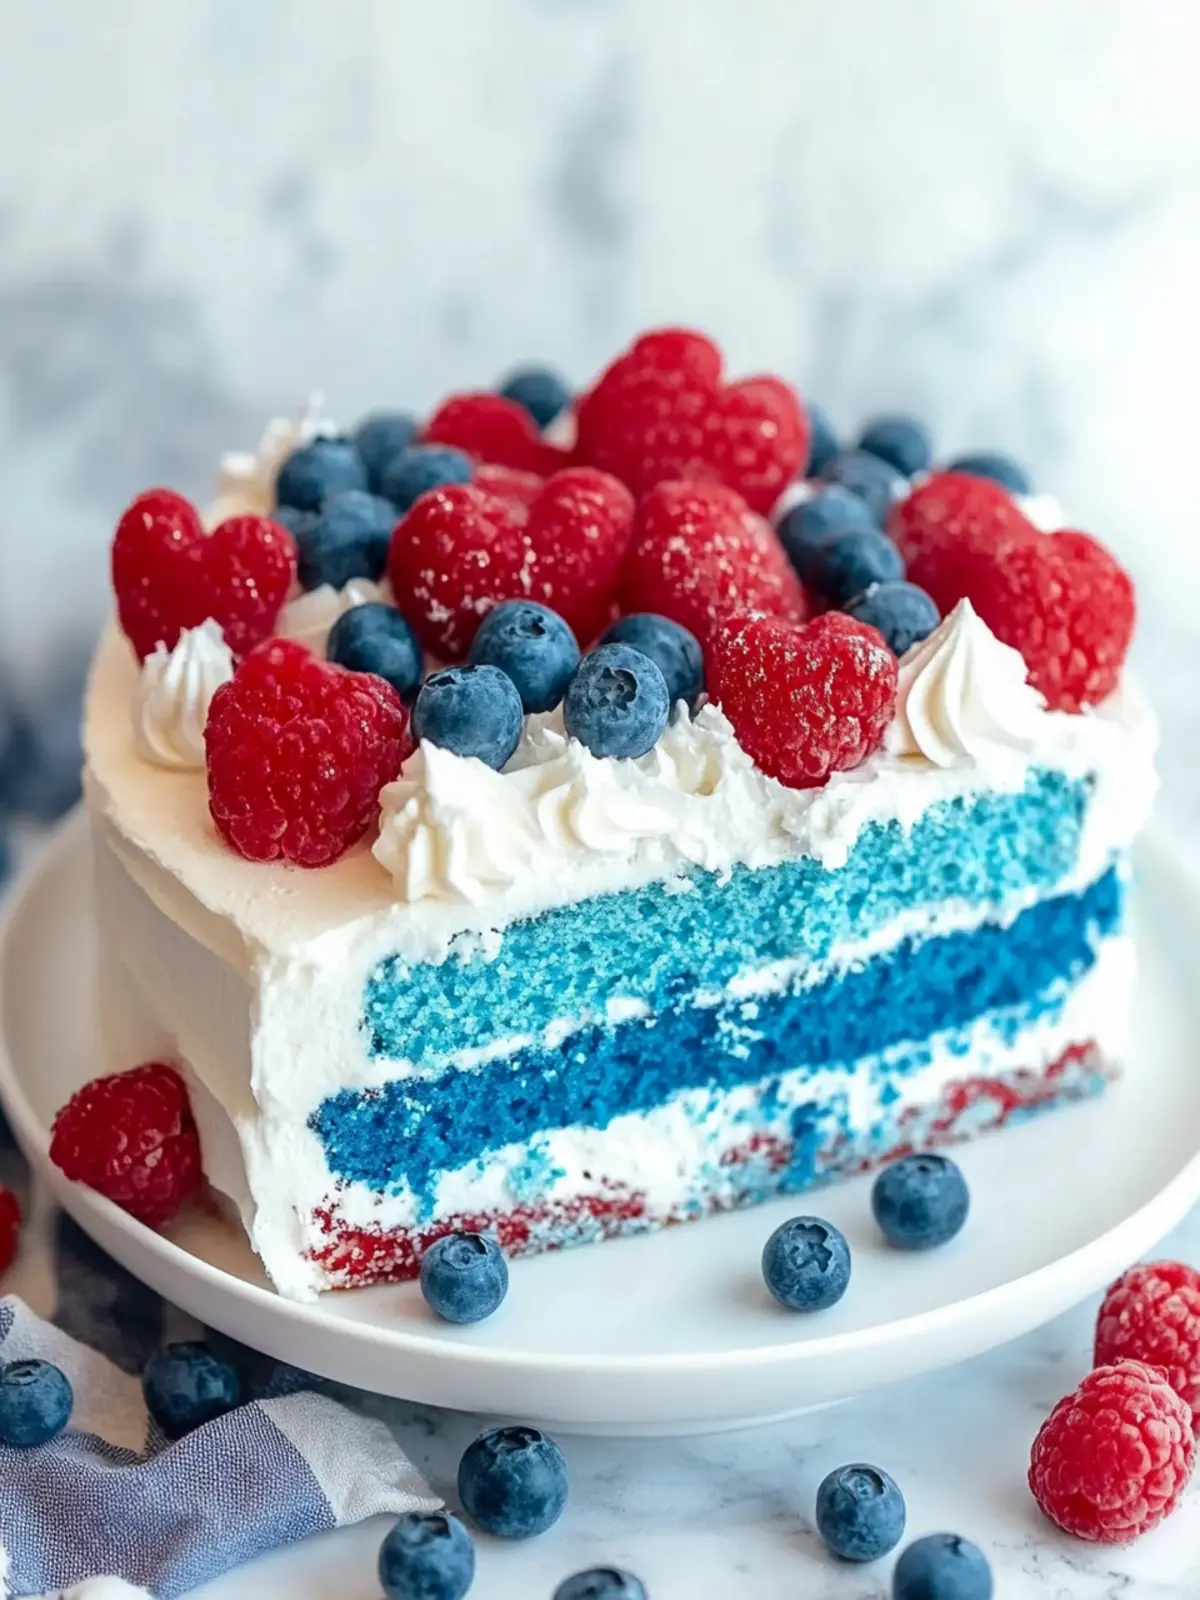
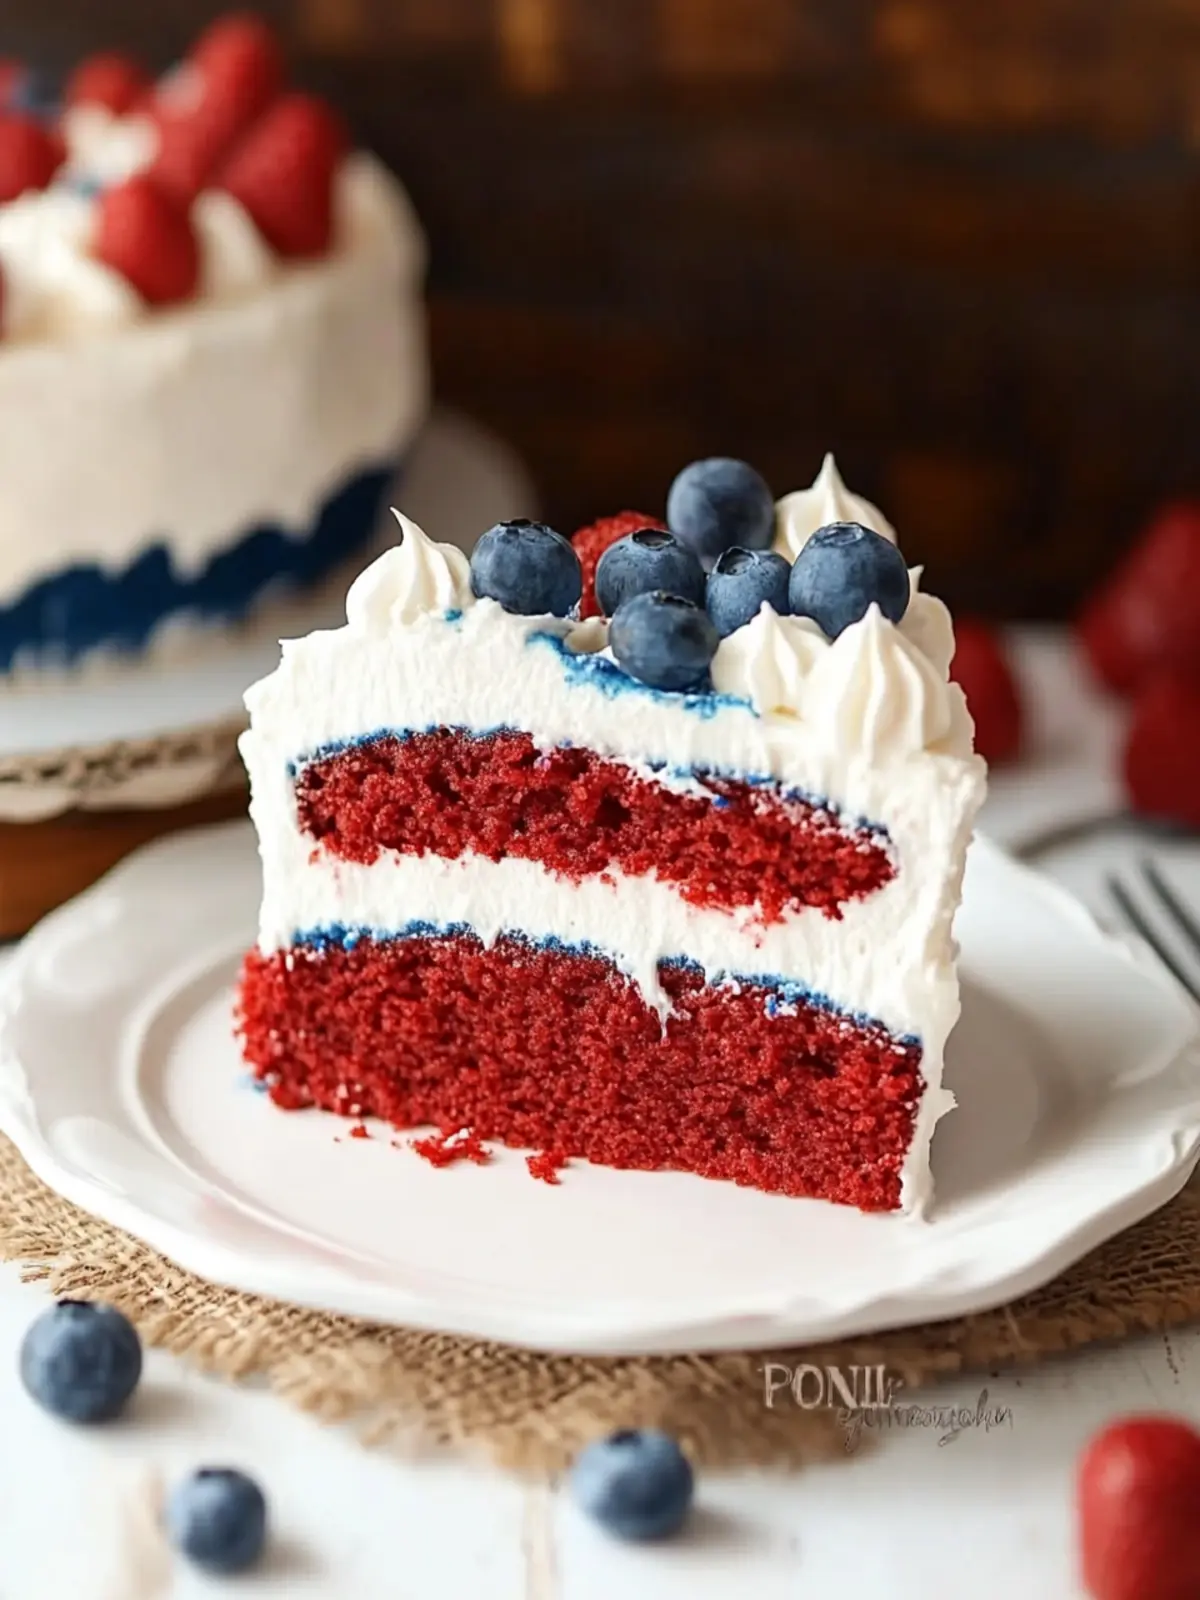
When the last summer barbecue of the season approached, I found myself craving something that would capture the spirit of the day. I peeked into my pantry, and inspiration struck—why not create a dazzling Red White and Blue Cake? This dessert isn’t just a treat for the taste buds; it’s a feast for the eyes too! The layers of vibrant red and blue nestled between light and fluffy white cake mix evoke the festive hues of patriotism.
With my excitement brewing, I knew I could whip up something special with minimal effort. After a busy week filled with takeout and fast food fatigue, I longed for a fun and colorful way to bring joy back into my kitchen. This delightful cake recipe combines a convenient box mix with creative splashes of food coloring, topped with a generous dollop of whipped cream. Perfect for celebrations or just because—it’s guaranteed to become a new favorite! So, let’s dive into this effortless yet visually stunning Red White and Blue Cake recipe that will wow your friends and family while keeping your spirit lifted.

Why is this Red white and blue cake recipe a must-try?
Vibrant Colors: This cake dazzles with bold red and blue layers that are visually stunning, making it perfect for festive occasions.
Quick & Easy: Ready in just 45 minutes, it’s a fantastic choice for a last-minute dessert when you’re short on time.
Crisp Flavors: Topped with light whipped cream, it adds a refreshing touch that balances the sweetness beautifully.
Versatile Delight: Whether for Independence Day or a summer gathering, this cake is sure to become a crowd-pleaser.
Fun to Make: Get creative with toppings like sprinkles to personalize your cake; it’s an enjoyable baking experience for all ages!
Don’t forget to check out more creative dessert ideas in our post about exciting cake variations!
Red White and Blue Cake Ingredients
• Let’s gather what you need for the perfect Red white and blue cake recipe!
For the Cake Batter
- White Cake Mix – the base of this colorful dessert, providing a fluffy texture.
- Blue Food Coloring – add a few drops to achieve that vibrant blue layer.
- Red Food Coloring – similarly, a few drops will create a stunning red layer.
For the Topping
- Prepared Whipped Cream Topping – a light and airy finish that complements the cake beautifully.
- Optional Red, White, and Blue Sprinkles – for an extra festive touch! Perfect for celebrations!
How to Make Red White and Blue Cake
Preheat the Oven: Begin by preheating your oven according to the package instructions of the cake mix. Spray a 13-inch by 9-inch baking sheet with non-stick spray to ensure easy removal later.
Prepare the Batter: Follow the box instructions to prepare the cake mix. It’s time to divide the mixture into three equal portions, placing each into separate bowls. Add red food coloring to one bowl and blue to another.
Spread the White Batter: Pour the white layer of cake batter into your prepared pan. Use a spatula to spread it evenly, ensuring full coverage for a smooth foundation.
Add the Red Layer: For the second layer, gently drizzle the red batter on top of the white layer. Take care not to mix the two; you want distinct, colorful layers!
Top with Blue Batter: Now, repeat the process with the blue batter as your third layer. Drizzle it gently over the red, keeping the layers separate and vibrant.
Bake It: Give the baking pan a little tap on the countertop to allow any air bubbles to surface. Bake in the preheated oven according to the package instructions. Once done, let the cake cool completely.
Finish with Topping: When the cake is cool, spread a generous amount of prepared whipped cream topping over the entire surface. You can either serve it right away or cover it and chill for later.
Optional: Sprinkle with red, white, and blue sprinkles for a festive finishing touch!
Exact quantities are listed in the recipe card below.
What to Serve with Red White and Blue Cake?
When delighting in the festive layers of this cake, consider perfect pairings that elevate the whole experience.
Fresh Fruit Salad: A medley of juicy berries complements the cake’s sweetness, bringing a refreshing and colorful burst of flavor.
Vanilla Ice Cream: Creamy and rich, this classic pairs beautifully with the lightness of the whipped topping for a delightful contrast.
Lemonade: A zesty, chilled lemonade adds a tangy kick that balances the sweetness of the cake, creating a palate-pleasing combination.
Grilled Cheeseburgers: For a fun backyard barbecue, these savory bites offer a delightful contrast to the sweet cake, making for a well-rounded meal.
Chocolate Dipped Strawberries: A decadent treat that enhances the festive spirit. The chocolate richness is the perfect counterpoint to the light and airy cake.
Iced Tea: A refreshing glass of iced tea, sweetened or unsweetened, will quench your thirst and complement the cake’s vibrant flavors beautifully.
Each of these pairings not only enhances the enjoyment of your Red White and Blue Cake but also makes for a memorable meal for any gathering!
Storage Tips for Red White and Blue Cake
Room Temperature: If you plan to serve the cake immediately, it can be left at room temperature for up to 2 hours. Just make sure it’s covered to keep it fresh.
Fridge: Store any leftovers in an airtight container in the refrigerator for up to 3 days. This will help prevent the cake from drying out while preserving its vibrant layers.
Freezer: If you want to keep it longer, slice the cake and wrap individual portions in plastic wrap, then place them in an airtight freezer-safe container. It can be frozen for up to 3 months.
Reheating: To enjoy, simply thaw in the fridge overnight and serve chilled. If desired, add fresh whipped cream just before enjoying for a delightful touch!
Red white and blue cake variations
Feel free to express your creative side and customize this delightful cake to suit your personal taste!
Dairy-Free: Substitute the whipped cream with coconut whipped cream for a luscious, non-dairy alternative that’s just as fluffy.
Gluten-Free: Use a gluten-free cake mix to ensure everyone can enjoy this festive dessert without any worries.
Citrus Twist: Add zest from a lemon or lime into your white batter for a refreshing citrus flavor that brilliantly complements the sweetness.
Chocolate Layers: Incorporate chocolate cake mix for a delightful twist; the chocolate layers paired with the colorful frosting create an indulgent flavor combination.
Nutty Crunch: Sprinkle chopped nuts, like pecans or walnuts, between the layers for added texture and a nutty crunch that contrasts beautifully with the soft cake.
Berry Layers: To make it berry-infused, add crushed strawberries to the white batter for a fruity surprise; their natural sweetness enhances the overall flavor!
Spicy Kick: For a bit of heat, mix in a pinch of cayenne pepper or cinnamon to the batter, creating a warm surprise in every slice.
Fruity Topping: Instead of sprinkles, top with fresh mixed berries for a colorful and healthier alternative that boosts freshness and a burst of flavor!
Make Ahead Options
These delightful Red White and Blue Cake layers are perfect for meal prep enthusiasts! You can prepare the colorful cake layers up to 24 hours in advance by baking and cooling the cake completely, then wrapping it tightly in plastic wrap to keep it fresh. To maintain the cake’s quality and moisture, refrigerate it until you’re ready to serve. The whipped cream topping can also be made a day ahead and stored in the fridge. When you’re ready to serve, simply spread the topping over the layered cake, add festive sprinkles, and you’ll have a stunning dessert that’s just as delicious and visually appealing, saving you time on busy occasions!
Expert Tips for Red White and Blue Cake
- Color Balance: Use gel food coloring for more vibrant hues; liquid variants may not provide the desired intensity in your red white and blue cake recipe.
- Layering Technique: Pour the batter from a height to ensure even layers. Gentle drizzling can help maintain distinct layers without mixing.
- Cooling Time: Allow the cake to cool thoroughly before adding the whipped cream. This prevents the topping from melting and helps it maintain a beautiful shape.
- Serving Suggestions: If serving later, keep the whipped topping separate until just before serving to ensure freshness. Garnish each slice with a sprinkle!
- Storage Tips: Store leftovers in an airtight container in the refrigerator for up to three days; although, it’s best enjoyed fresh!
Red White and Blue Cake Recipe FAQs
How do I choose the right food coloring for my cake?
Absolutely! I recommend using gel food coloring for a vibrant and vivid finish in your Red White and Blue Cake recipe. Gel colors pack a punch and mix better than liquid versions, ensuring your layers stand out beautifully. Just a little goes a long way, so start with a small amount and add more if needed until you reach your desired shade.
How should I store the Red White and Blue Cake?
Great question! If you have leftovers, store the cake in an airtight container in the refrigerator for up to 3 days. Be sure to cover it well to maintain its moisture and the vividness of the layers. If it’s warm in your kitchen, it’s best to refrigerate it sooner rather than later.
Can I freeze the Red White and Blue Cake?
Yes, you can! I often freeze leftover cake for later enjoyment. To do so, slice the cake into individual portions first. Wrap each slice tightly in plastic wrap and place them in an airtight freezer-safe container. It can last in the freezer for up to 3 months. When you’re ready to enjoy, just thaw it in the fridge overnight, and add some fresh whipped cream right before serving for that freshly made touch!
What if my cake layers mix together?
If you notice that your layers are mixing while pouring, don’t worry too much! To avoid this, make sure to drizzle the batter gently and from a height. Additionally, you can use a spatula to carefully spread the layer without disturbing the one beneath. If it does happen, just embrace the unique look—it will still taste delicious!
Are there any dietary considerations I should keep in mind?
Definitely! For those with allergies, check the cake mix and whipped cream labels for common allergens like gluten or dairy. If you’re looking for a gluten-free option, many brands offer gluten-free cake mixes. Additionally, be mindful of any guests with dye sensitivities. You can always use natural coloring alternatives made from vegetables or fruit.
Can I make this cake ahead of time?
Very much! You can prepare the cake, cool it, and keep it wrapped in plastic wrap in the fridge for up to two days before adding the whipped cream topping. This way, you can simply add the topping and optional sprinkles right before serving to keep everything fresh and beautiful.
Celebrate with This Easy Red White and Blue Cake Recipe
Ingredients
Equipment
Method
- Preheat your oven according to the cake mix package instructions. Spray the baking sheet with non-stick spray.
- Prepare the cake mix following the box instructions. Divide the mixture into three equal portions.
- Add red food coloring to one bowl and blue to another.
- Pour the white layer of cake batter into the prepared pan and spread evenly with a spatula.
- Drizzle the red batter on top of the white layer carefully to maintain distinct layers.
- Repeat with the blue batter as your third layer, ensuring layers are separate.
- Tap the baking pan on the countertop to release air bubbles and bake according to package instructions.
- Let the cake cool completely before spreading whipped cream topping.
- Optionally, sprinkle with red, white, and blue sprinkles before serving.